")
Are you trying to construct a WooCommerce retailer but don’t know the place to begin?
Let’s make it simple!
On this WooCommerce tutorial, we’ll take you through the fundamentals of organising your personal WooCommerce retailer and present you simply how easy it’s to get began.
So put in your entrepreneurial hat and let’s get began!
Disclosure: Our website is reader-supported. If you buy any service by our accomplice hyperlinks, we could earn a fee at no further price to you.
What’s WooCommerce?
WooCommerce is an open-source eCommerce resolution that has revolutionized the best way companies promote on-line. It’s a WordPress plugin that lets you rapidly create an internet retailer on your services and products.
The plugin comes with a variety of options and choices, making it simple to customise your retailer to fulfill your particular wants. With WooCommerce, you’ll be able to add merchandise, handle orders and funds, and rather more.
For many who are simply getting began, WooCommerce makes it simple to stand up and working rapidly. There are a selection of themes out there to select from, so you may make certain your retailer seems to be precisely the best way you need it to.
Plus, with the assistance of plugins and extensions, you’ll be able to simply prolong and customise your retailer’s performance even additional.
What Do You Must Construct a WooCommerce Retailer?
You’ve determined to affix the eCommerce wave and have taken an ideal first step. However earlier than you launch your retailer, you’ll want a number of issues.
- Area Title: That is your retailer’s deal with and what prospects will sort into their browsers to entry your web site.
- Internet Internet hosting Service: That is the place your web site’s recordsdata and knowledge might be saved. A superb internet hosting service will mean you can simply handle and replace your web site.
- SSL Certificates: It is a safety measure that encrypts the info exchanged between your web site and your prospects. It’s important for securely accepting your prospects’ on-line funds.
So there you’ve got it.
These are the three key components you’ll have to construct a WooCommerce retailer.
It’s necessary to keep in mind that these items usually are not free and price you some cash.
However you might be questioning, if WooCommerce is free, why do I have to pay for something?
The reality is, whereas WooCommerce is free, there are a number of stuff you’ll have to buy to make your web site profitable. These embody internet hosting, a website title, and an SSL certificates.
This stuff are important for any web site, not simply WooCommerce shops.
With out them, your web site gained’t be safe, gained’t be seen on the internet, and gained’t be capable of settle for funds securely.
Nevertheless, this may price an arm and a leg in the event you don’t know the place to look.
Fortunately, Cloudways, a robust managed cloud internet hosting supplier, has agreed to supply TalkBitz readers an unique low cost of 15% off for 3 months.
Plus, you get a free SSL certificates with each plan.
And that’s not all – you additionally get a 3-day trial.
All you must do is pay to register your area title as we speak, which is about $1 to $20.
Prepared?
Let’s get all the way down to enterprise and get your retailer up and working!
1. Getting Began With WooCommerce
Whether or not you’re a budding entrepreneur or an skilled enterprise proprietor, launching an eCommerce retailer might be an amazing course of.
Fortunately, it’s additionally one thing you are able to do by yourself, with the precise steerage and sources.
Registering a Area Title
Step one is to register your area title.
Namecheap has probably the greatest costs in the case of domains, so that you’ll remember to get the very best deal.
When you don’t have already got a website title, don’t fear. We’ve acquired your again!
Merely, enter your required area title under and hit the “Search” button to examine if it’s out there and to purchase it from Namecheap.
Verify in case your area title is out there:
If that’s too heavy for you, learn our information on the best way to register a website title to get one rapidly and simply.
When you’ve chosen and registered your area title, it’s time to get internet hosting.
Organising Internet Internet hosting
There are various various kinds of internet hosting to select from, however some of the in style and economical decisions is shared internet hosting.
Shared internet hosting is nice for smaller websites and blogs, however in the event you’re in search of one thing extra strong and safe on your eCommerce retailer, then you definately’ll want a robust internet hosting supplier.
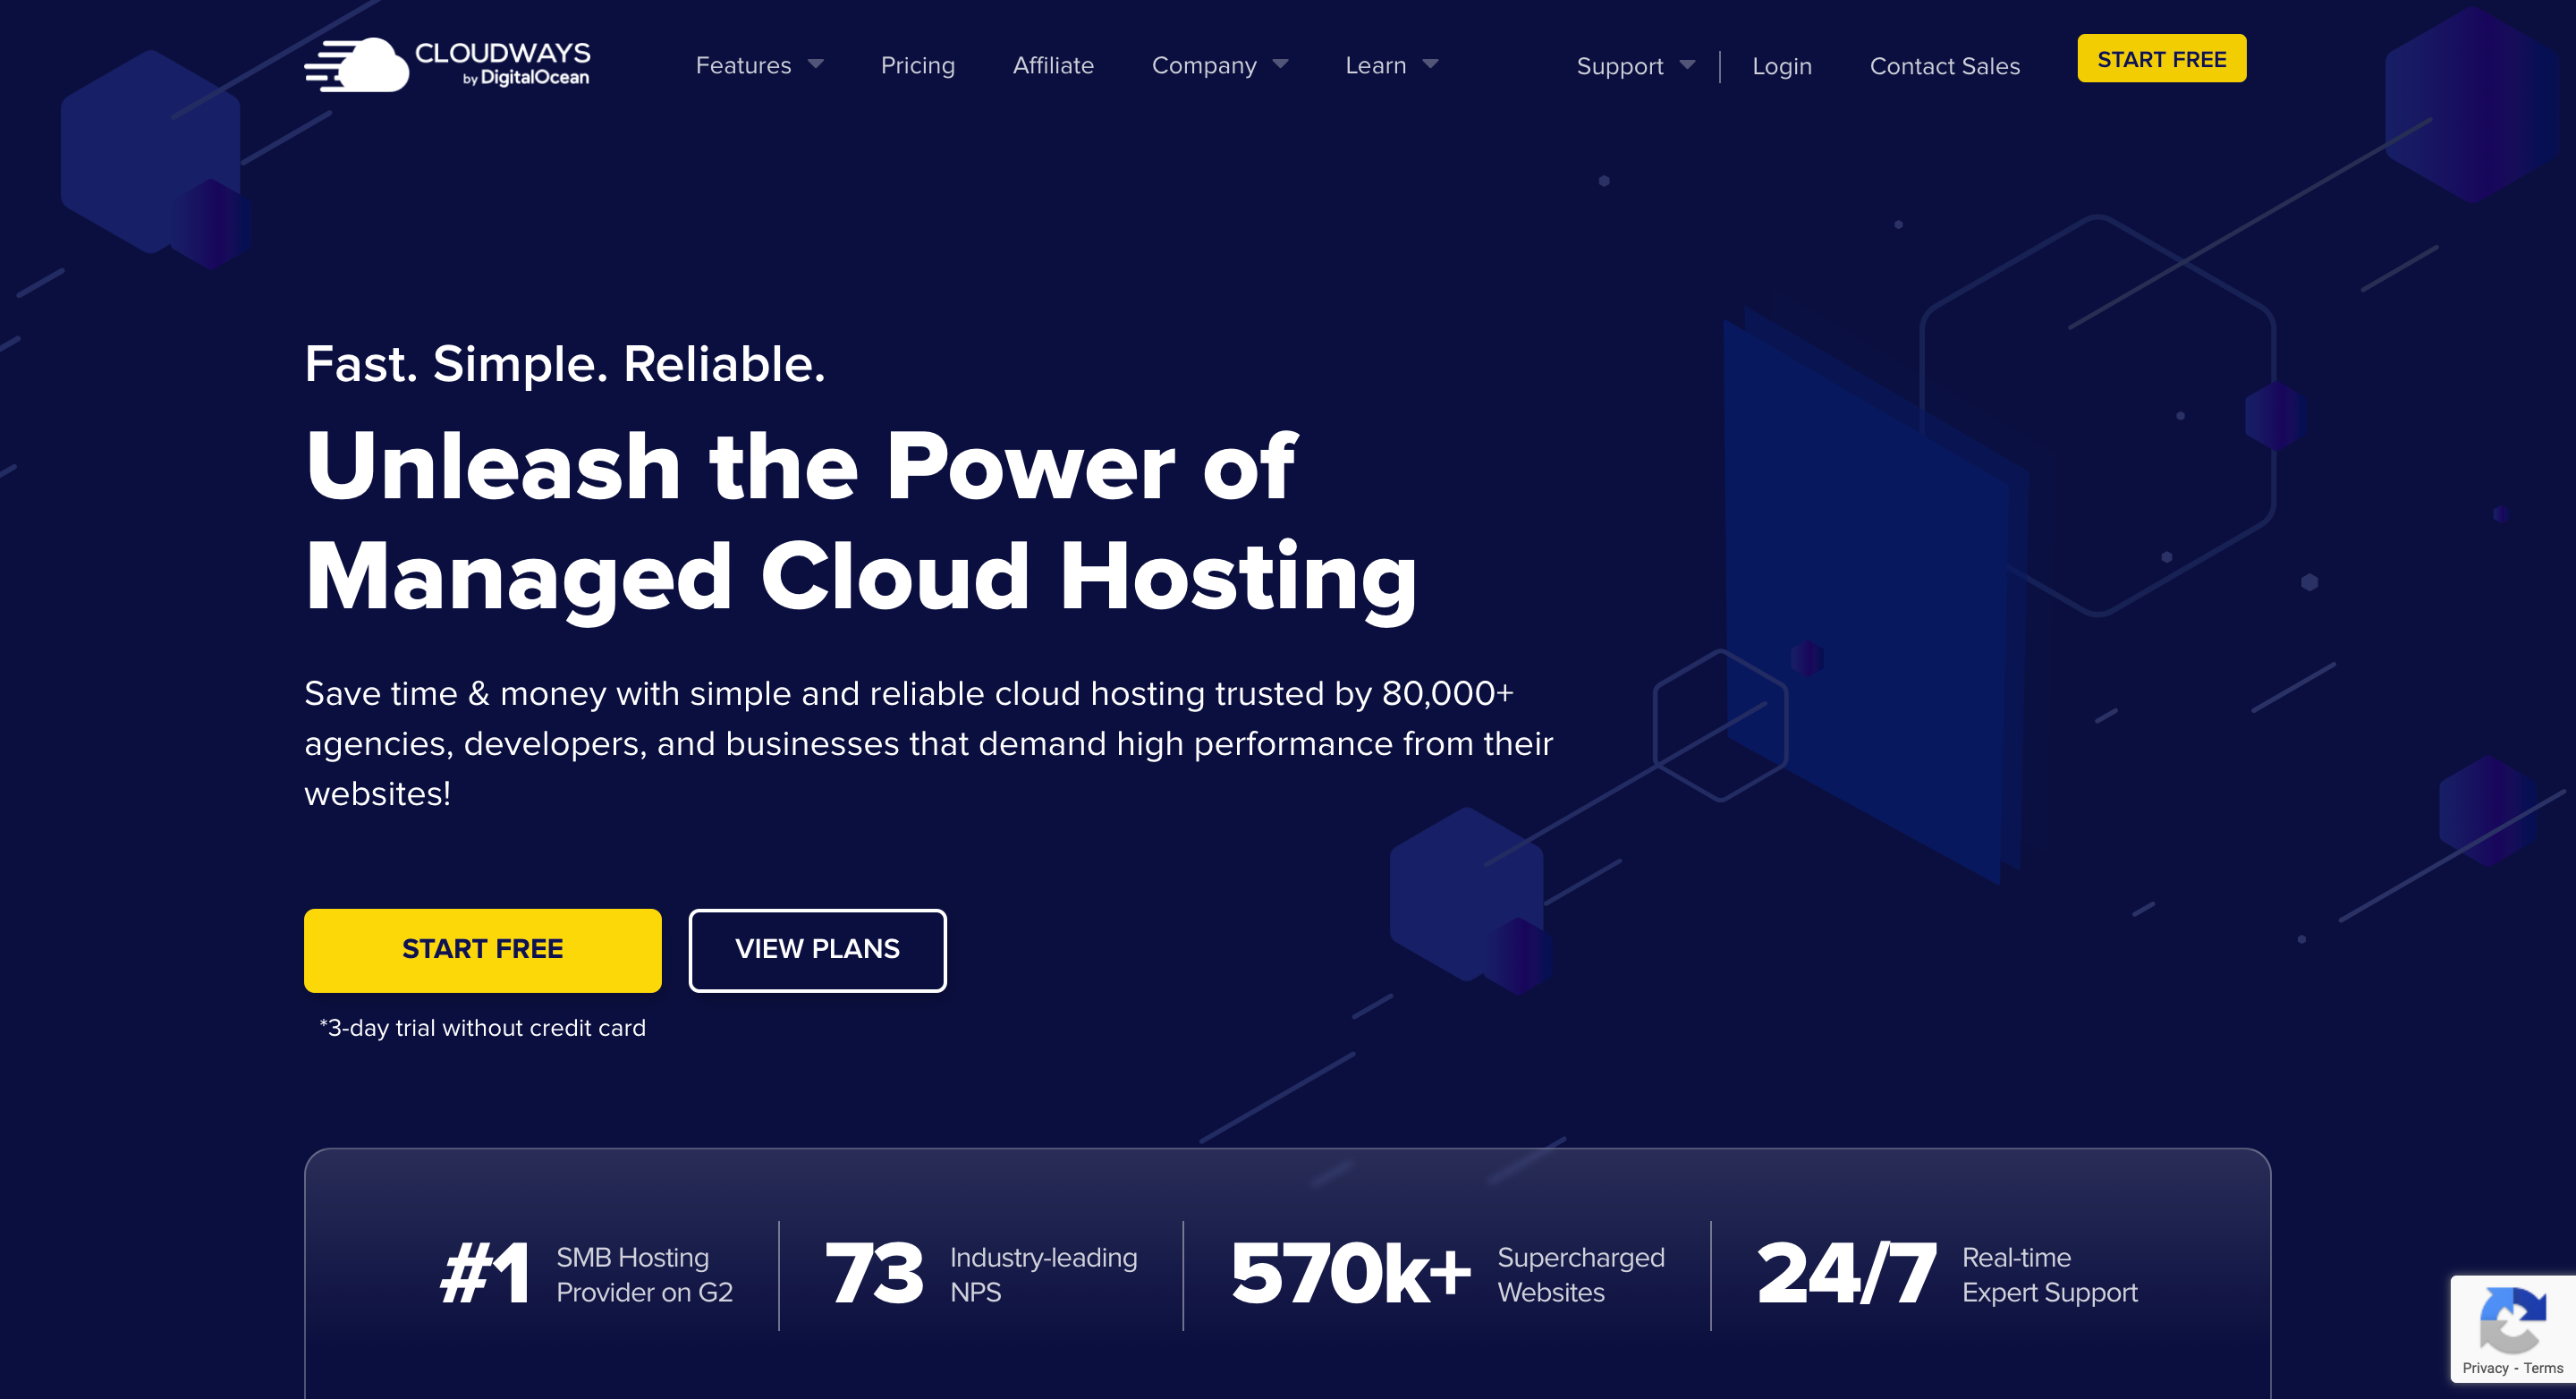
Cloudways is a managed cloud internet hosting supplier that gives a spread of options particularly designed to assist energy your eCommerce retailer.
→ Click on right here to go over to Cloudways and hit the “Begin Free” button to begin your 3-day trial
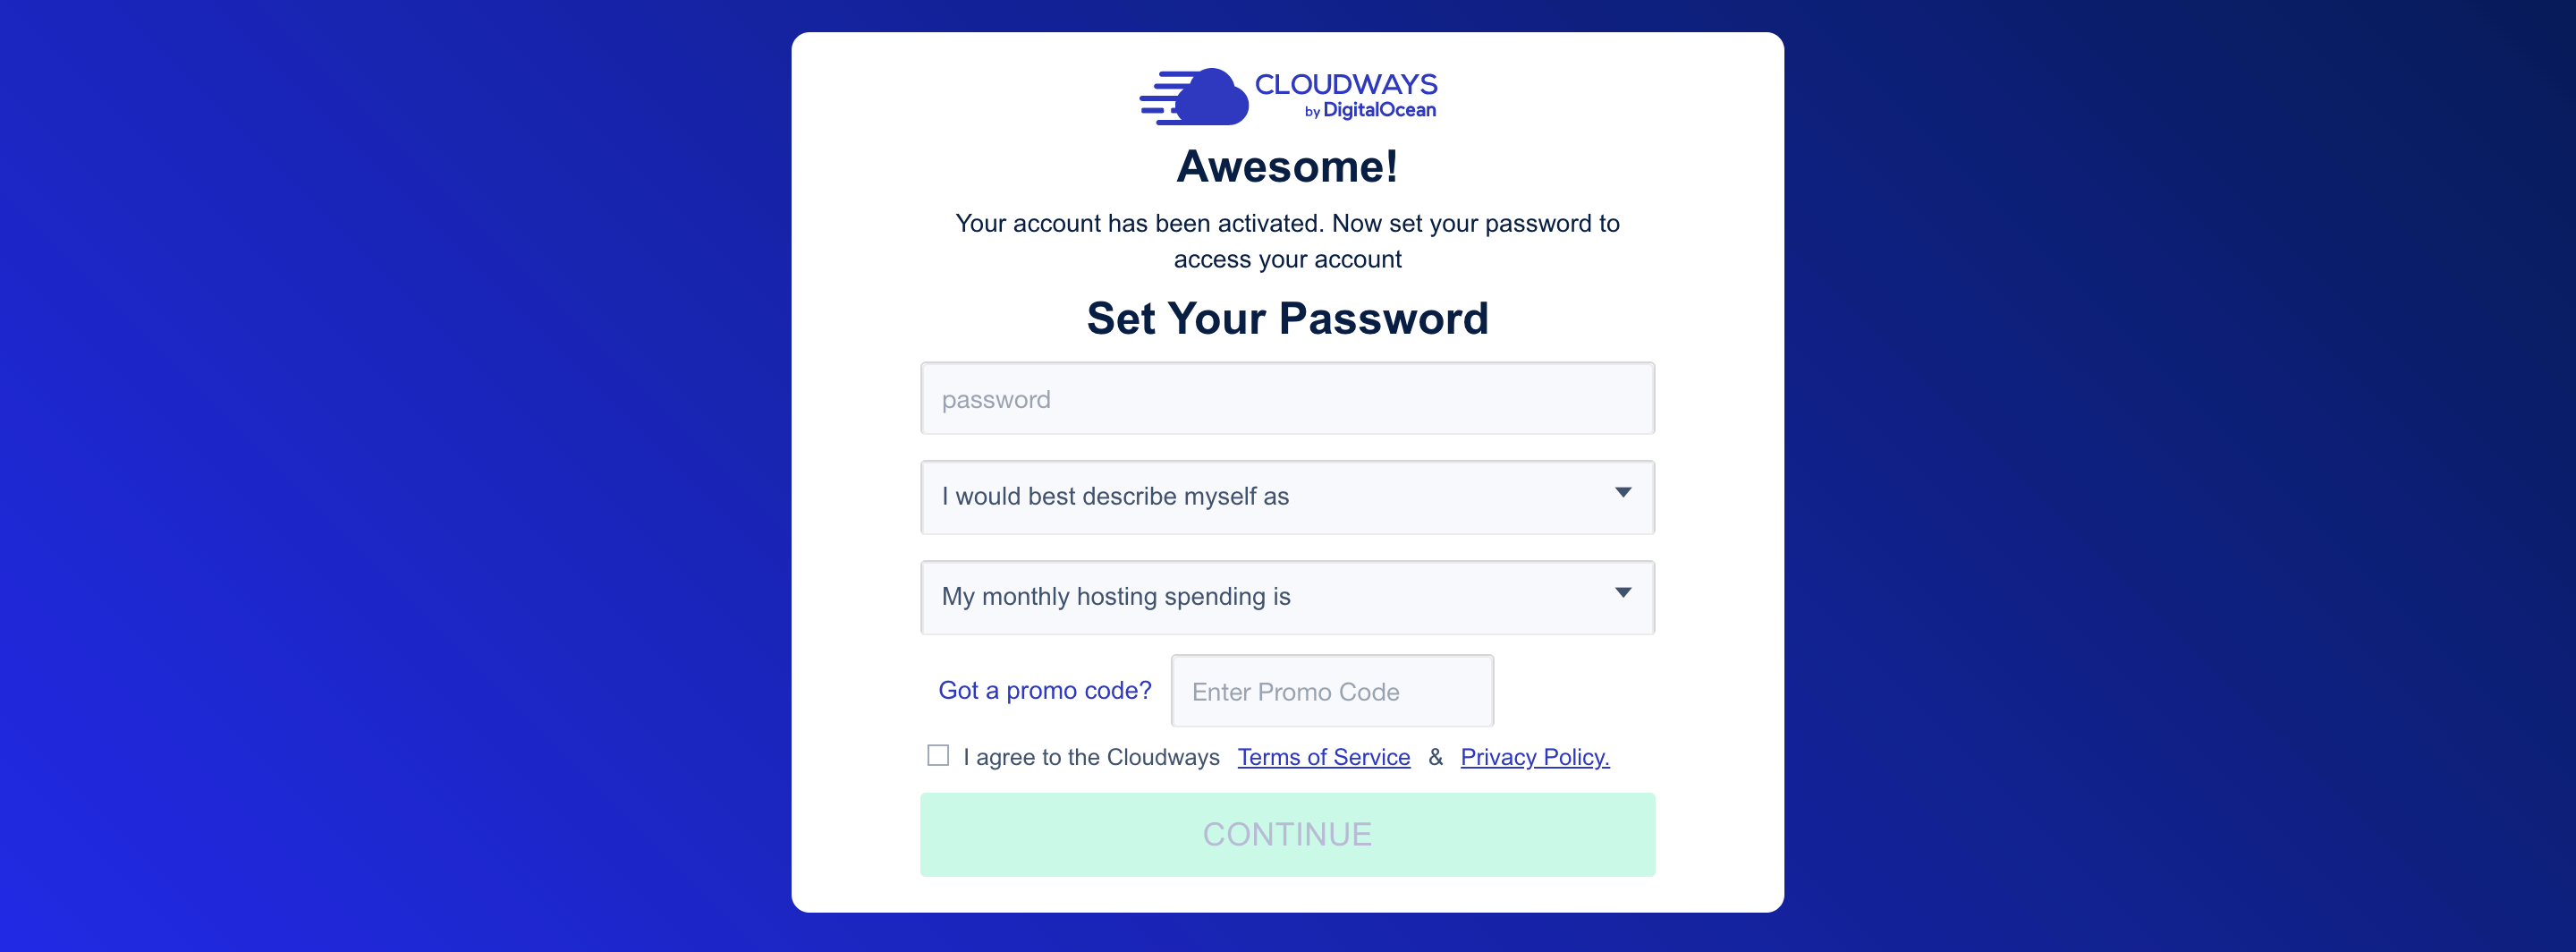
Subsequent, you may be requested to create and internet hosting account with them. Enter your data and click on “Proceed.”
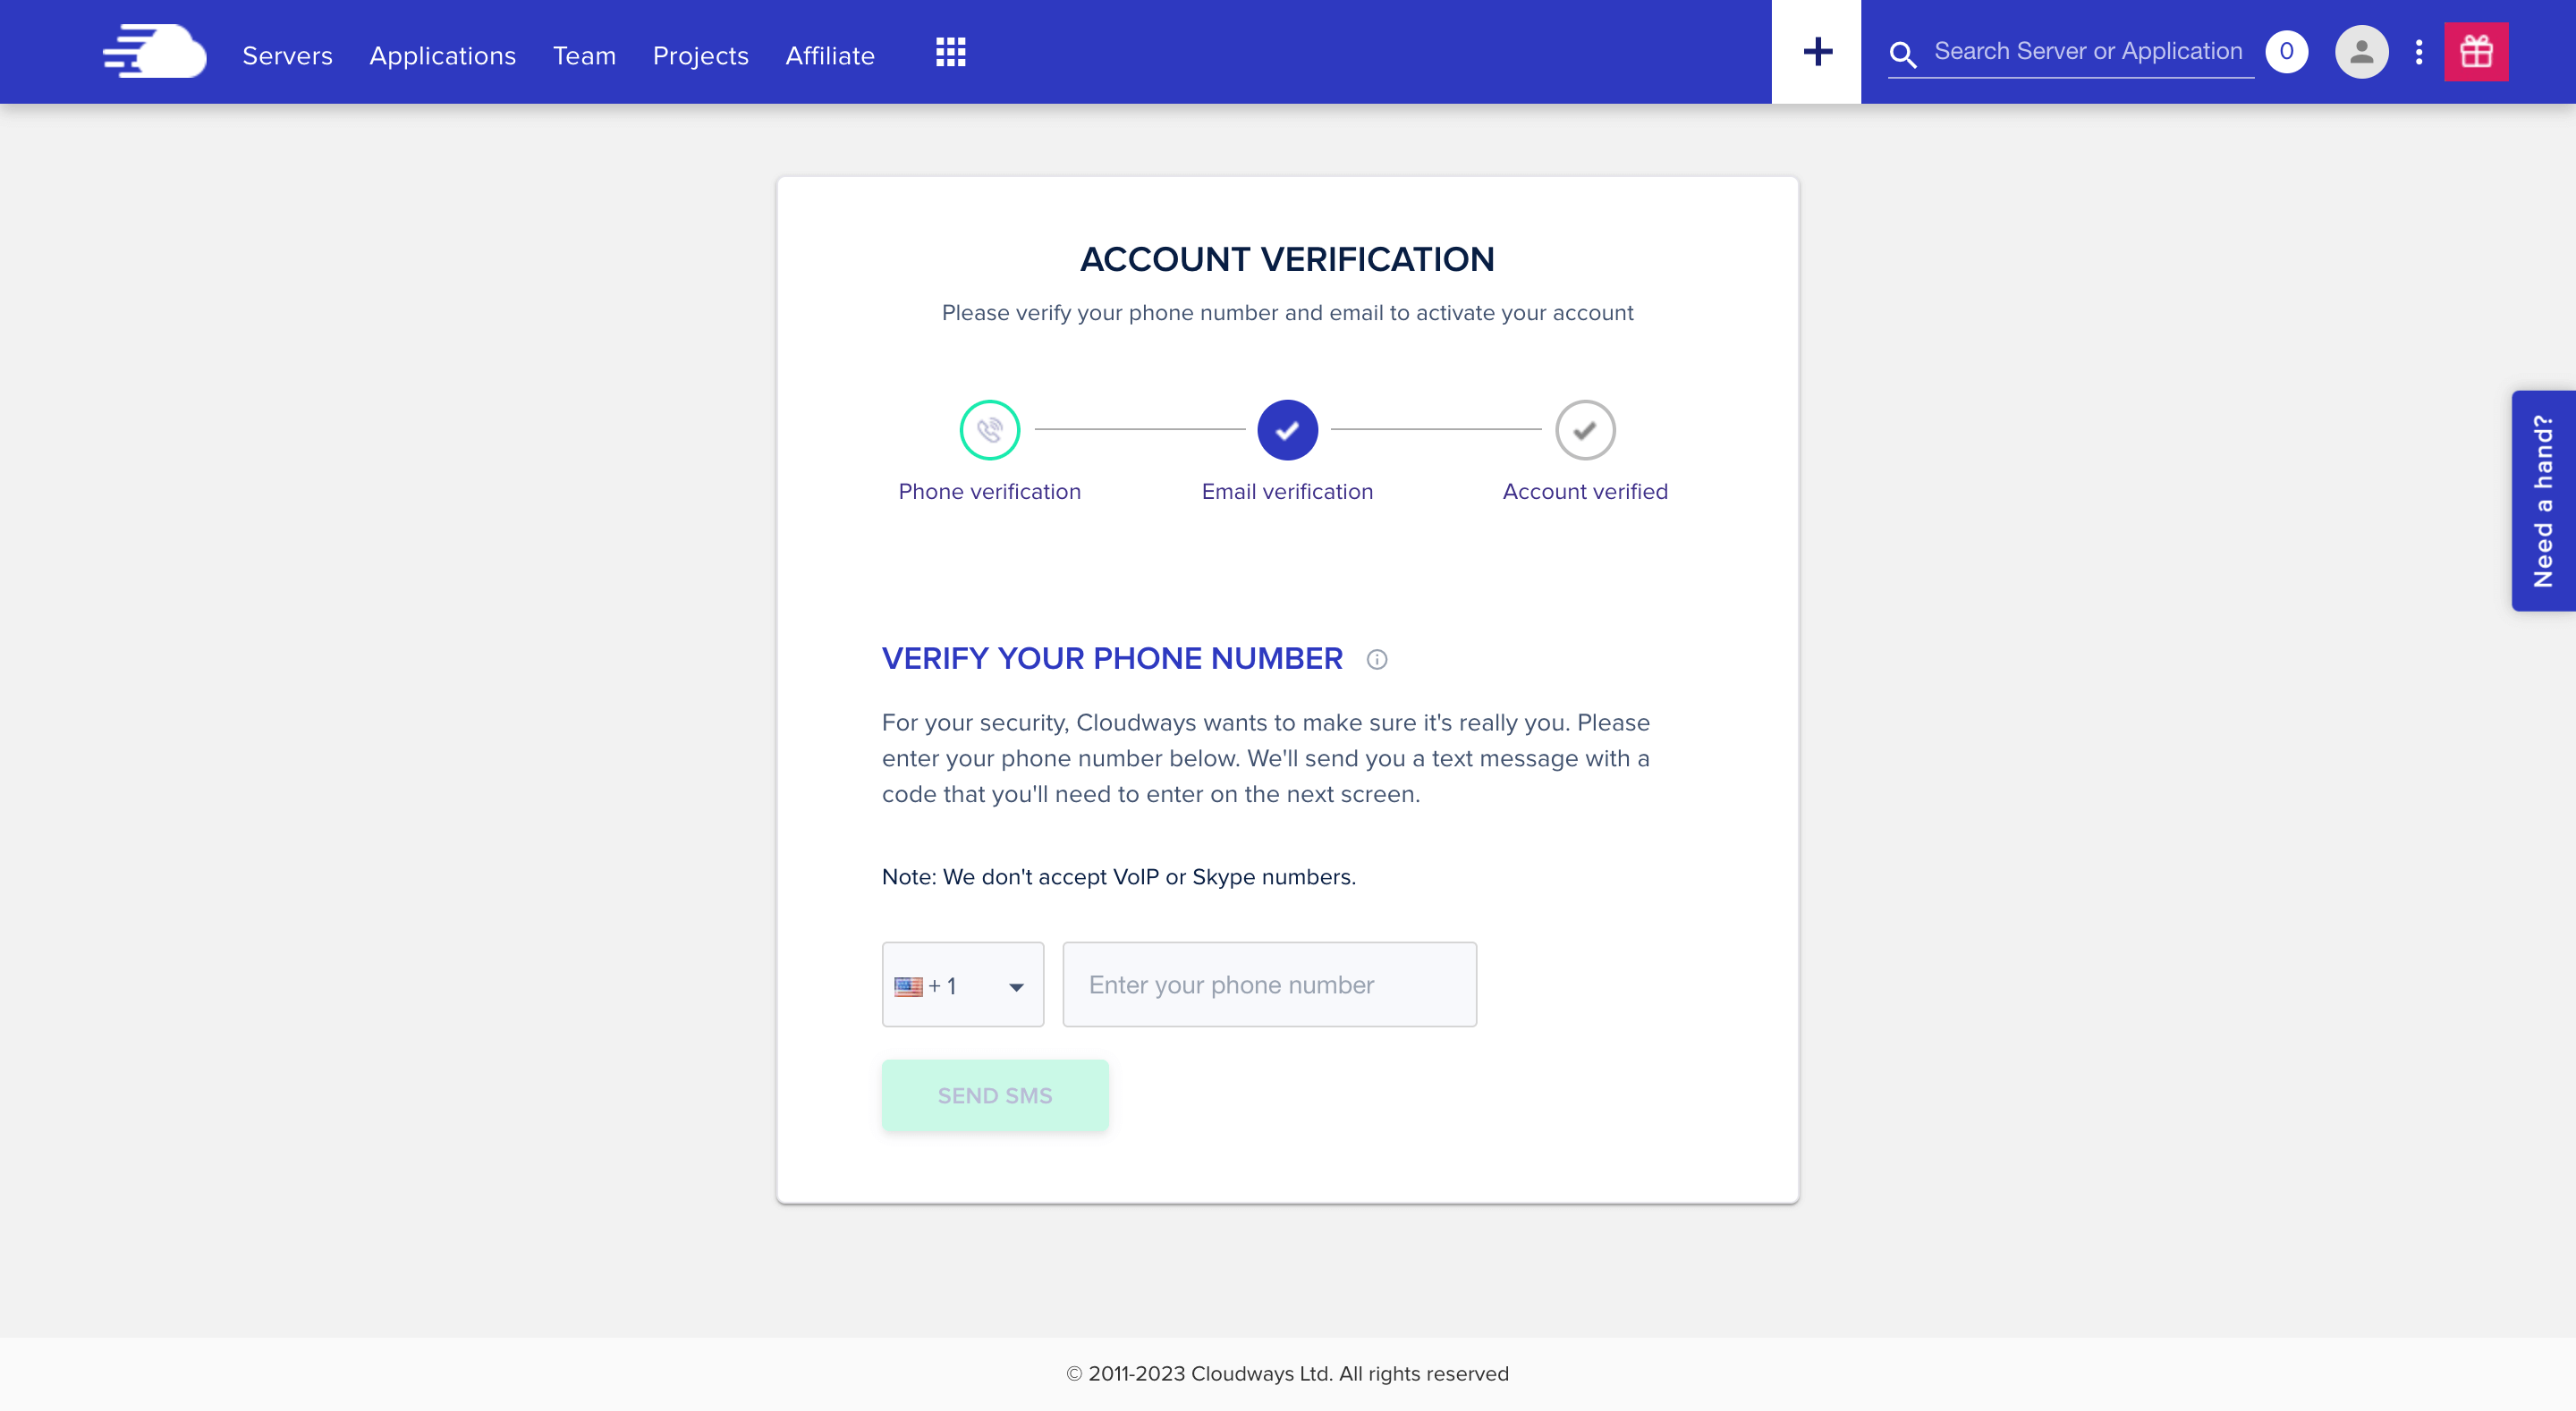
After you create an account, they’ll ask you to confirm it. Click on, the “Confirm your account” button, and comply with the on-screen directions to confirm your account.
Subsequent, you’ll see the Cloudways server configuration wizard to get your app up and working. You’ll be capable of choose an app, choose your server, and choose the server location. When you’ve performed that, you’ll be capable of configure your server settings and launch your app.
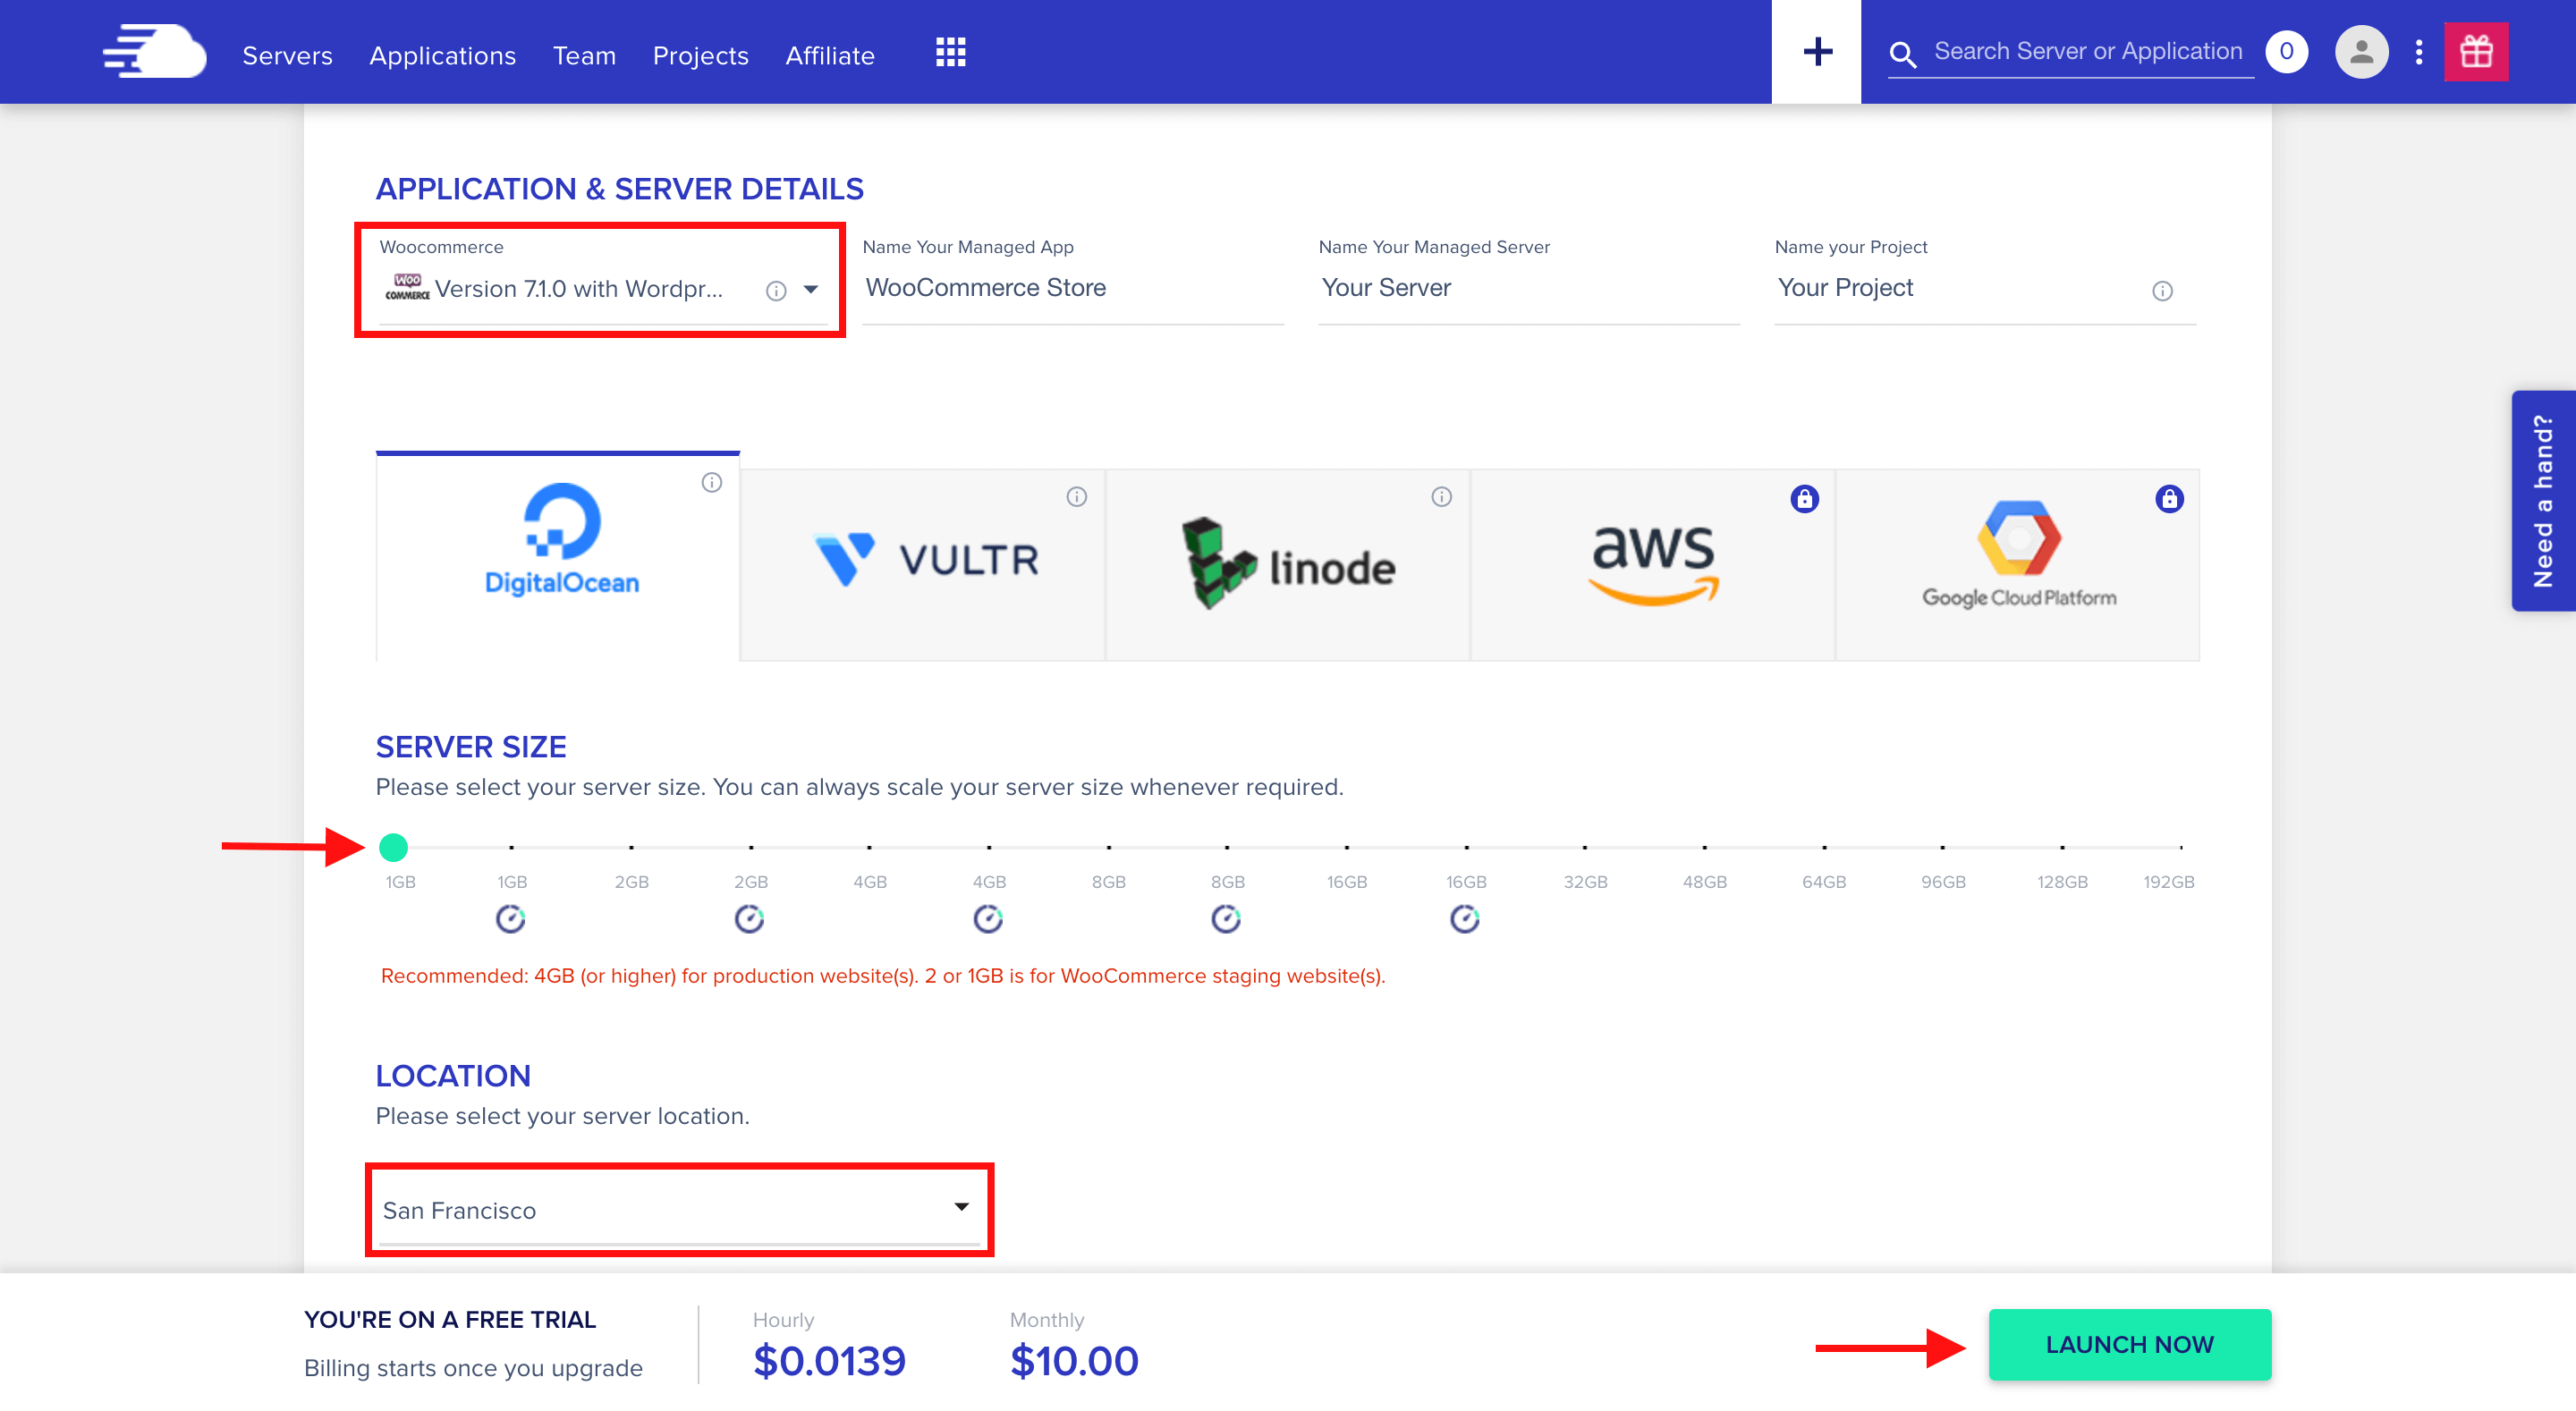
In our case, we’re organising an eCommerce retailer, so go forward and choose the configurations as follows:
- Software & Server Particulars: Choose Woocmmerce from the dropdown checklist. For the App, Server, and Challenge, give them names associated to your web site. It will show you how to simply find every web site sooner or later, particularly if you wish to create a number of web sites or servers.
- Cloud Supplier and Server Dimension: They provide 5 completely different cloud infrastructure suppliers to select from. You’ll want to pick one supplier. When you’re simply beginning out, Digital Ocean’s 1GB server (1 Core Processor, 25GB Storage, and 1TB Bandwidth) must be adequate and you’ll at all times scale up your server as your retailer grows.
- Server Location: For the very best outcomes, choose a server that’s near your prospects. That manner, your eCommerce retailer will load quicker.
When you’ve completed organising your Cloudways server, click on the “Launch Now” button to proceed.
As soon as your server is prepared, it’s time to log in to your WooCommerce retailer!
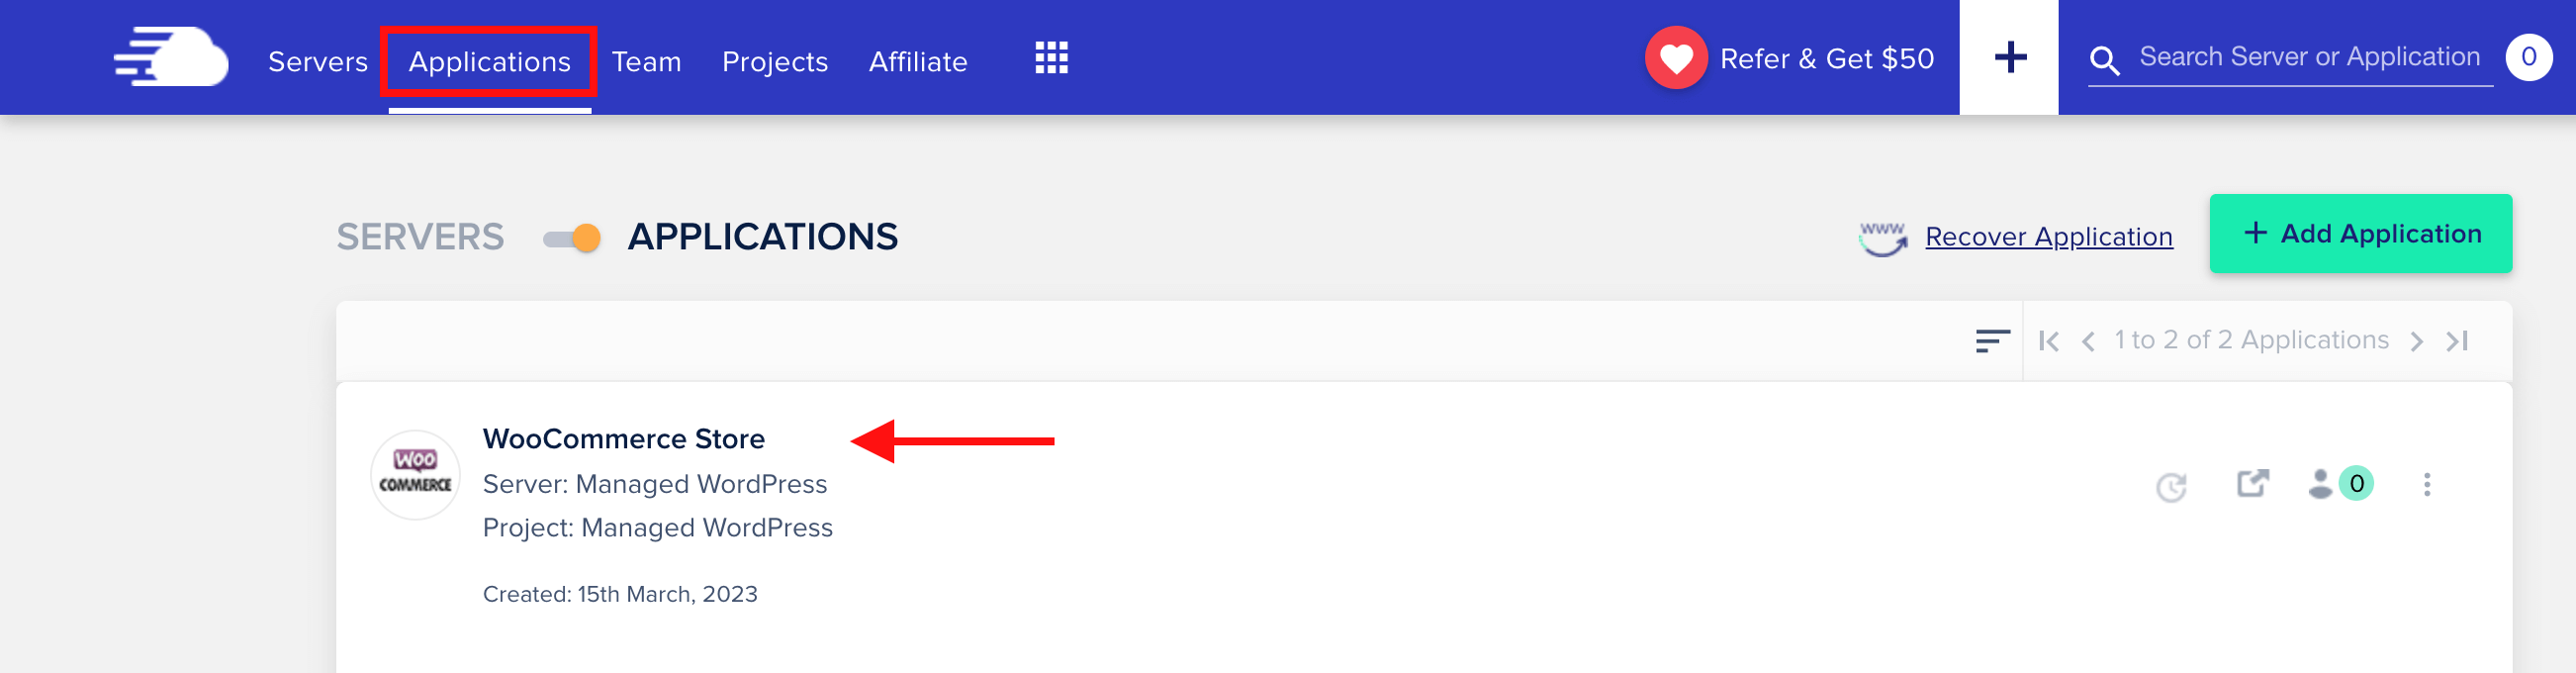
To get began, head to the Cloudways Platform and click on Purposes within the top-left menu. From there, you’ll see an inventory of all of your apps – click on in your WooCommerce retailer to enter the applying space.
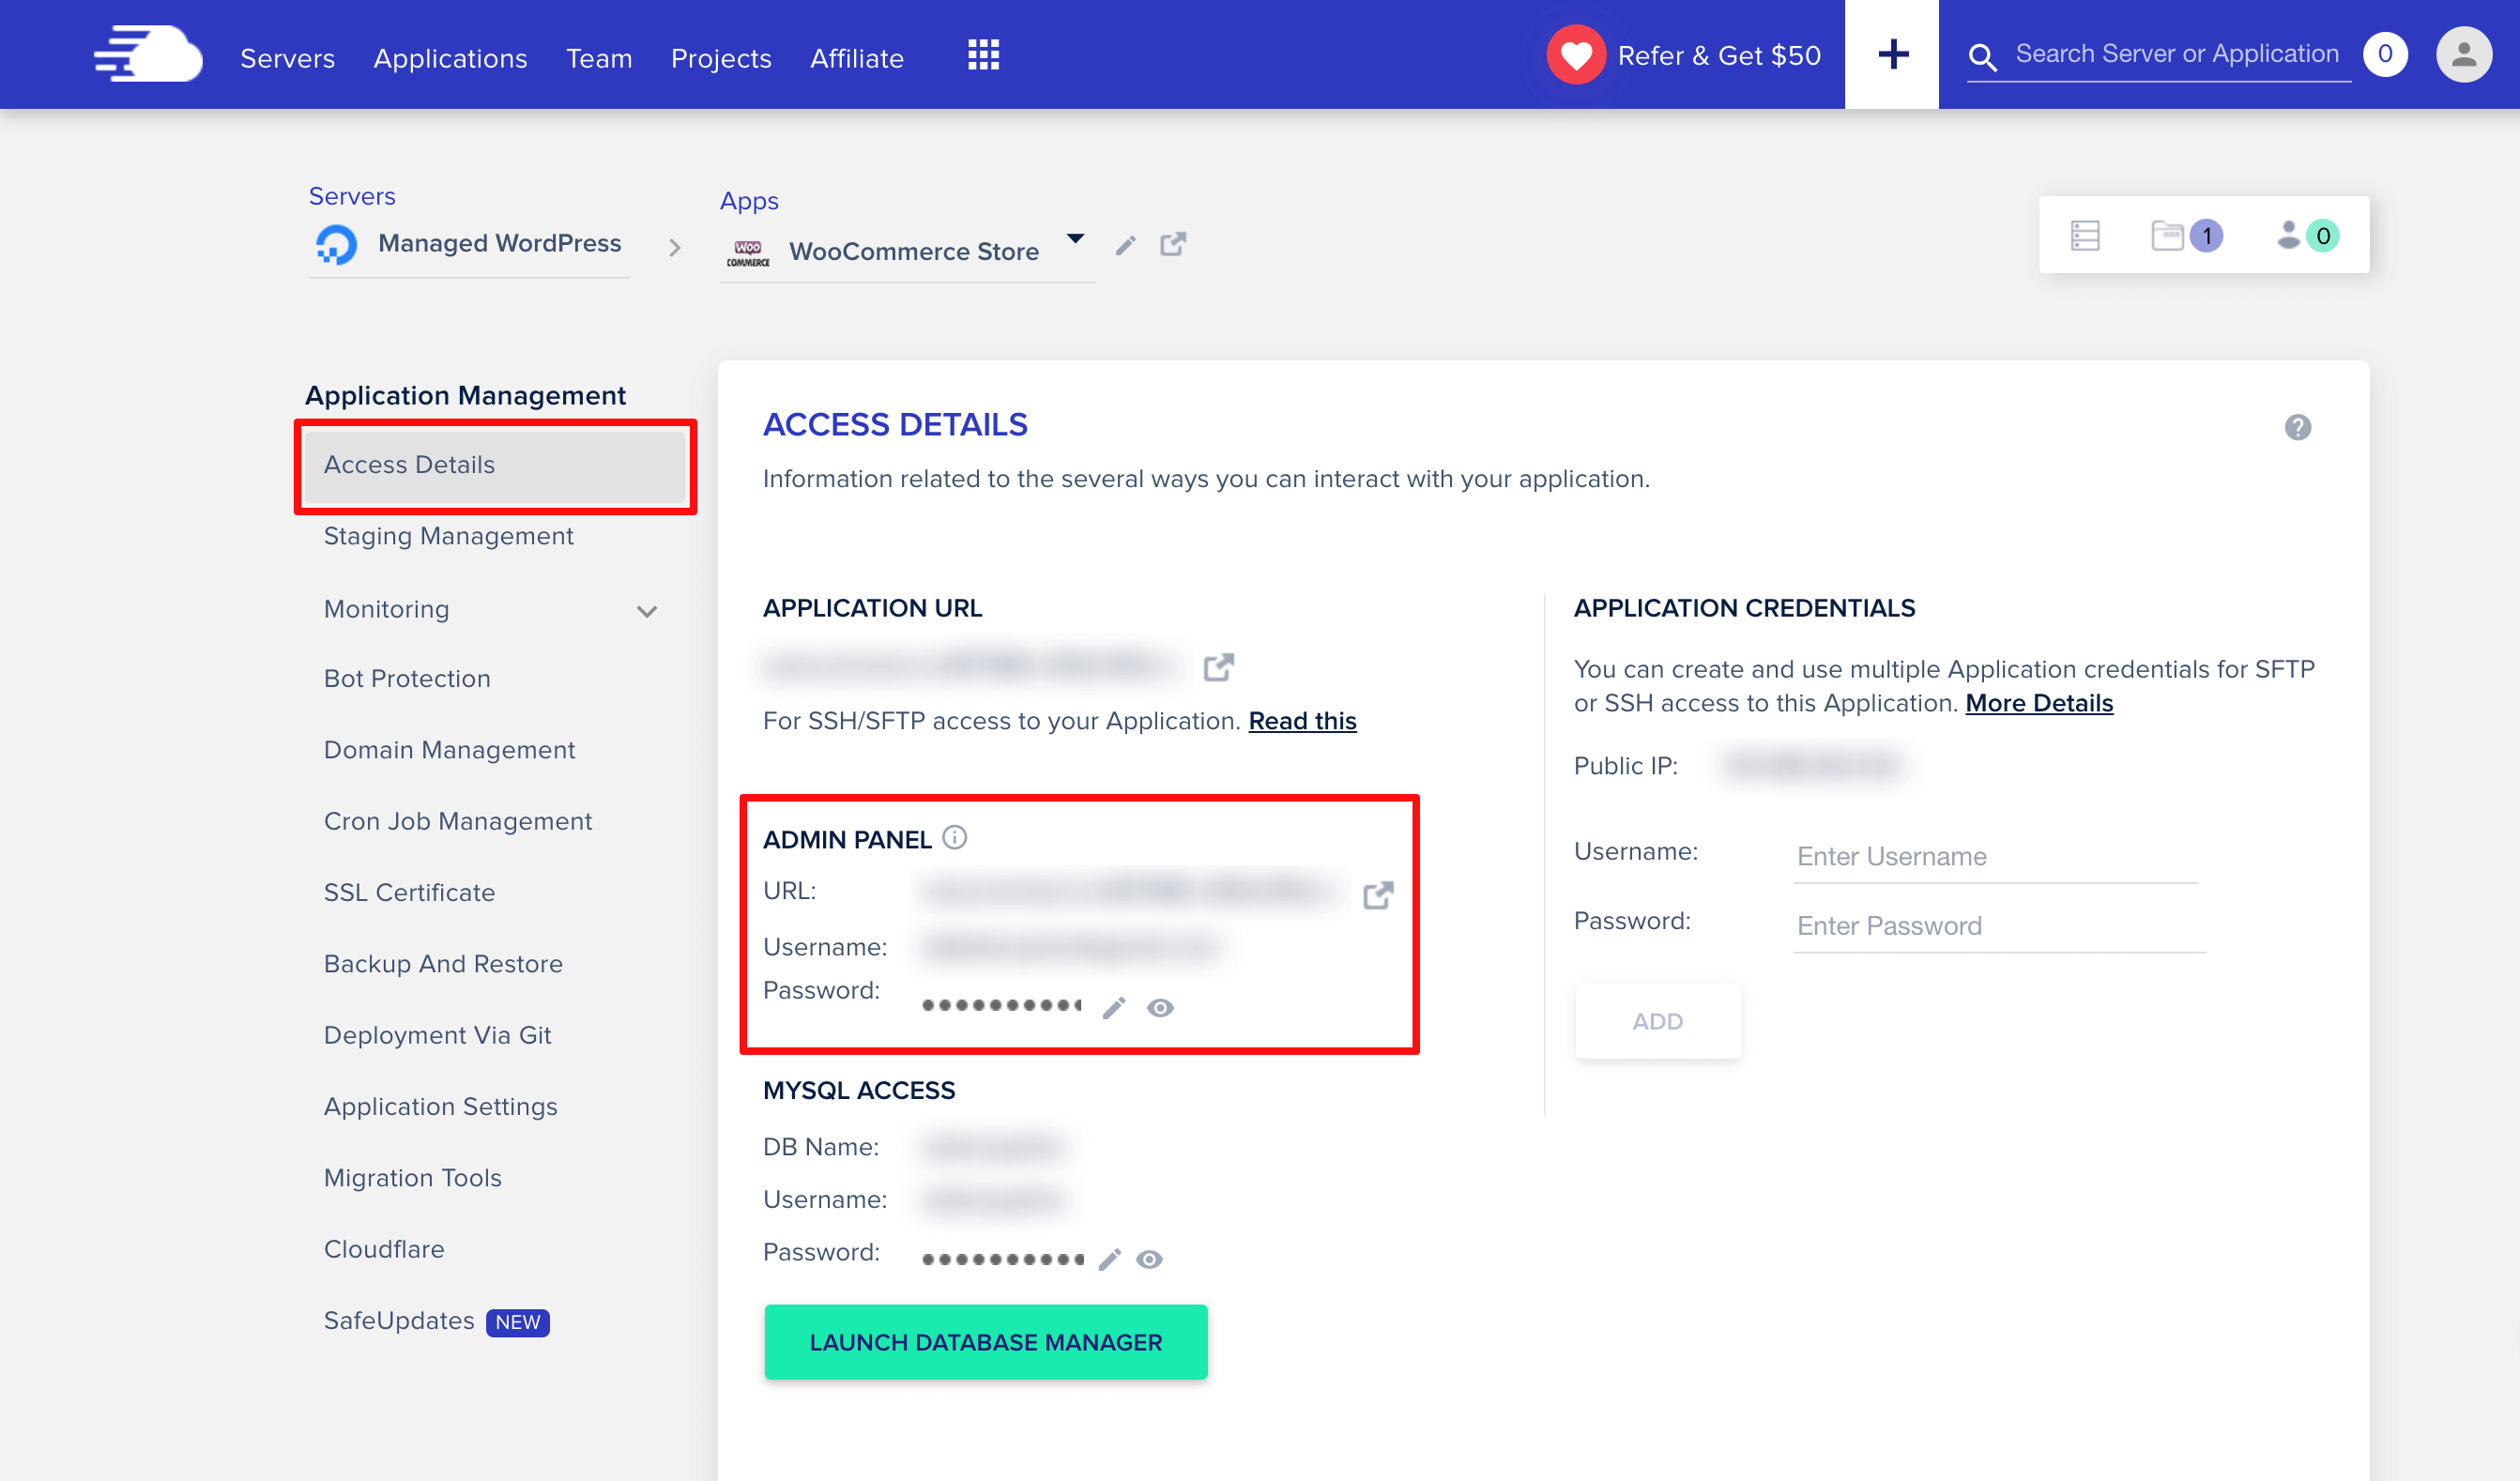
When you’re within the utility space, you’ll discover the credentials you’ll want to log in to your WooCommerce Dashboard – the URL on your admin panel, in addition to your username and password.
With the URL and your credentials at hand, click on the URL and log in to the WooCommerce Dashboard.
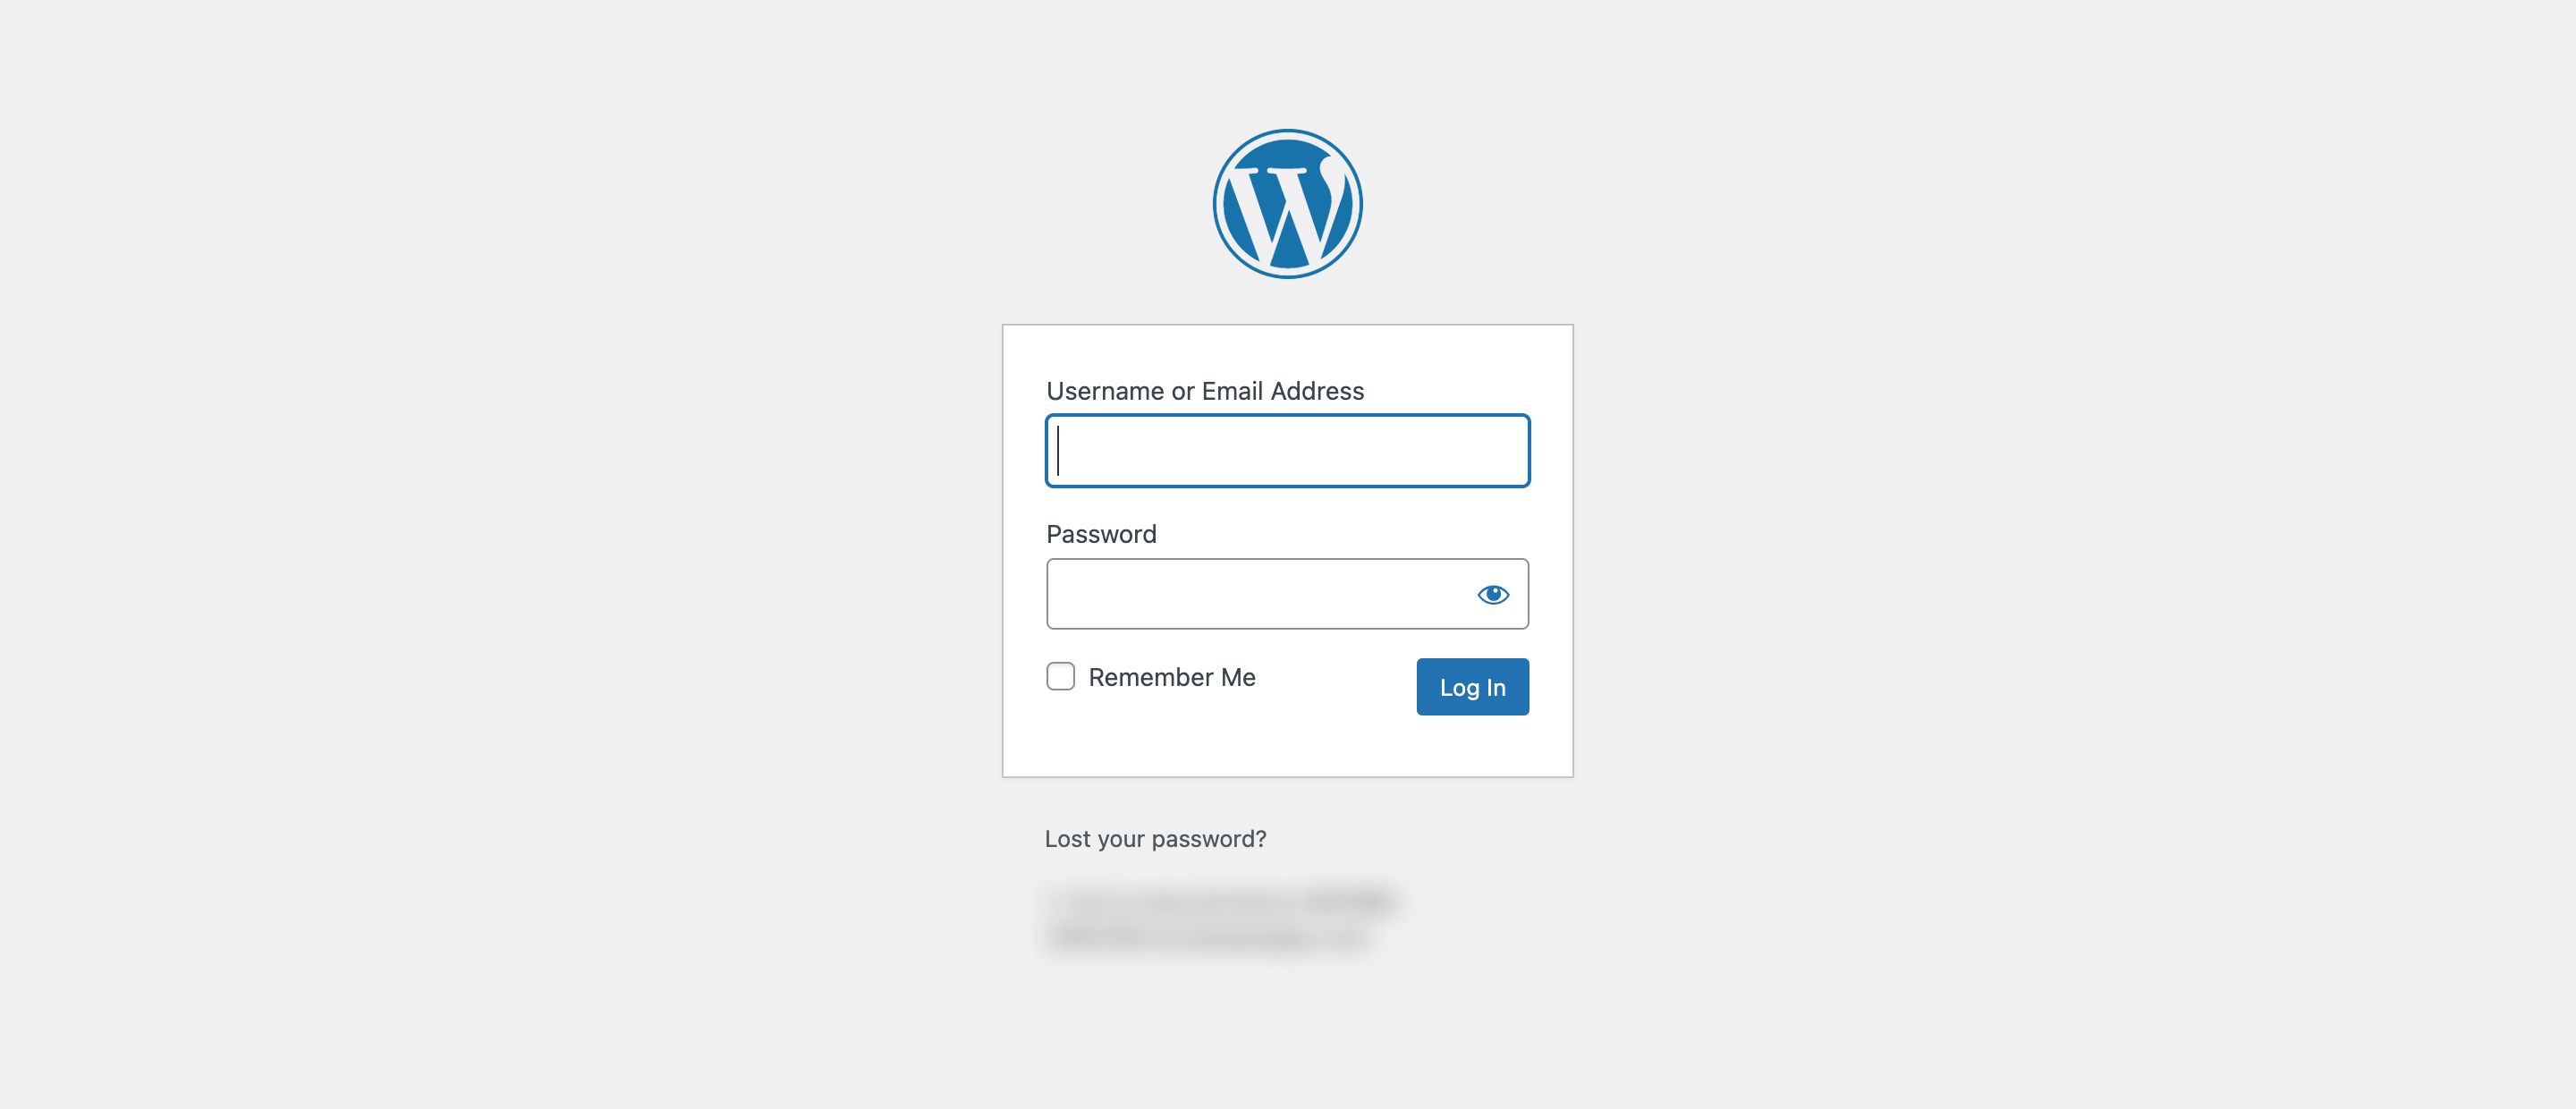
Subsequent, copy your Username and Password from the Admin Panel, and paste them into the WooCommerce Login Web page.
You can too click on “keep in mind me” in the event you don’t wish to should enter your credentials each time you log in. With that performed, click on the “Log in” button and also you’ll be taken to the WooCommerce dashboard.
Now that you simply’re logged in, you must be capable of begin customizing your retailer, including merchandise, and organising fee strategies. It’s that easy!
2. Organising the WooCommerce Retailer
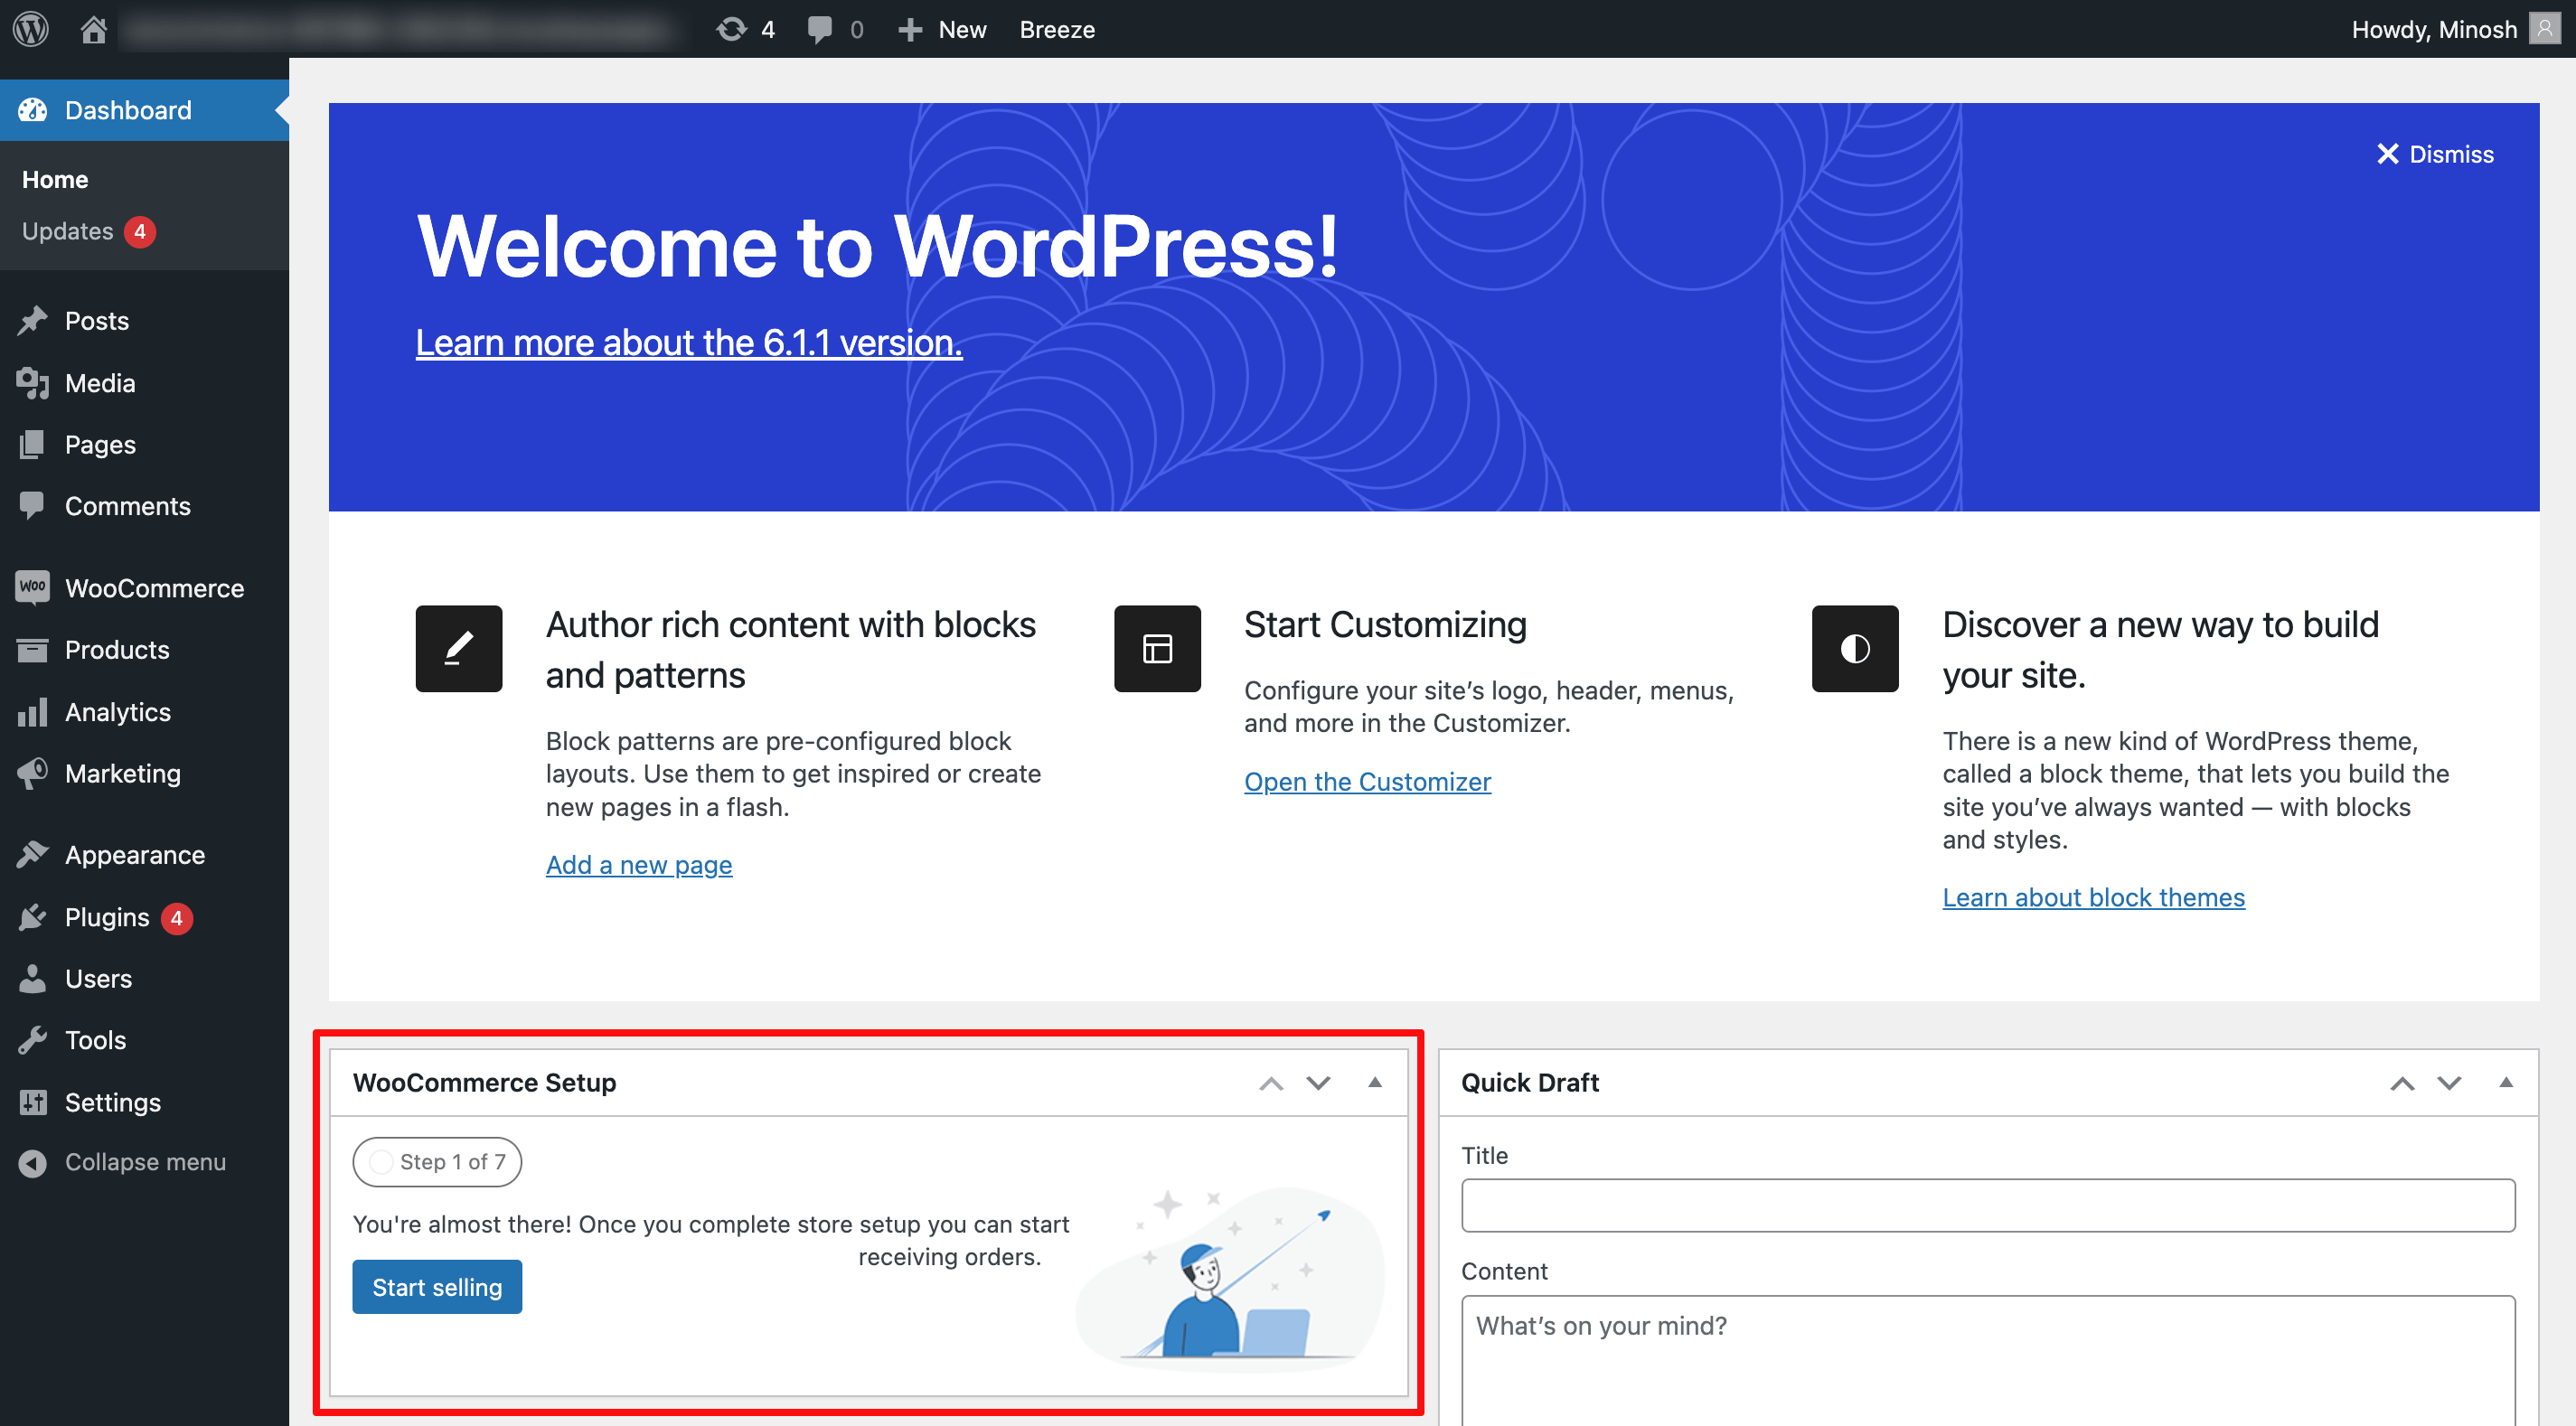
Now that you’ve got WooCommerce put in in your WordPress setup, it’s time to begin organising your on-line retailer!
First, click on the “Begin Promoting” button to launch the WooCommerce setup wizard. This wizard will information you thru the method of organising your retailer, step-by-step.
The setup wizard will information you thru the method of organising your retailer, beginning with getting into your retailer particulars. Right here, you’ll enter fundamental data reminiscent of your retailer’s deal with and promoting and transport areas, in addition to the foreign money you’d like to make use of.
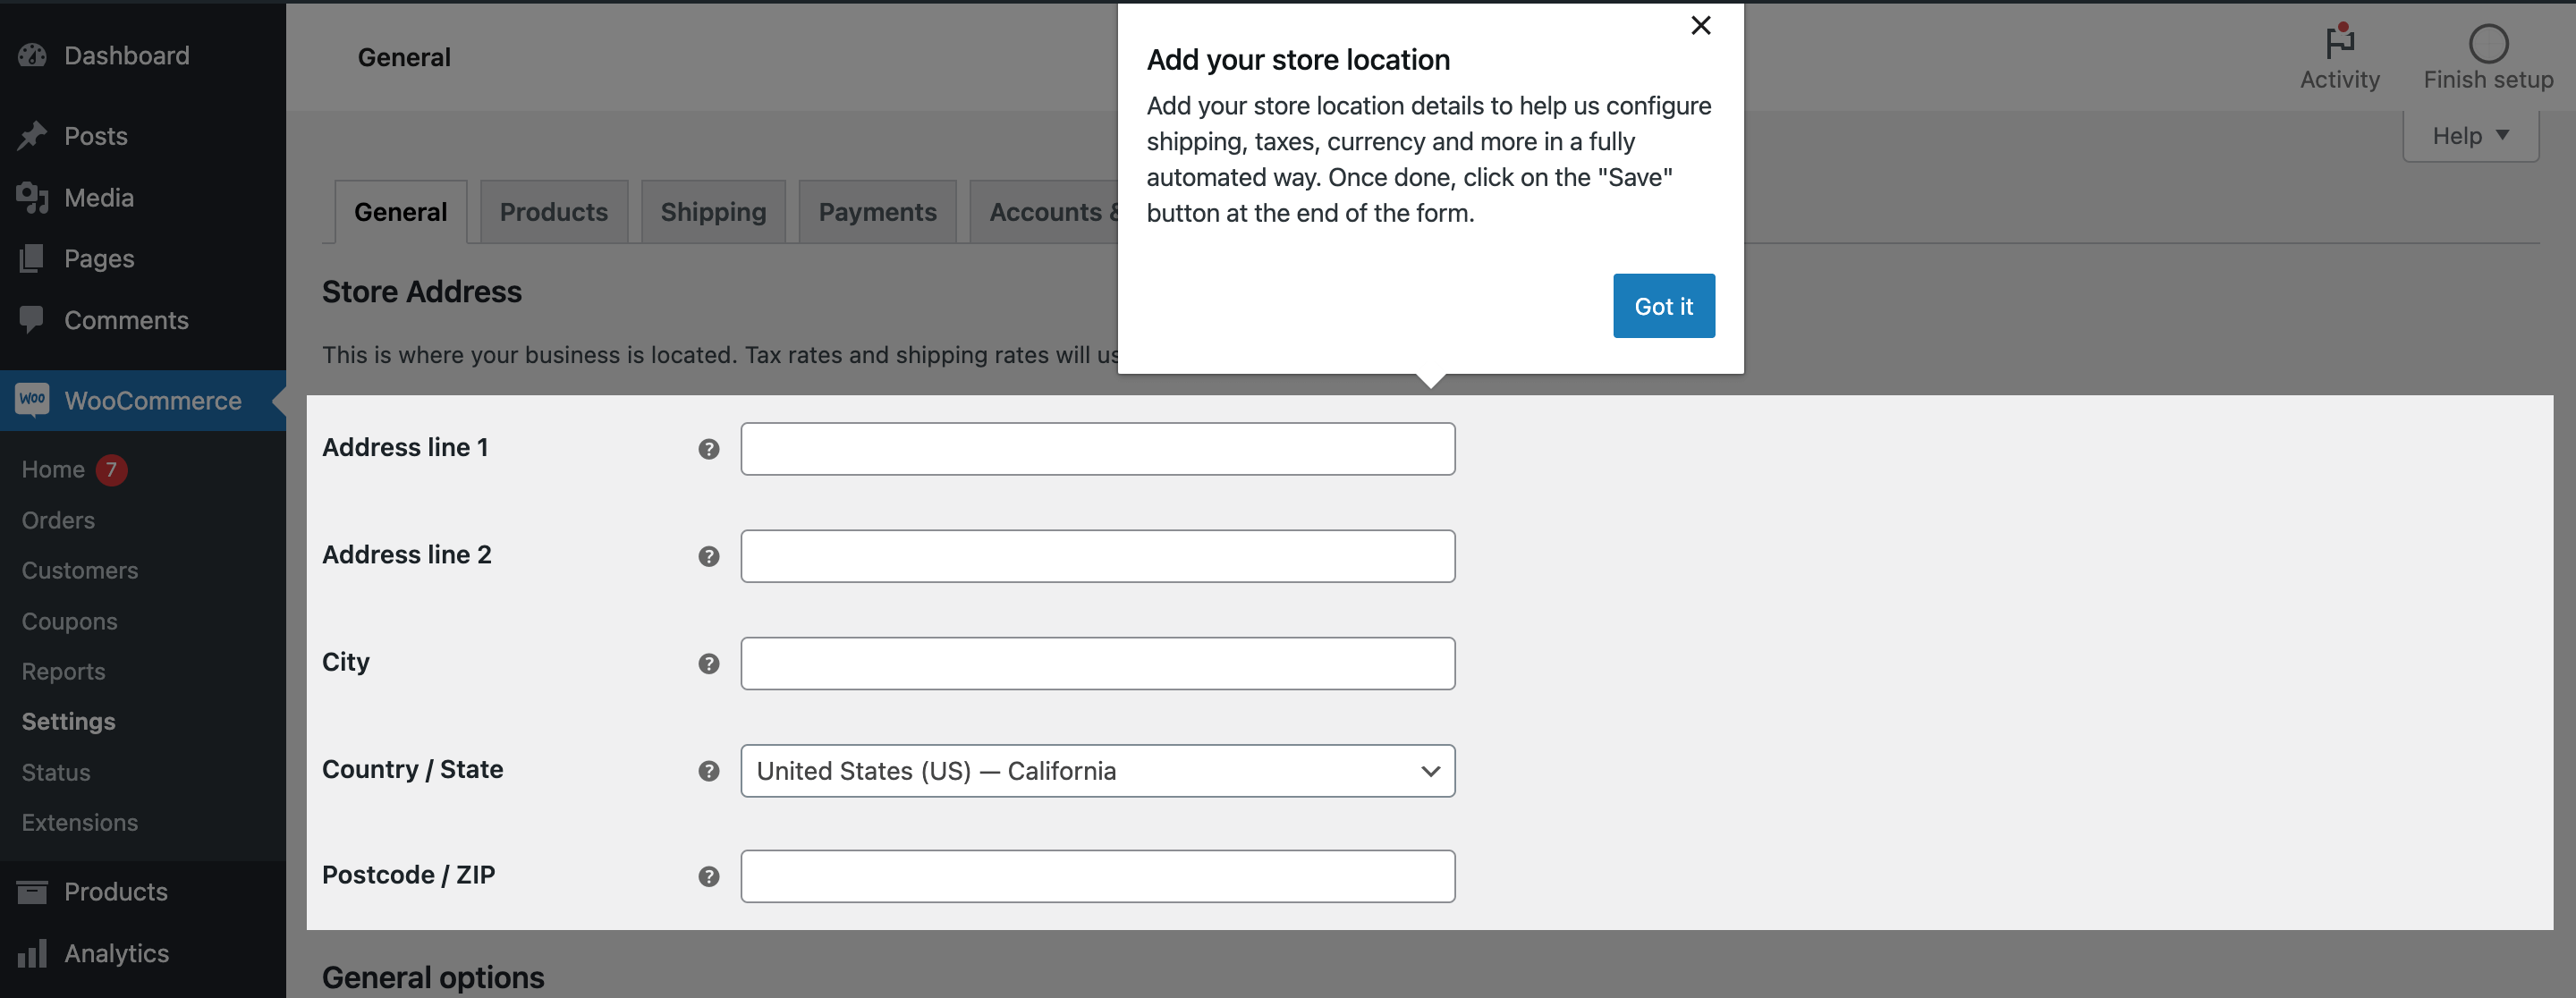
It’s necessary that you simply enter this data appropriately and totally, so take your time and double-check it earlier than you progress on.
When you’ve completed, don’t neglect the save them.
After that, it’s time to maneuver on to the subsequent step of the setup wizard. Merely click on the “Proceed Setup” button on the prime proper nook and it’ll take you to the subsequent web page of the setup course of.
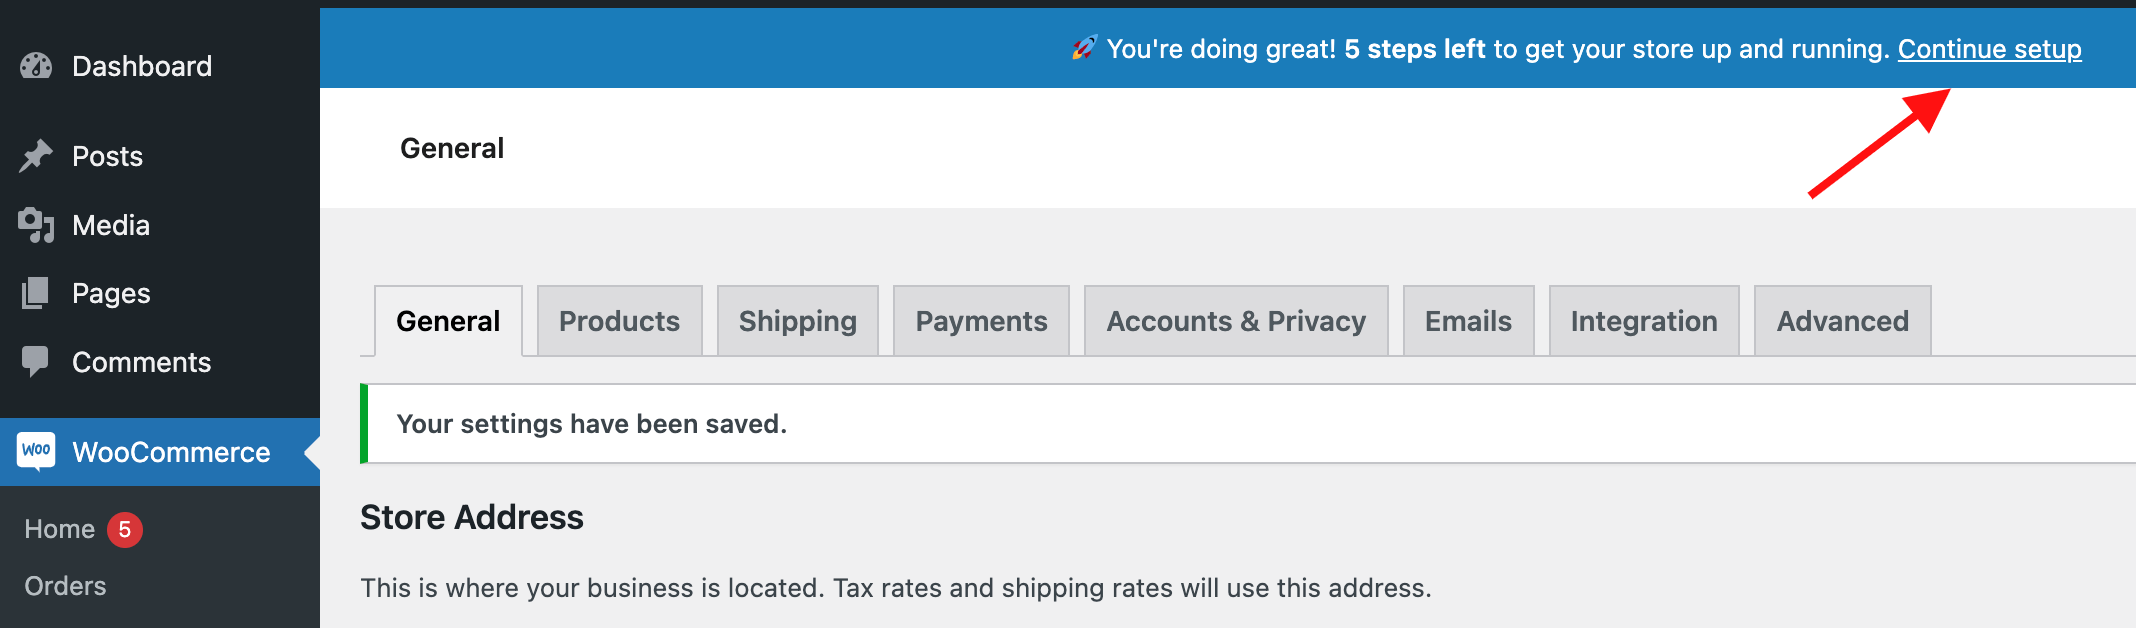
On this web page, it is possible for you to to evaluation the deal with you’ve got entered and ensure every thing is so as. Upon getting verified all the small print, you’ll be able to click on the “Proceed” button to maneuver on to the subsequent step.
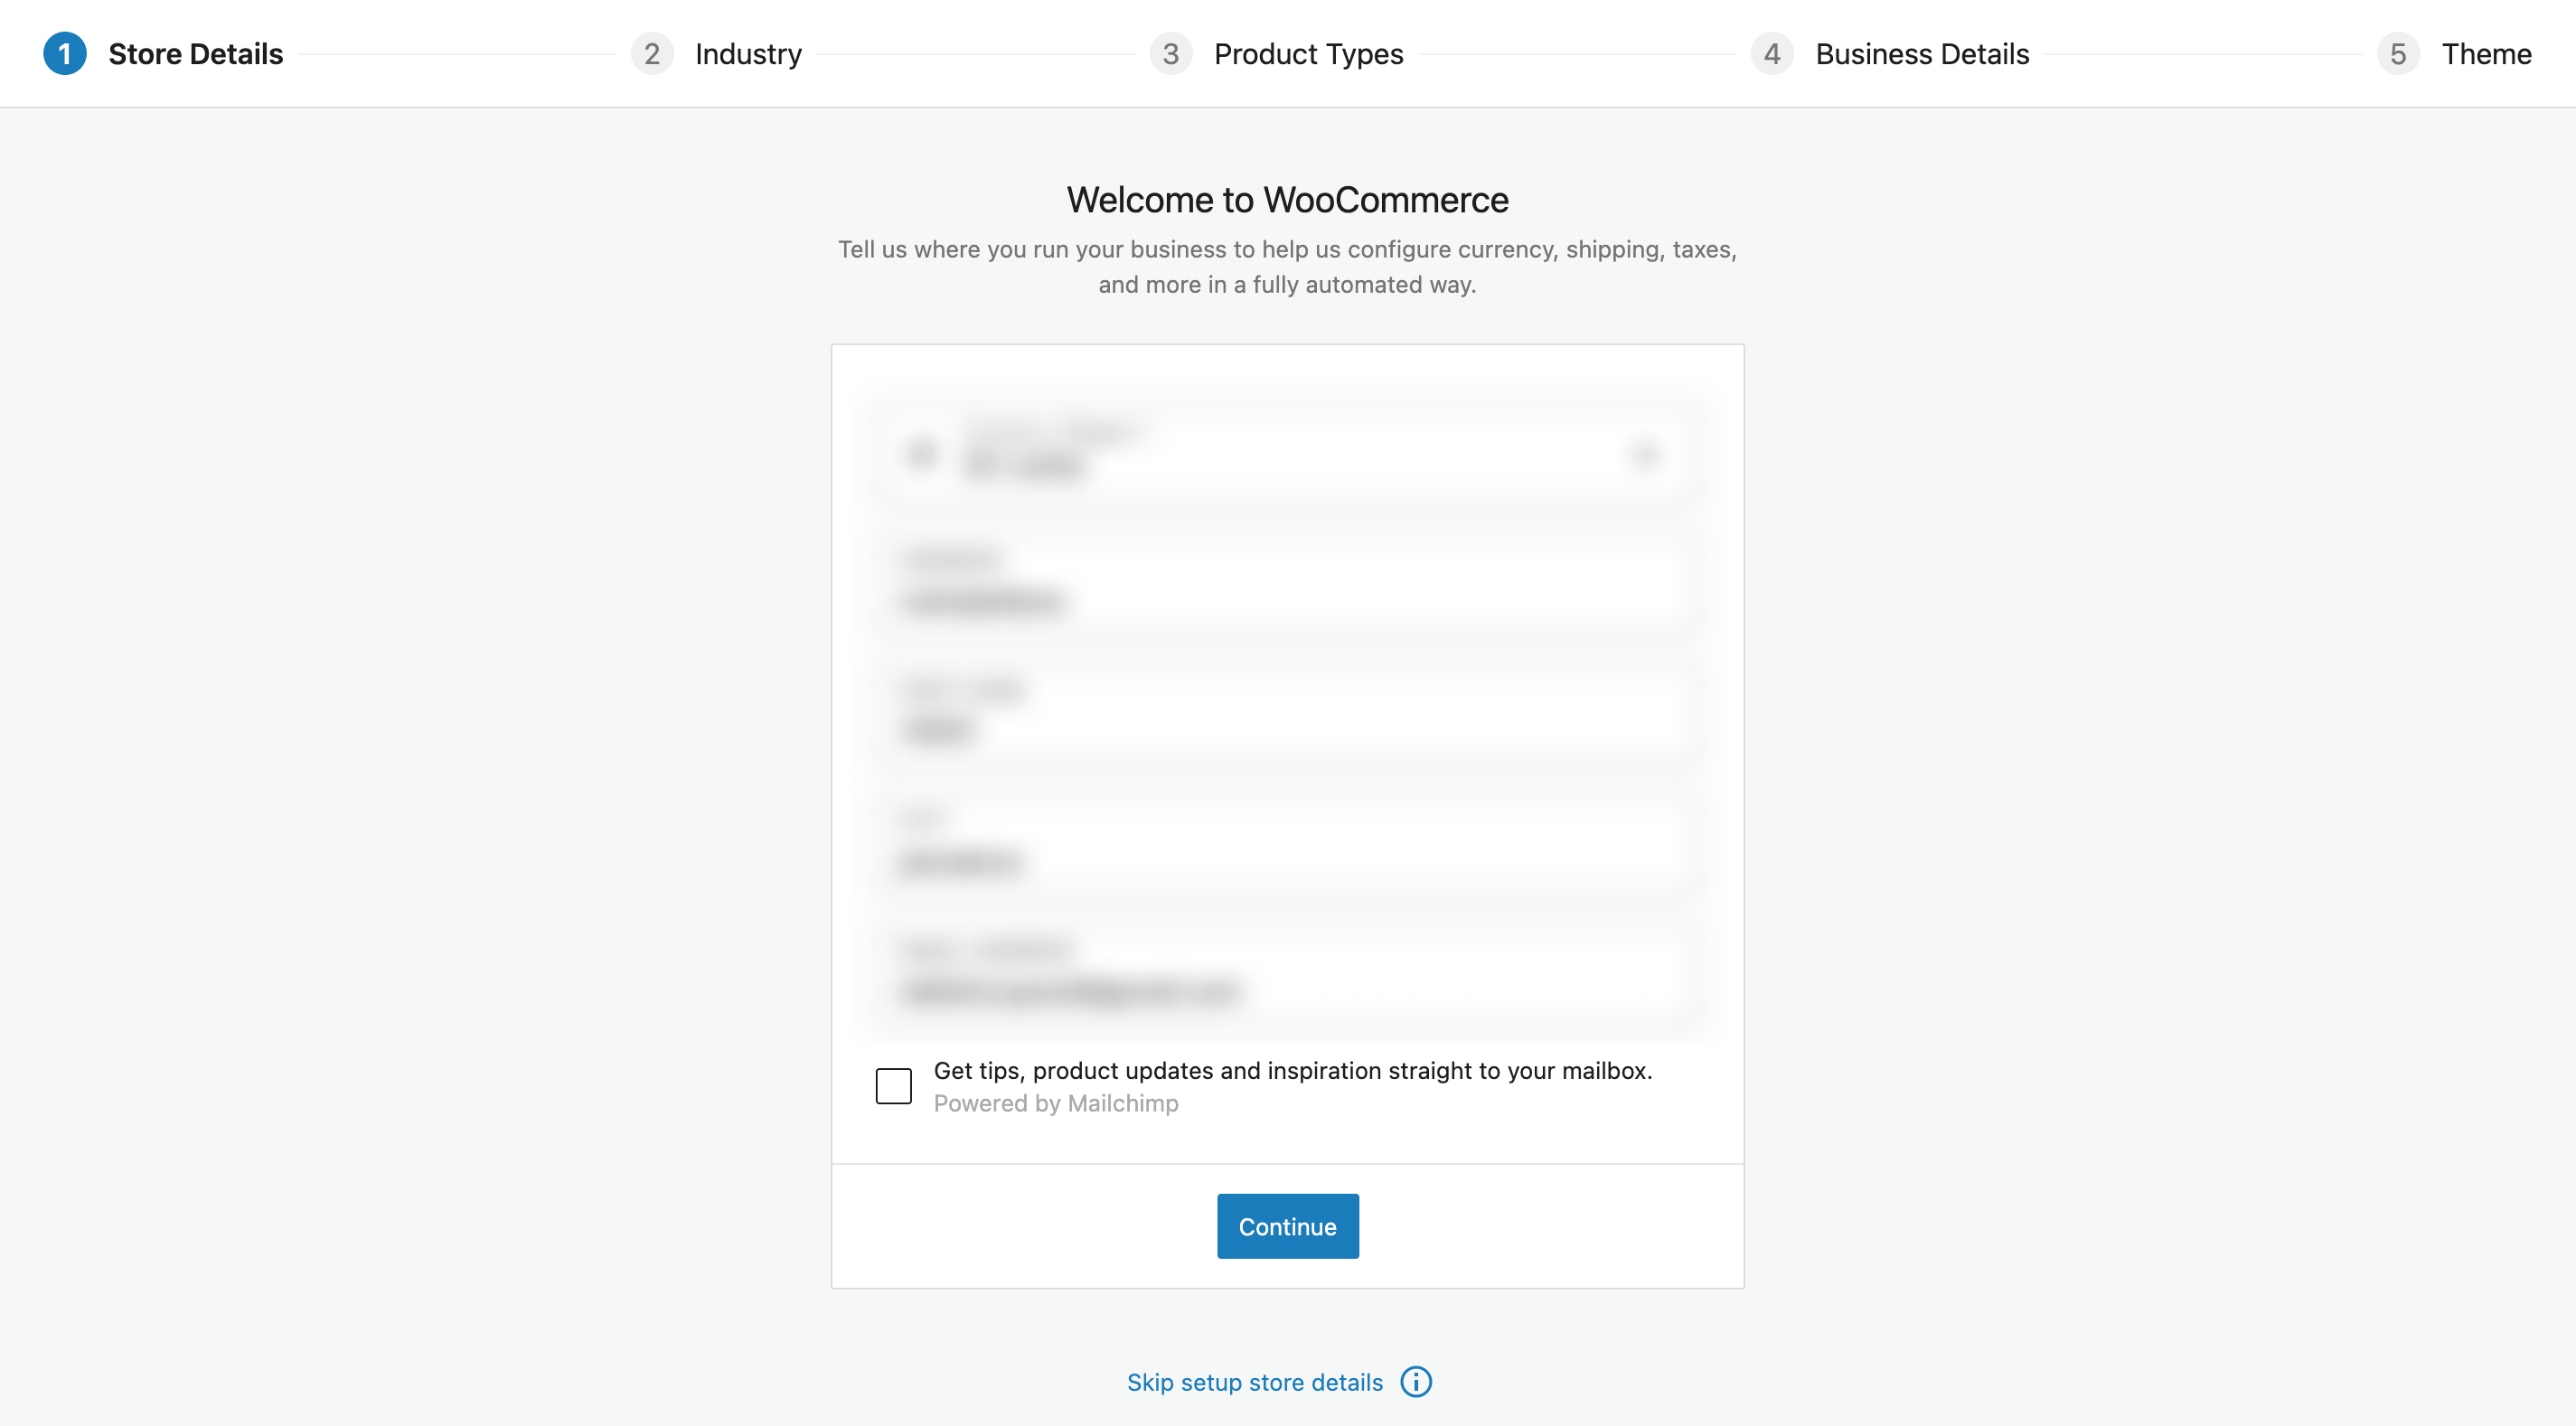
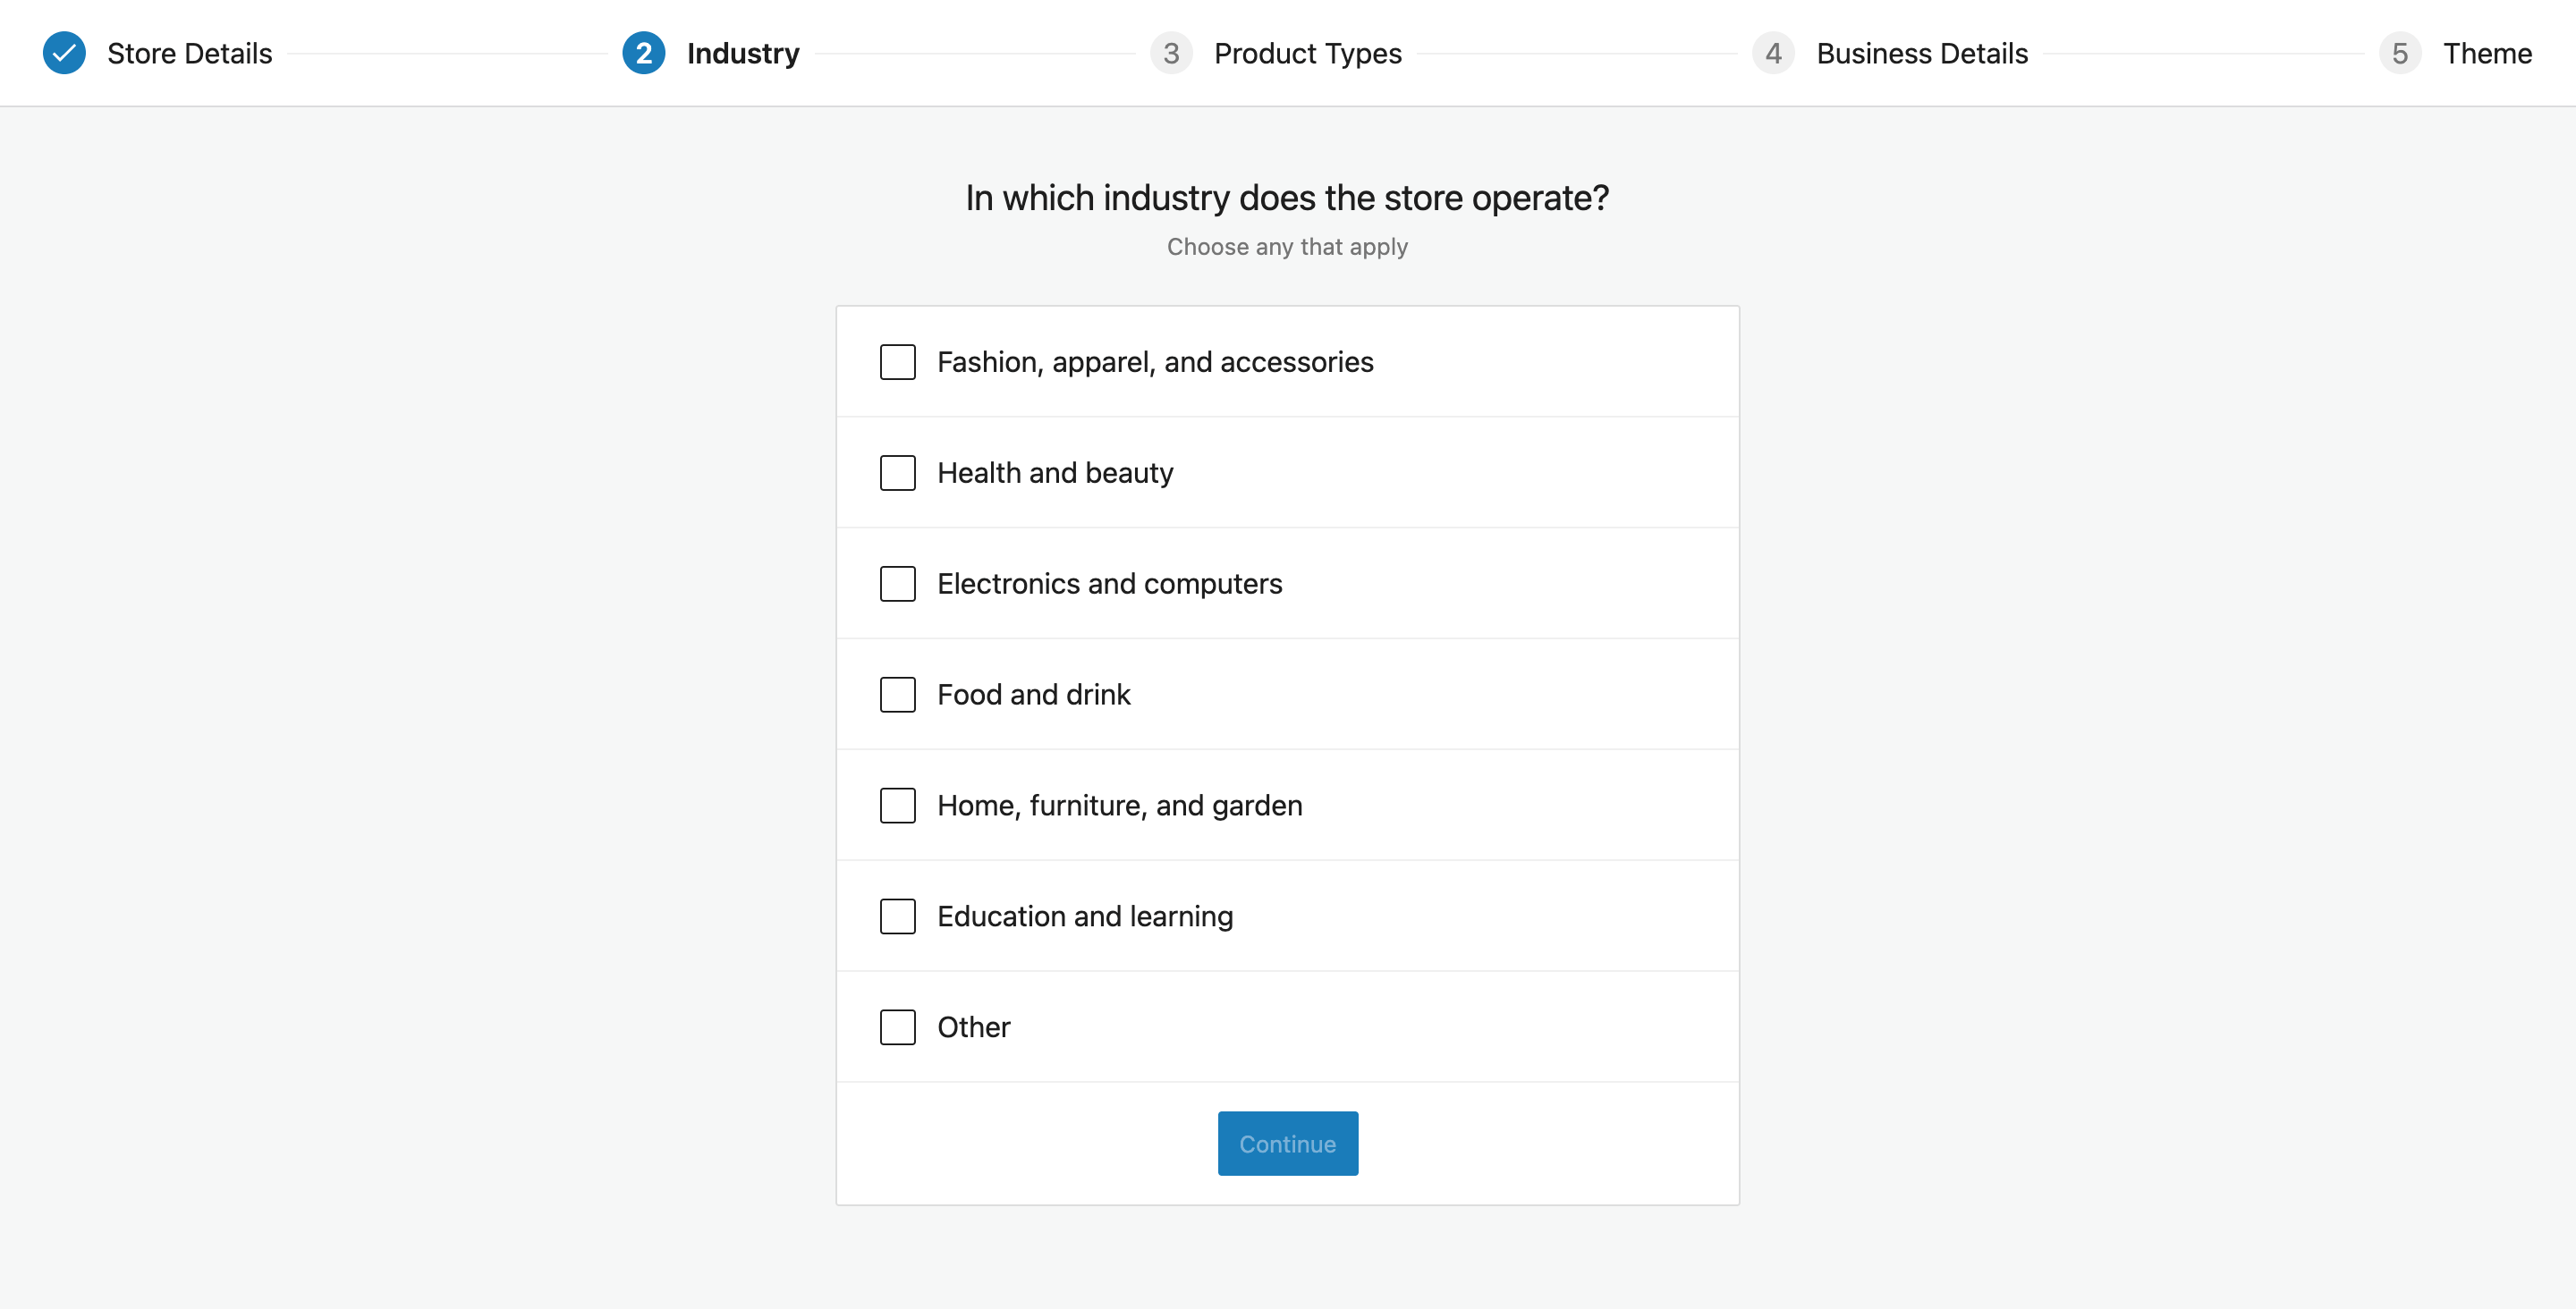
Subsequent, you’ll be requested concerning the business you’re in. You may have a wide range of choices to select from, from clothes and vogue to electronics and training. Simply choose those that apply to what you are promoting and also you’re good to go.
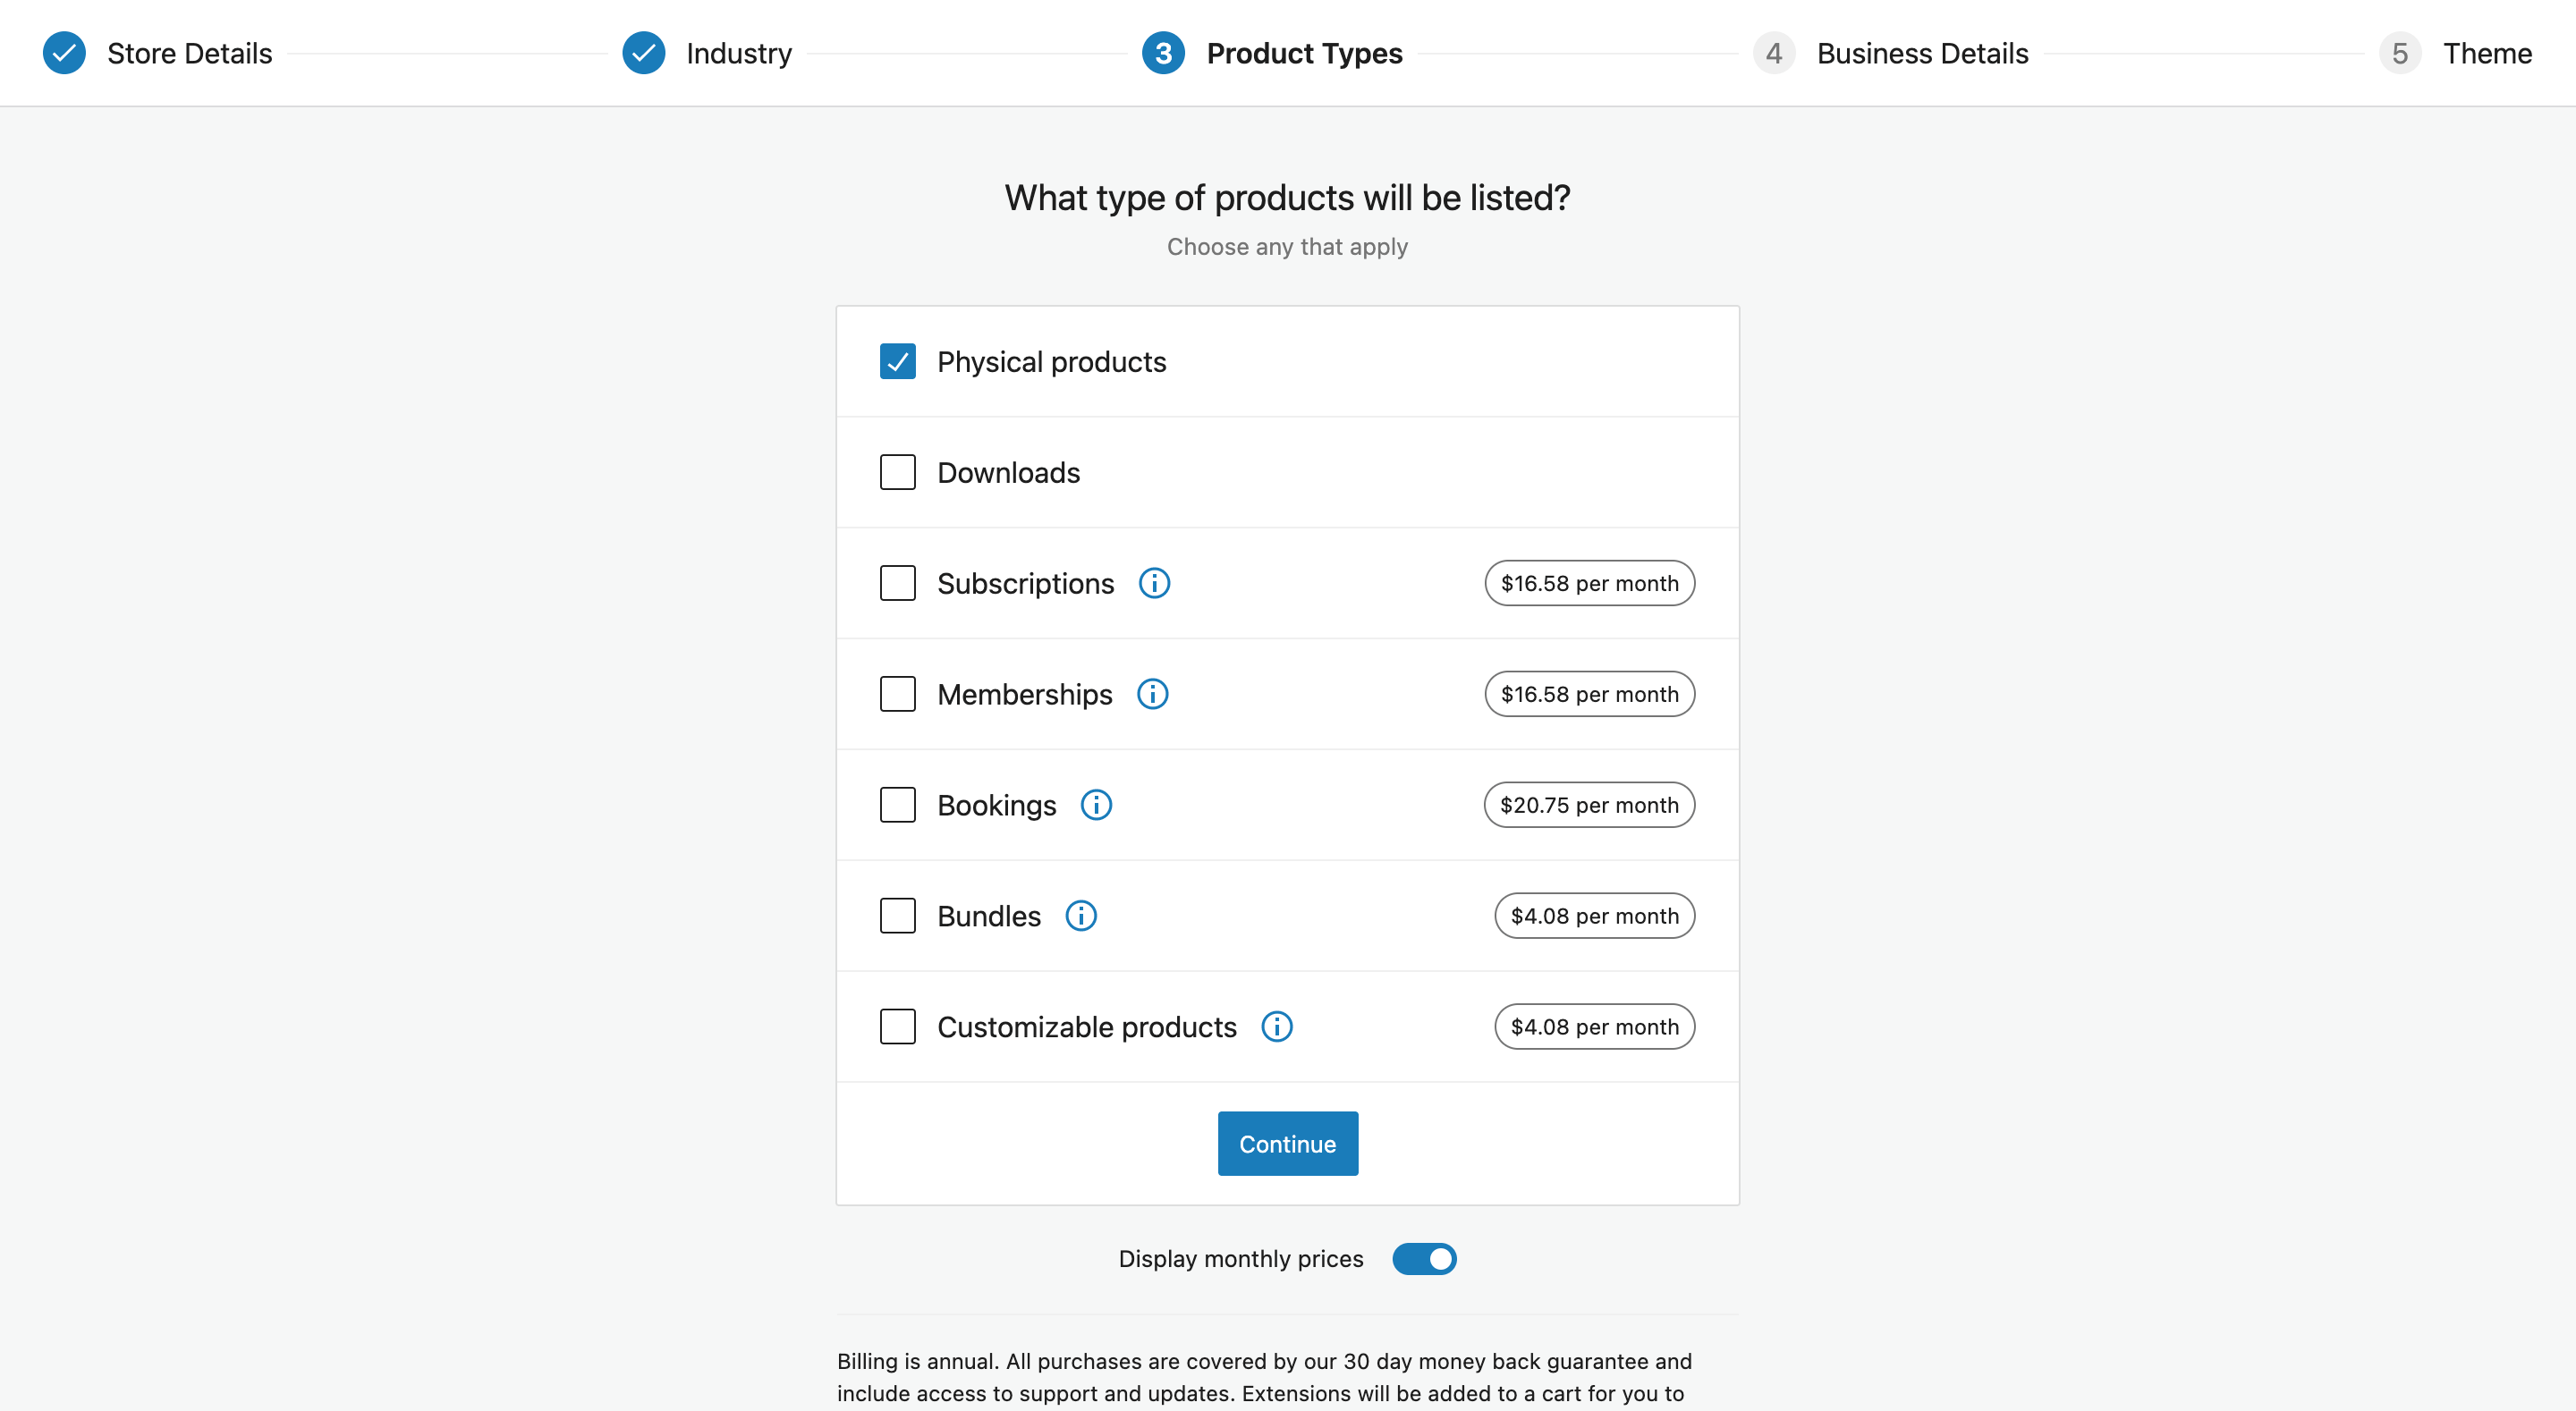
The following step within the setup wizard is to resolve what sort of merchandise you’ll be itemizing in your retailer.
Whether or not you’re promoting bodily items, digital downloads, subscriptions, appointments, or companies, WooCommerce has you coated.
One factor to notice is that some product varieties require further plugins or extensions. If you wish to checklist customizable merchandise, for instance, you’ll have to buy an extension to allow this function.
Equally, in the event you’re considering of working a subscription-based retailer, you’ll want an extension to arrange that form of retailer. This might price you a number of further bucks, but it surely’s value it in the long term.
Upon getting chosen the varieties of merchandise that you simply wish to checklist in your retailer, you’ll be able to transfer ahead with the setup.
Now, the setup wizard will ask you a number of easy questions on what you are promoting. It would ask what number of merchandise you’re planning to show, the place what you are promoting is positioned, and the way you may be promoting your merchandise, and so forth.
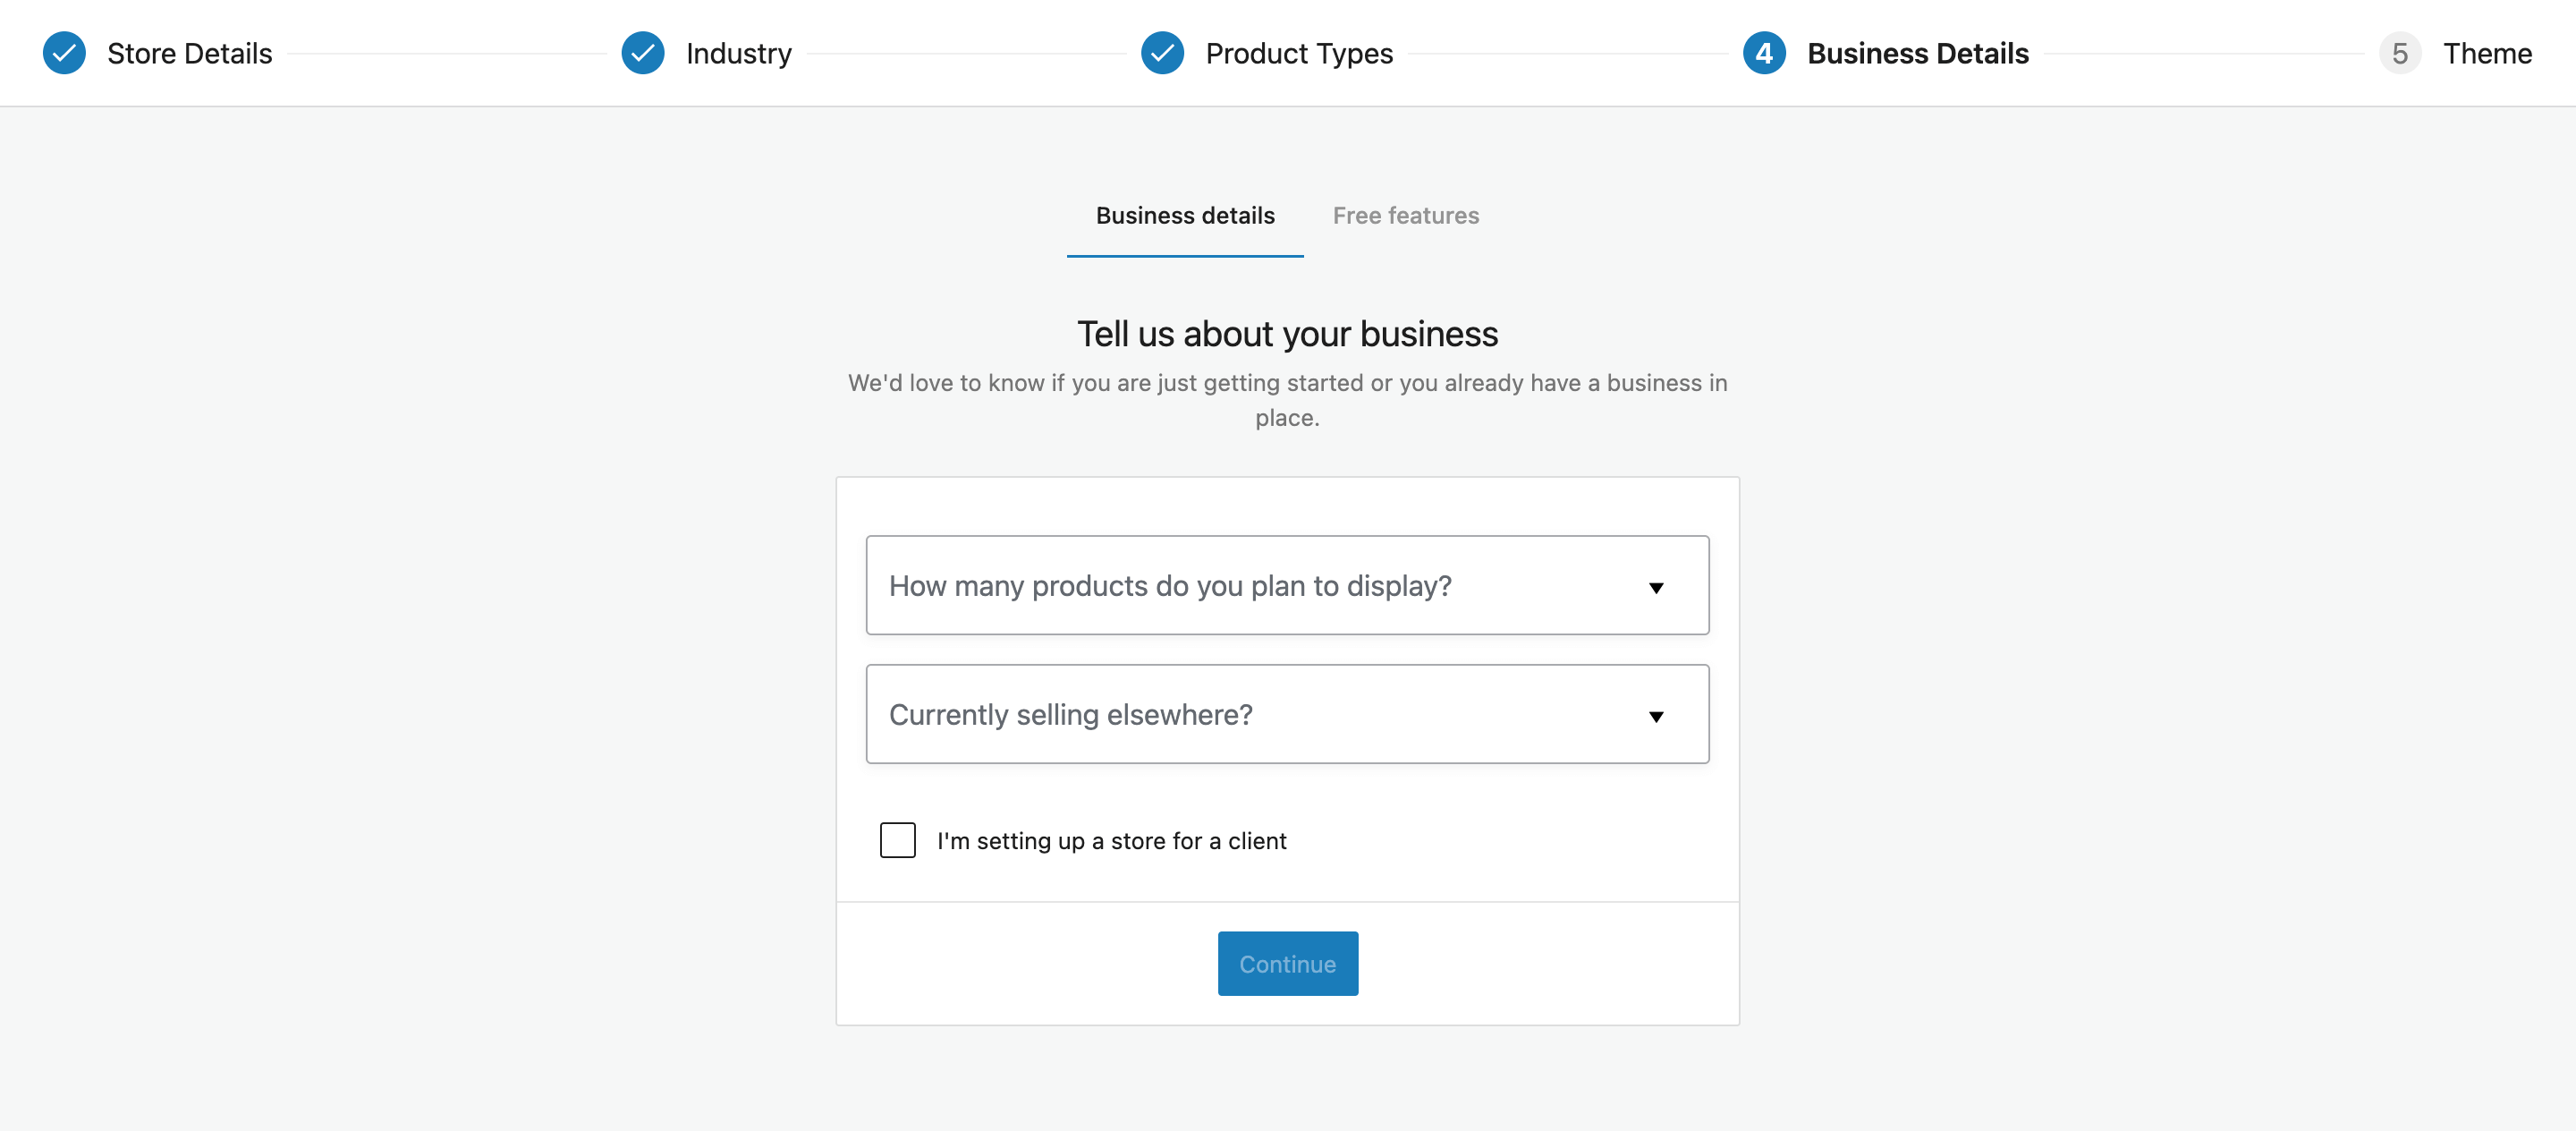
When you’ve answered these questions, WooCommerce will supply some free extensions that may assist improve your retailer. These are non-obligatory, so you’ll be able to add or take away them as you like.
Usually, these extensions add extra options or customization choices to your retailer.
On the final step of your WooCommerce setup, you may be requested to decide on a theme on your retailer. You may have the choice to decide on a free or a paid one.
Nevertheless, The best theme could make all of the distinction in the case of the success of your retailer. So put within the effort and time to ensure you choose the proper one for what you are promoting.
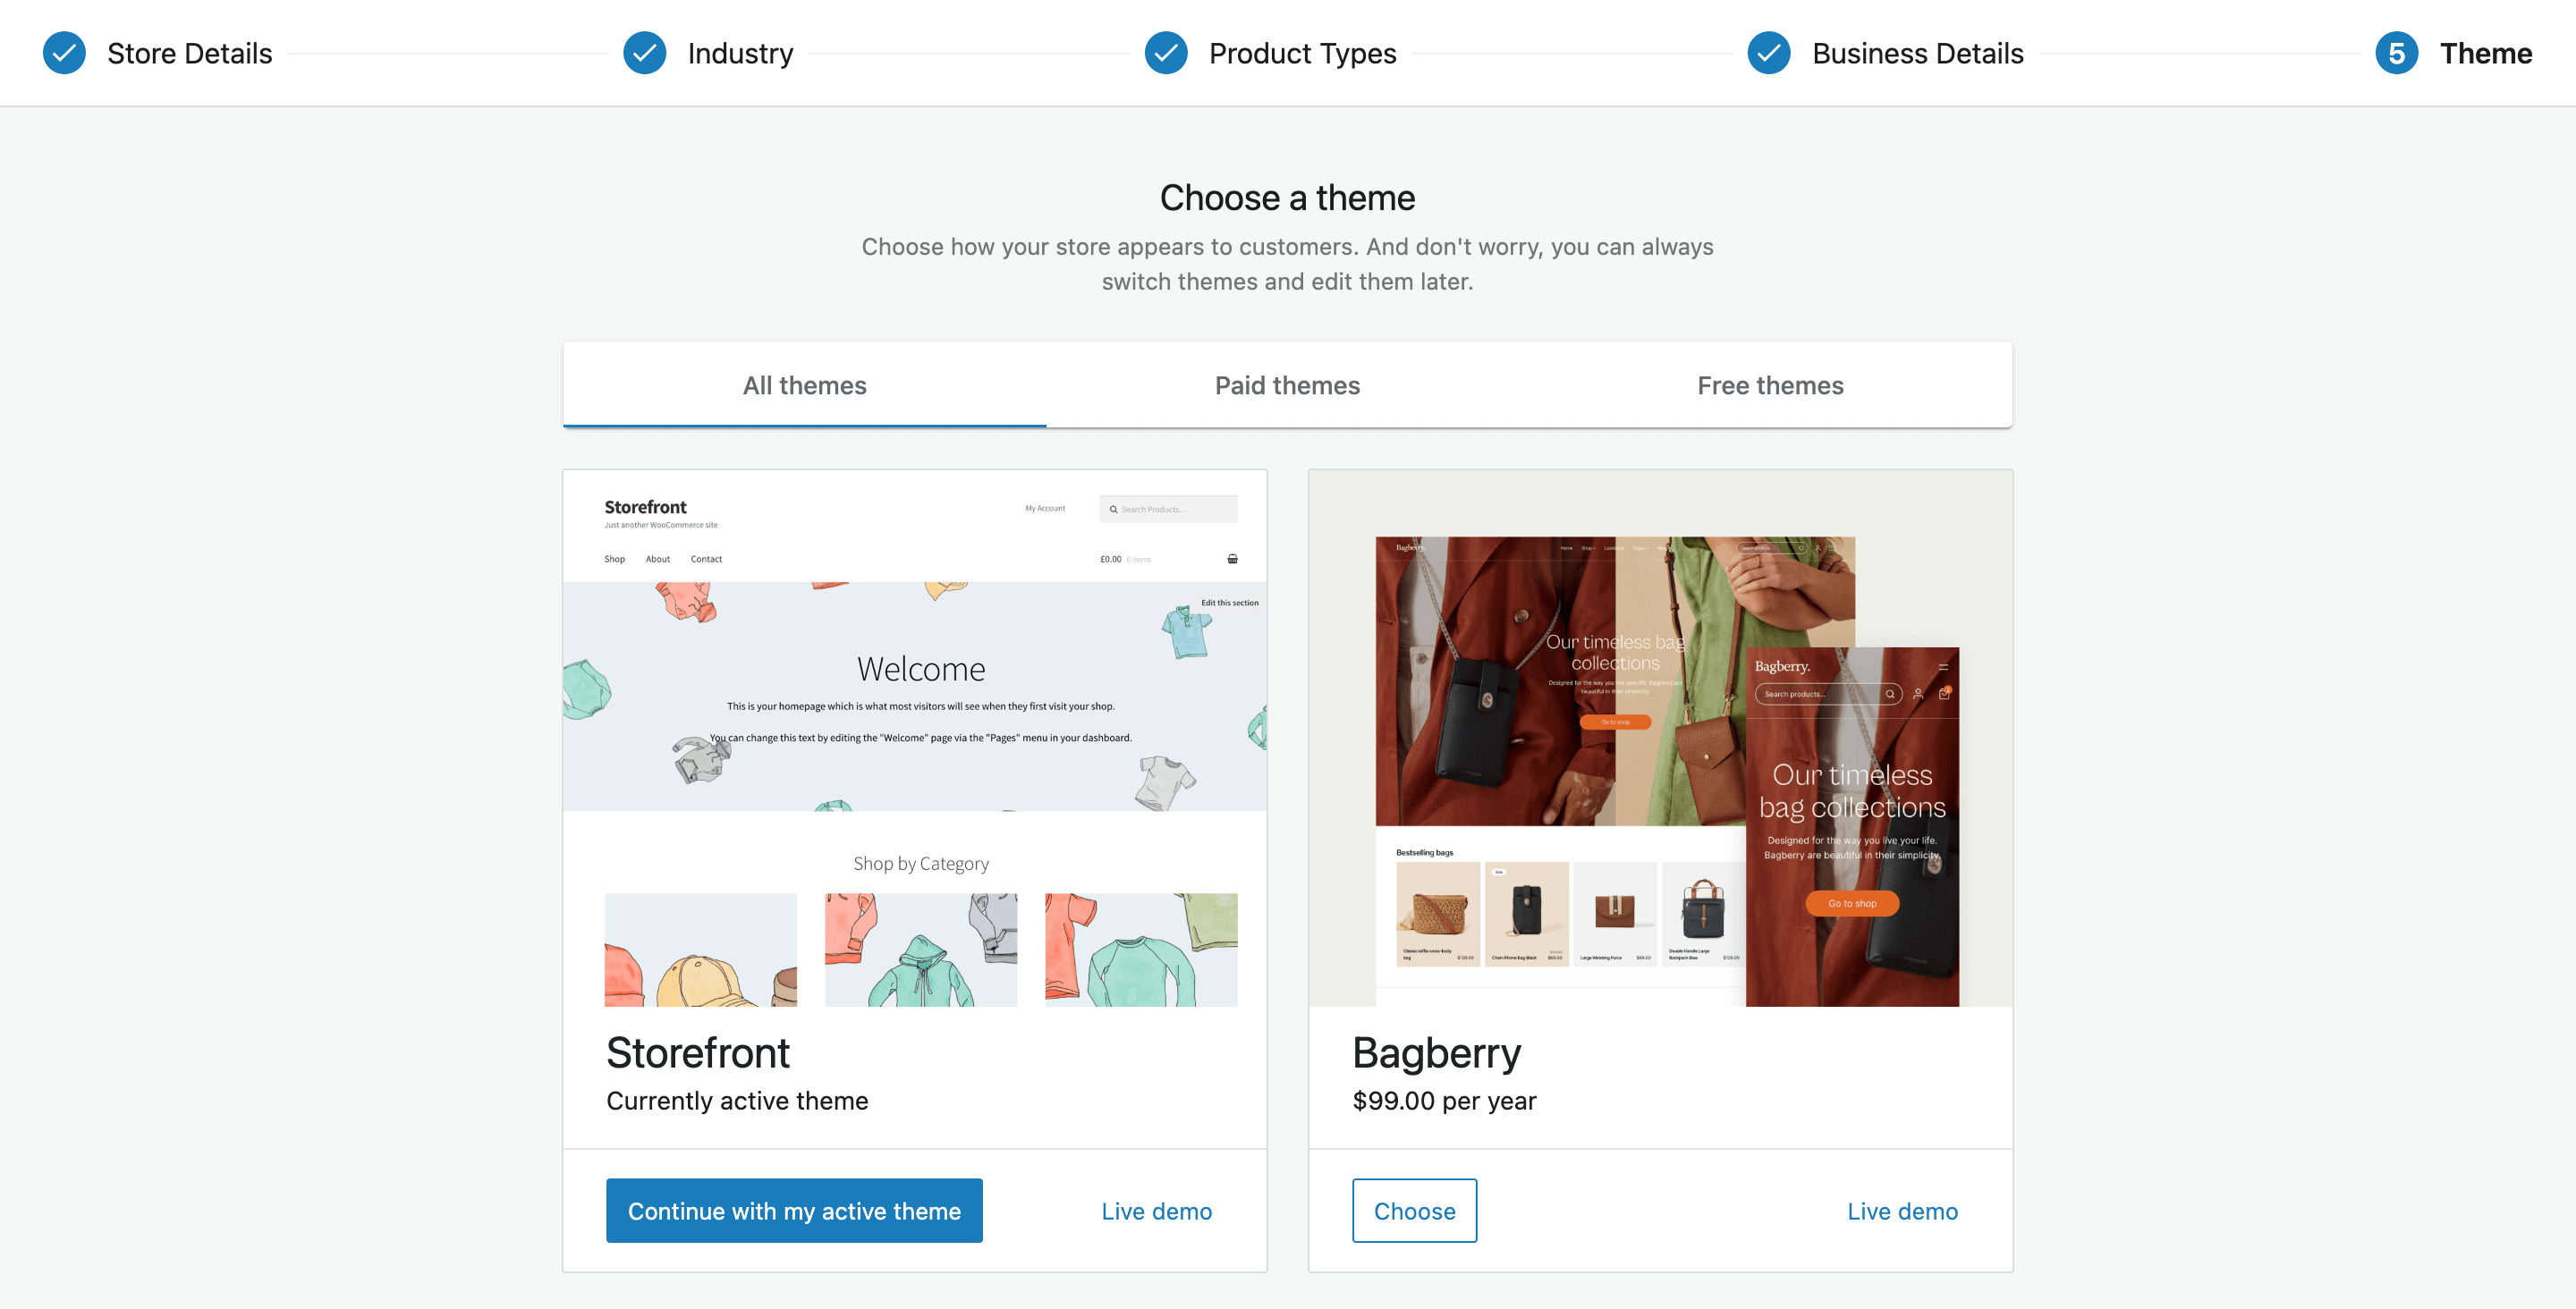
When you don’t know what theme to select proper now, that’s completely wonderful! You may at all times change your theme afterward. Click on the “Proceed with my lively theme” button in the event you’re undecided what to go together with.
3. Managing Your WooCommerce Retailer
Now that you simply’ve performed the arduous half and arrange the shop, it’s time so as to add merchandise, arrange a fee processor, and configure your transport and tax-related settings.
And don’t neglect, you might want to vary these settings as you handle your retailer. WooCommerce makes it simple to regulate settings as you go, so you’ll be able to at all times maintain your retailer up-to-date.
Including Merchandise
Now, head over to WooCommerce > Residence and click on the “Add Merchandise” button.
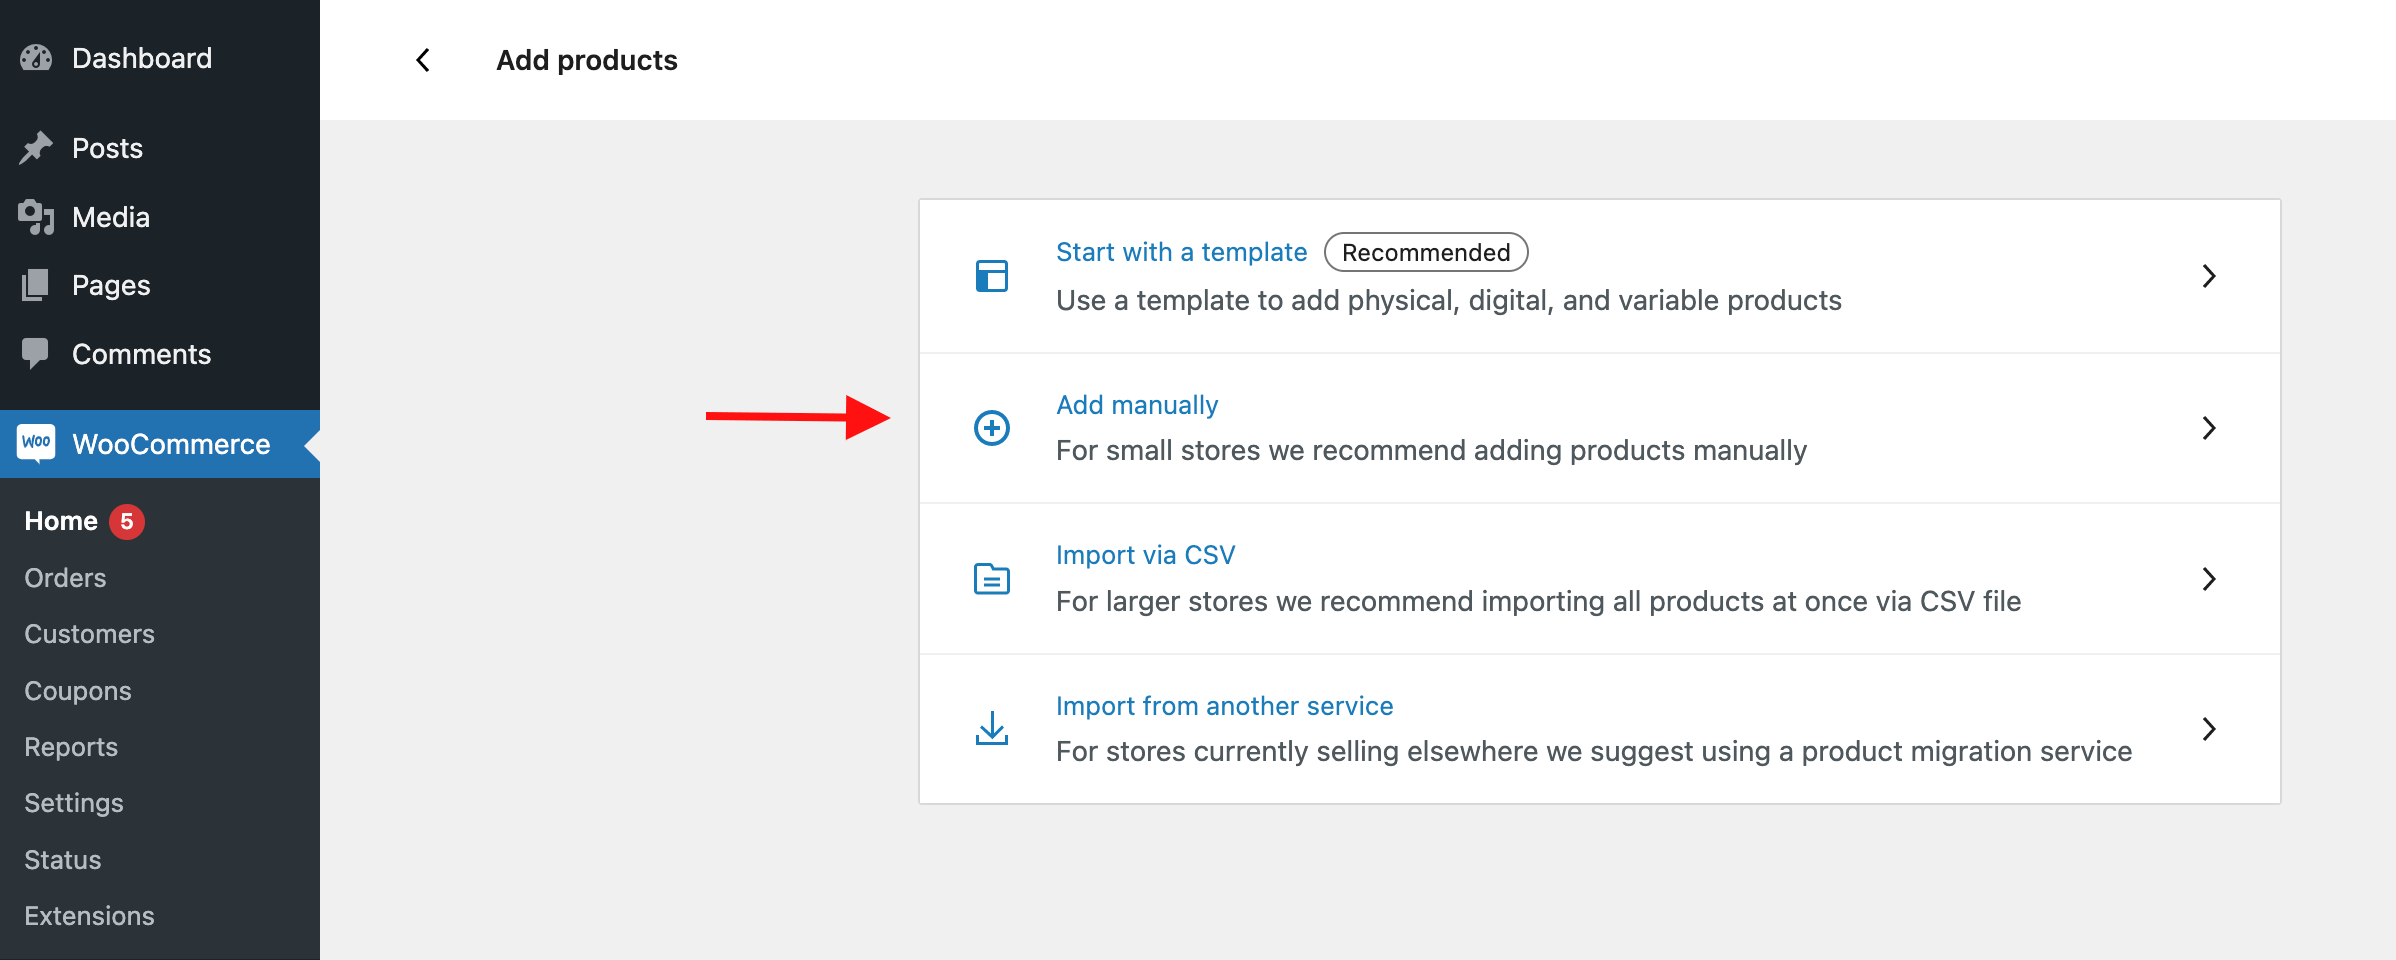
That gives you 4 choices. You may both begin with a template, add manually, import through CSV, or import from one other service.
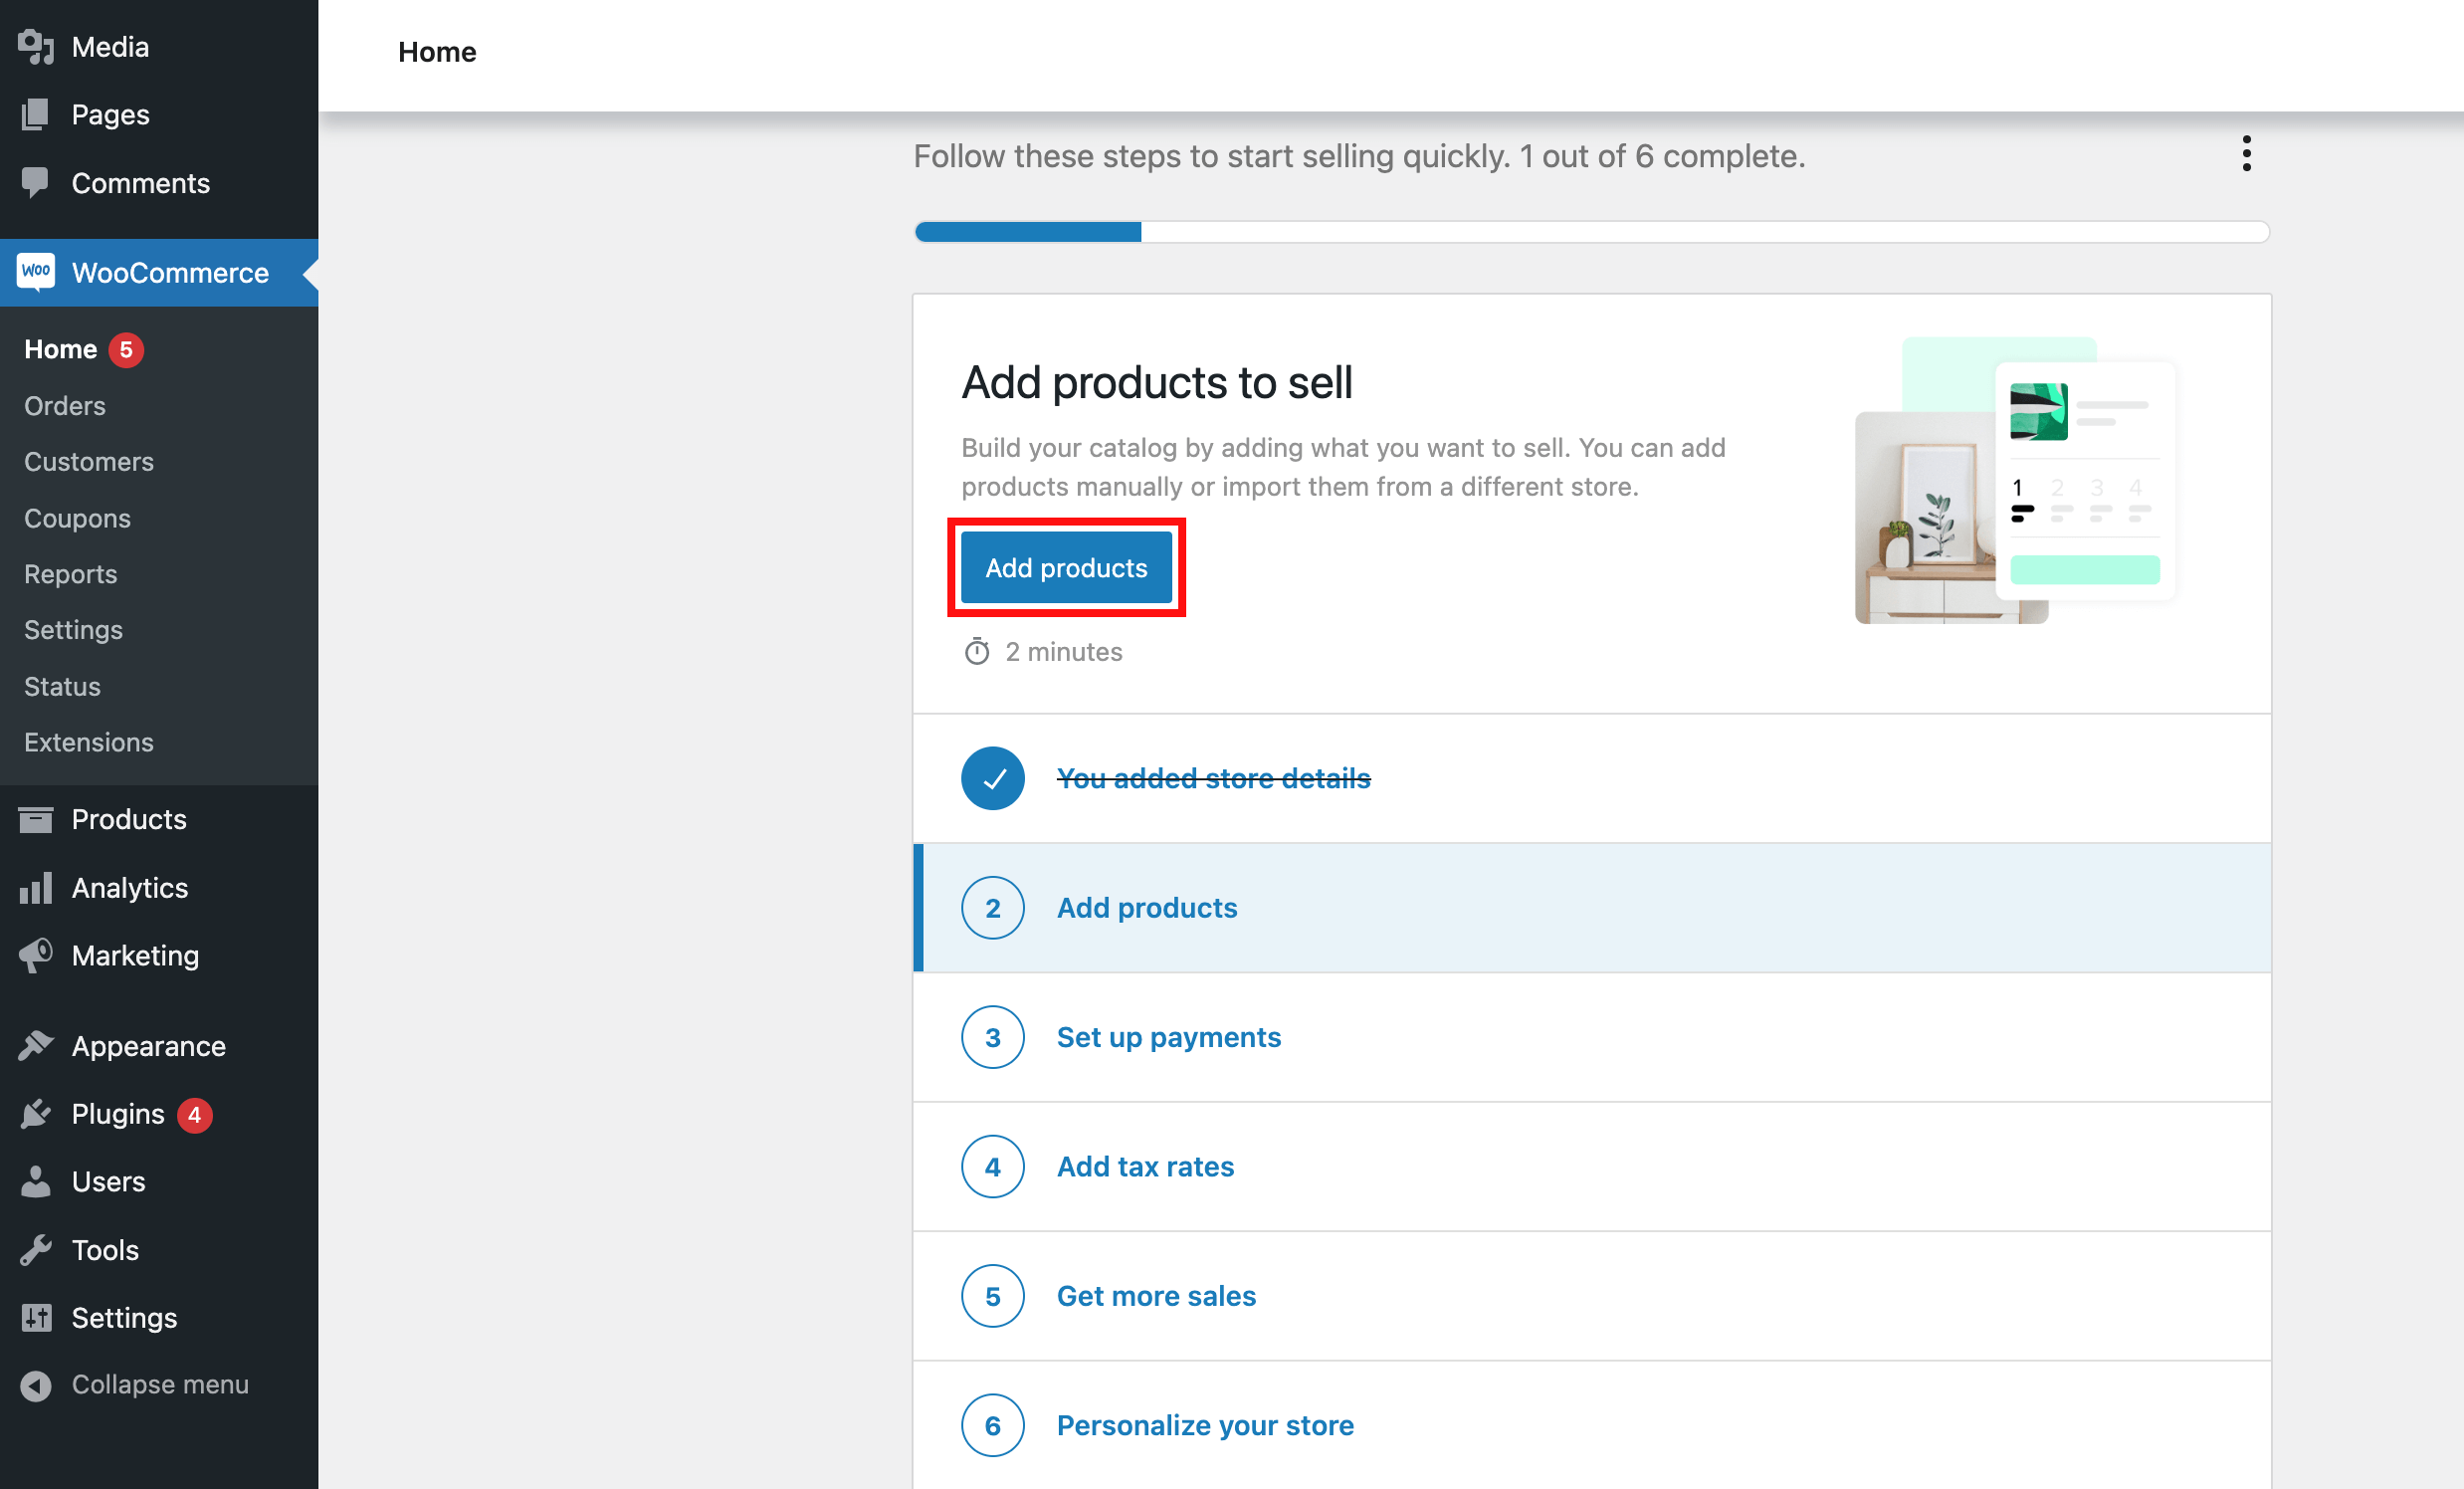
Relying on what’s finest for what you are promoting and desires, you’ll be able to select whichever possibility works finest for you. For instance, in the event you’re ranging from scratch, you might wish to select the “Add Manually” possibility.
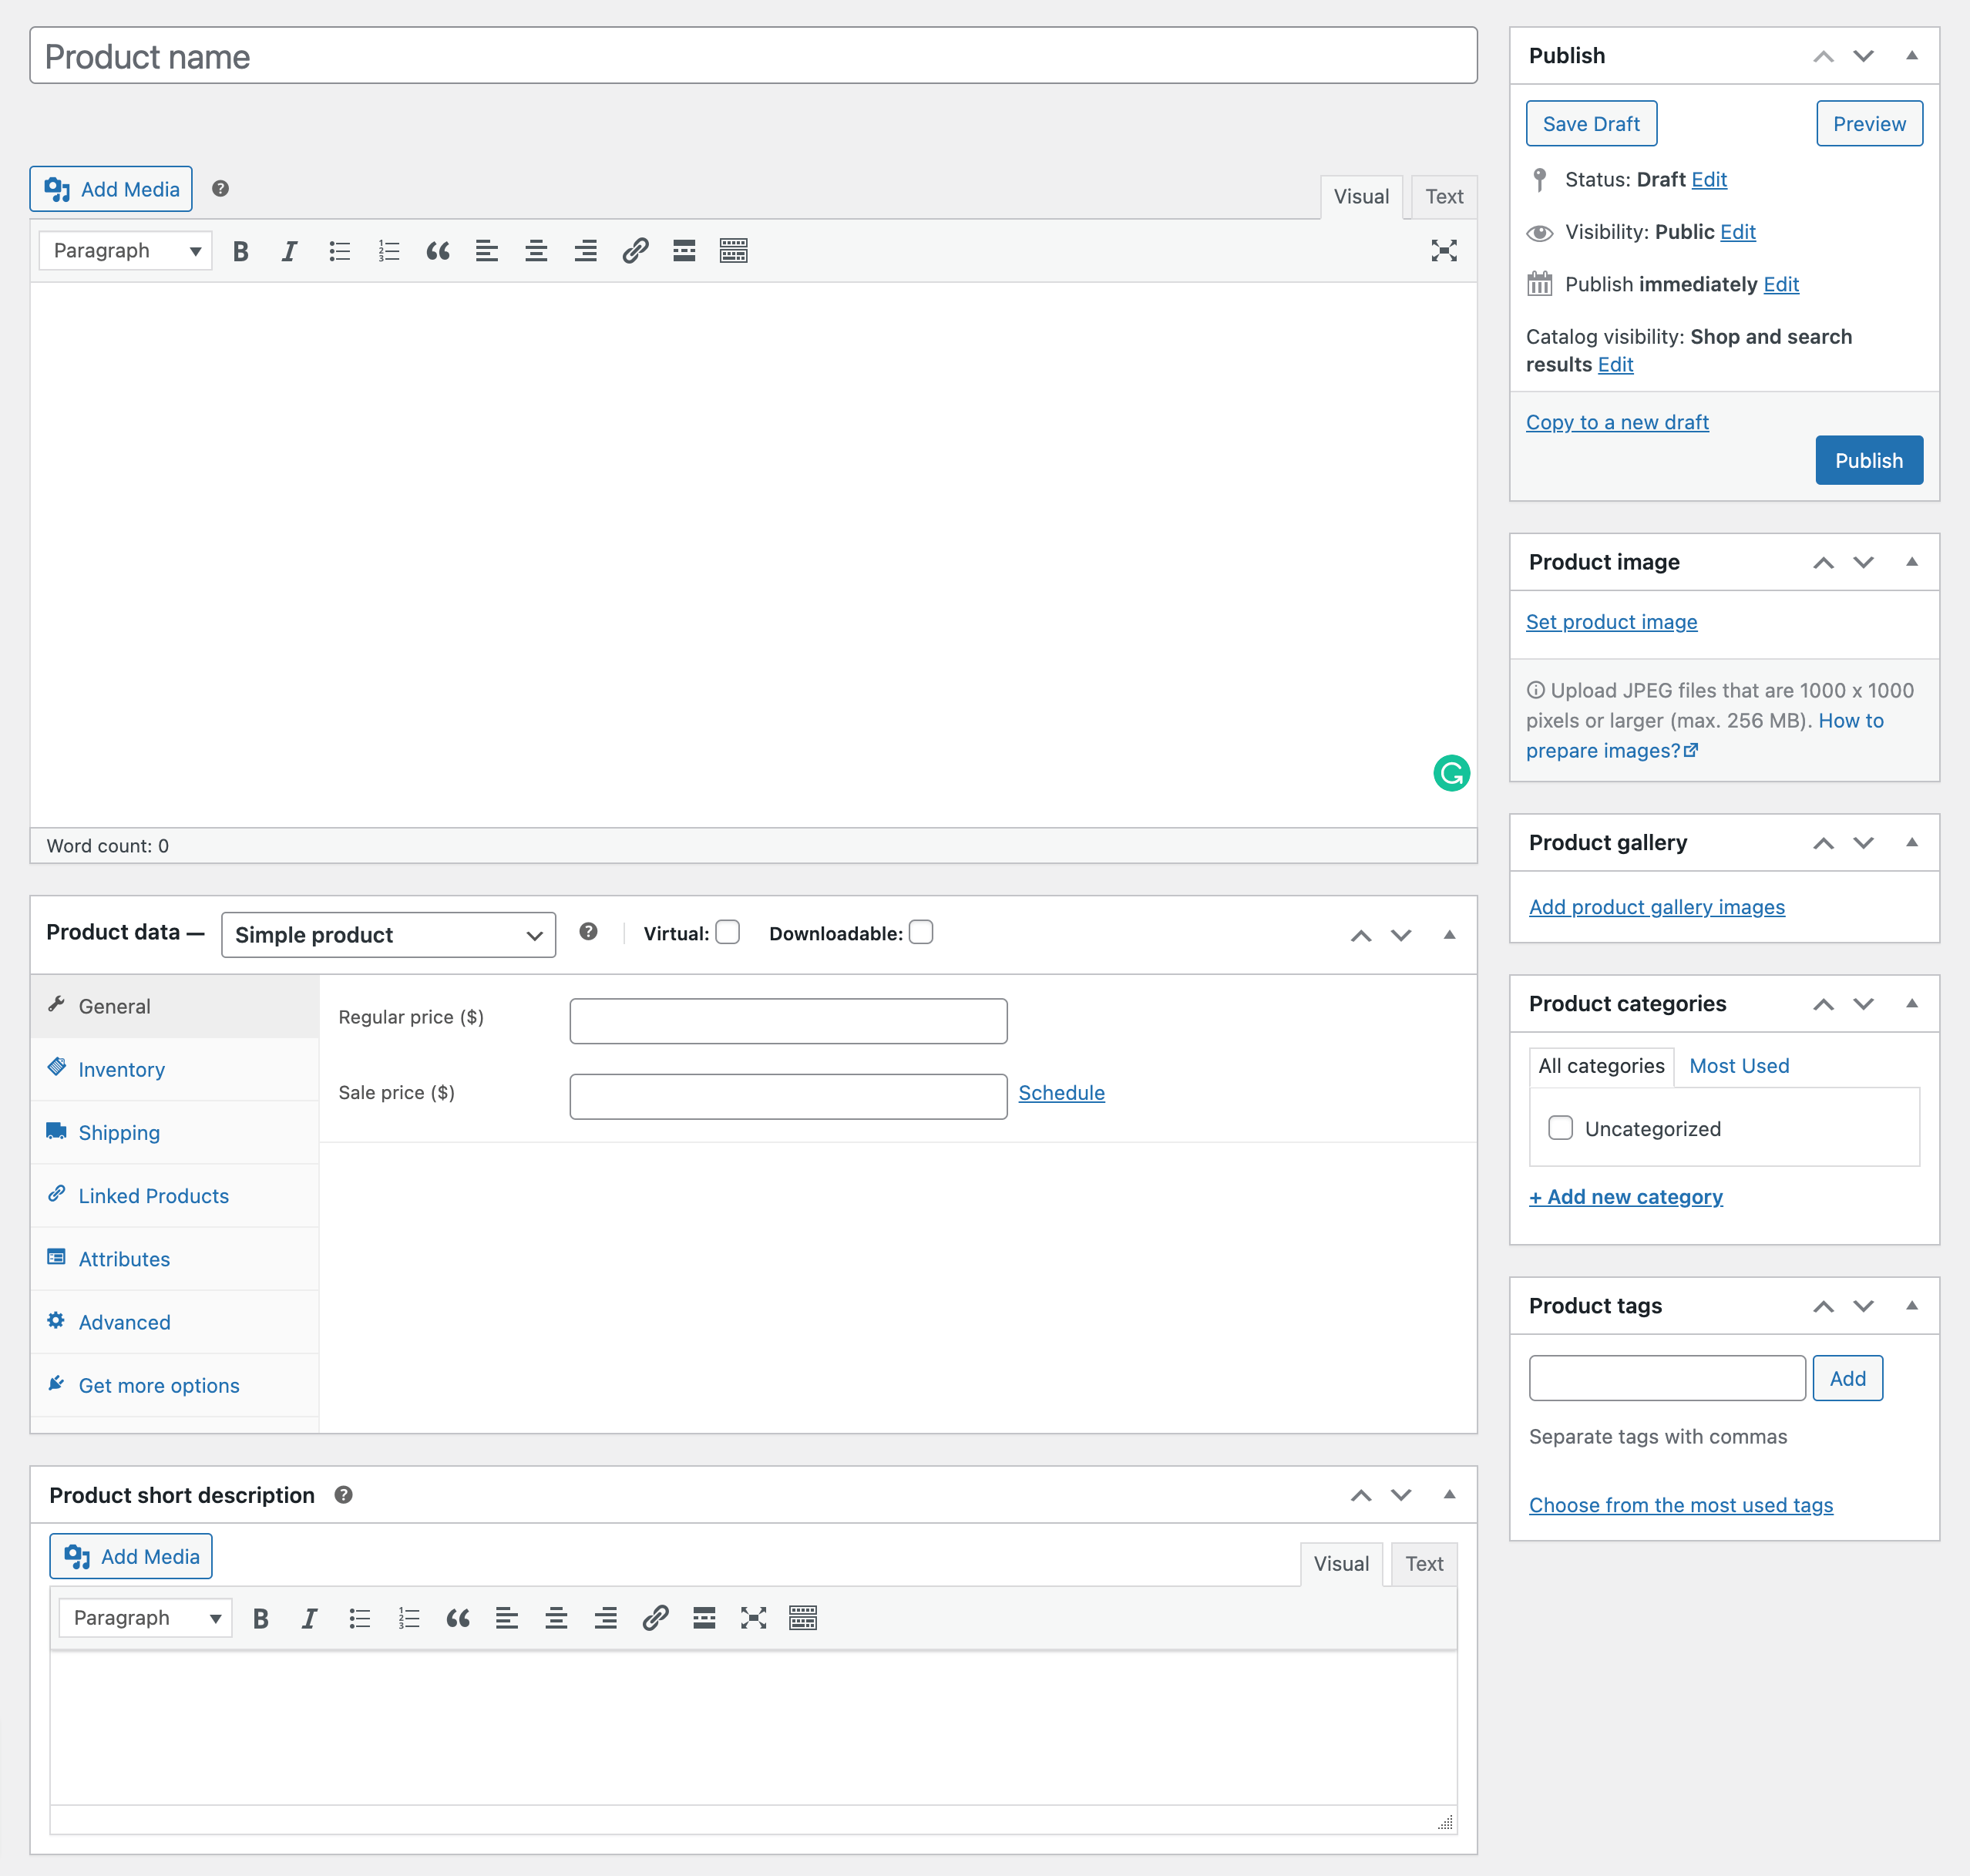
From there, you can begin itemizing your new product. Step one is to fill out the product data, together with the product title, value, photographs, tags, product knowledge, and outline.
Don’t fear in the event you’re feeling overwhelmed, as WooCommerce has an ideal information on the best way to add and handle merchandise. It’s very simple to comply with and perceive, so remember to learn it.
In terms of describing your product, you should utilize Copy.ai to ensure you’re creating the very best product descriptions. Copy.ai is an AI-driven copywriting platform that makes it simpler to create high-quality descriptions that interact readers.
Upon getting the product data arrange, the subsequent step is so as to add product photographs. That is necessary because it permits potential prospects to get a greater concept of what they are going to be shopping for.
You can too add further product photographs to point out off completely different angles or options, so be sure to put aside a while to ensure you get them proper.
For this, you should utilize Canva, an internet graphic design platform. With Canva, you’ll be able to simply create beautiful product photographs by eradicating picture backgrounds that may attract potential prospects.
When you’ve crammed out the product data and double-checked that every thing seems to be good, it’s time to click on “publish.”
Congratulations, your new product is now reside!
Integrating a Fee Supplier
Now that your first product is created and able to go, it’s time to get promoting!
However earlier than you are able to do that, you’ll want to discover a fee processor on your WooCommerce retailer.
A fee supplier/processor is a third-party service that lets you securely settle for funds out of your prospects. And in the event you’re utilizing WooCommerce, there are some nice fee processor choices so that you can select from.
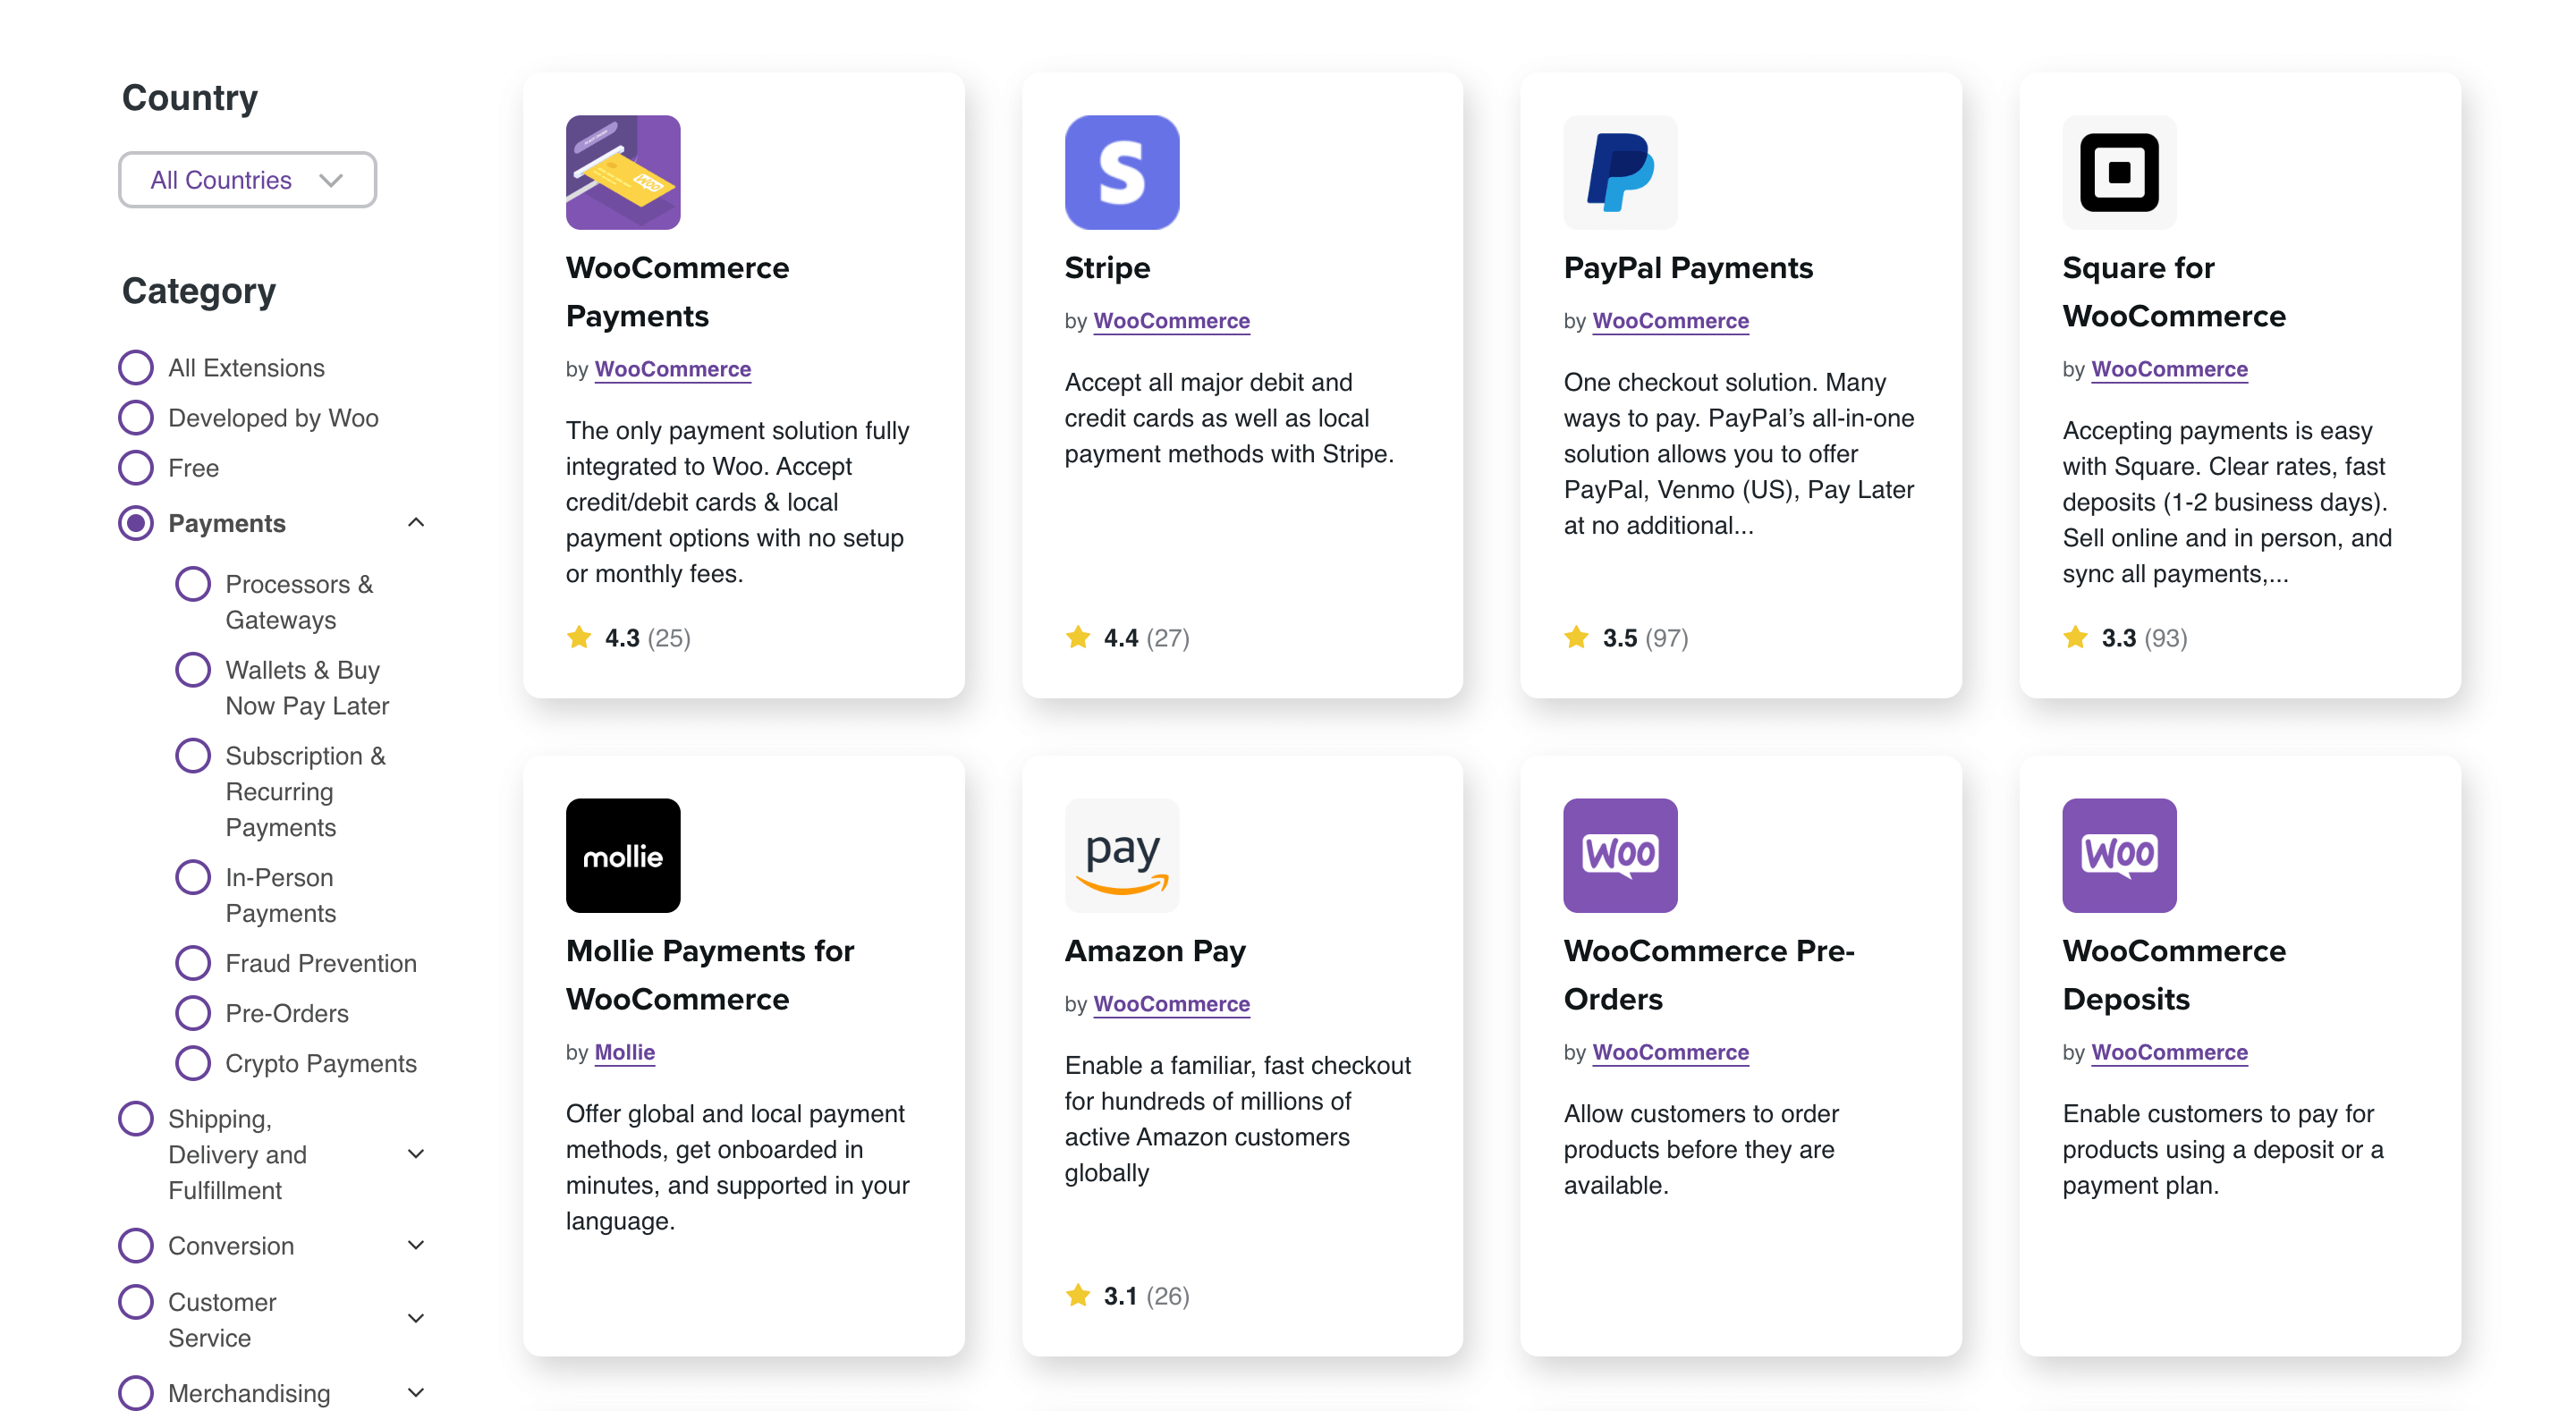
So, what are your choices? Effectively, the best option to get began is to easily click on the “View Choices” button in your WooCommerce dashboard.
It will take you to a web page the place you’ll be able to view an inventory of fee processors which are appropriate with WooCommerce.
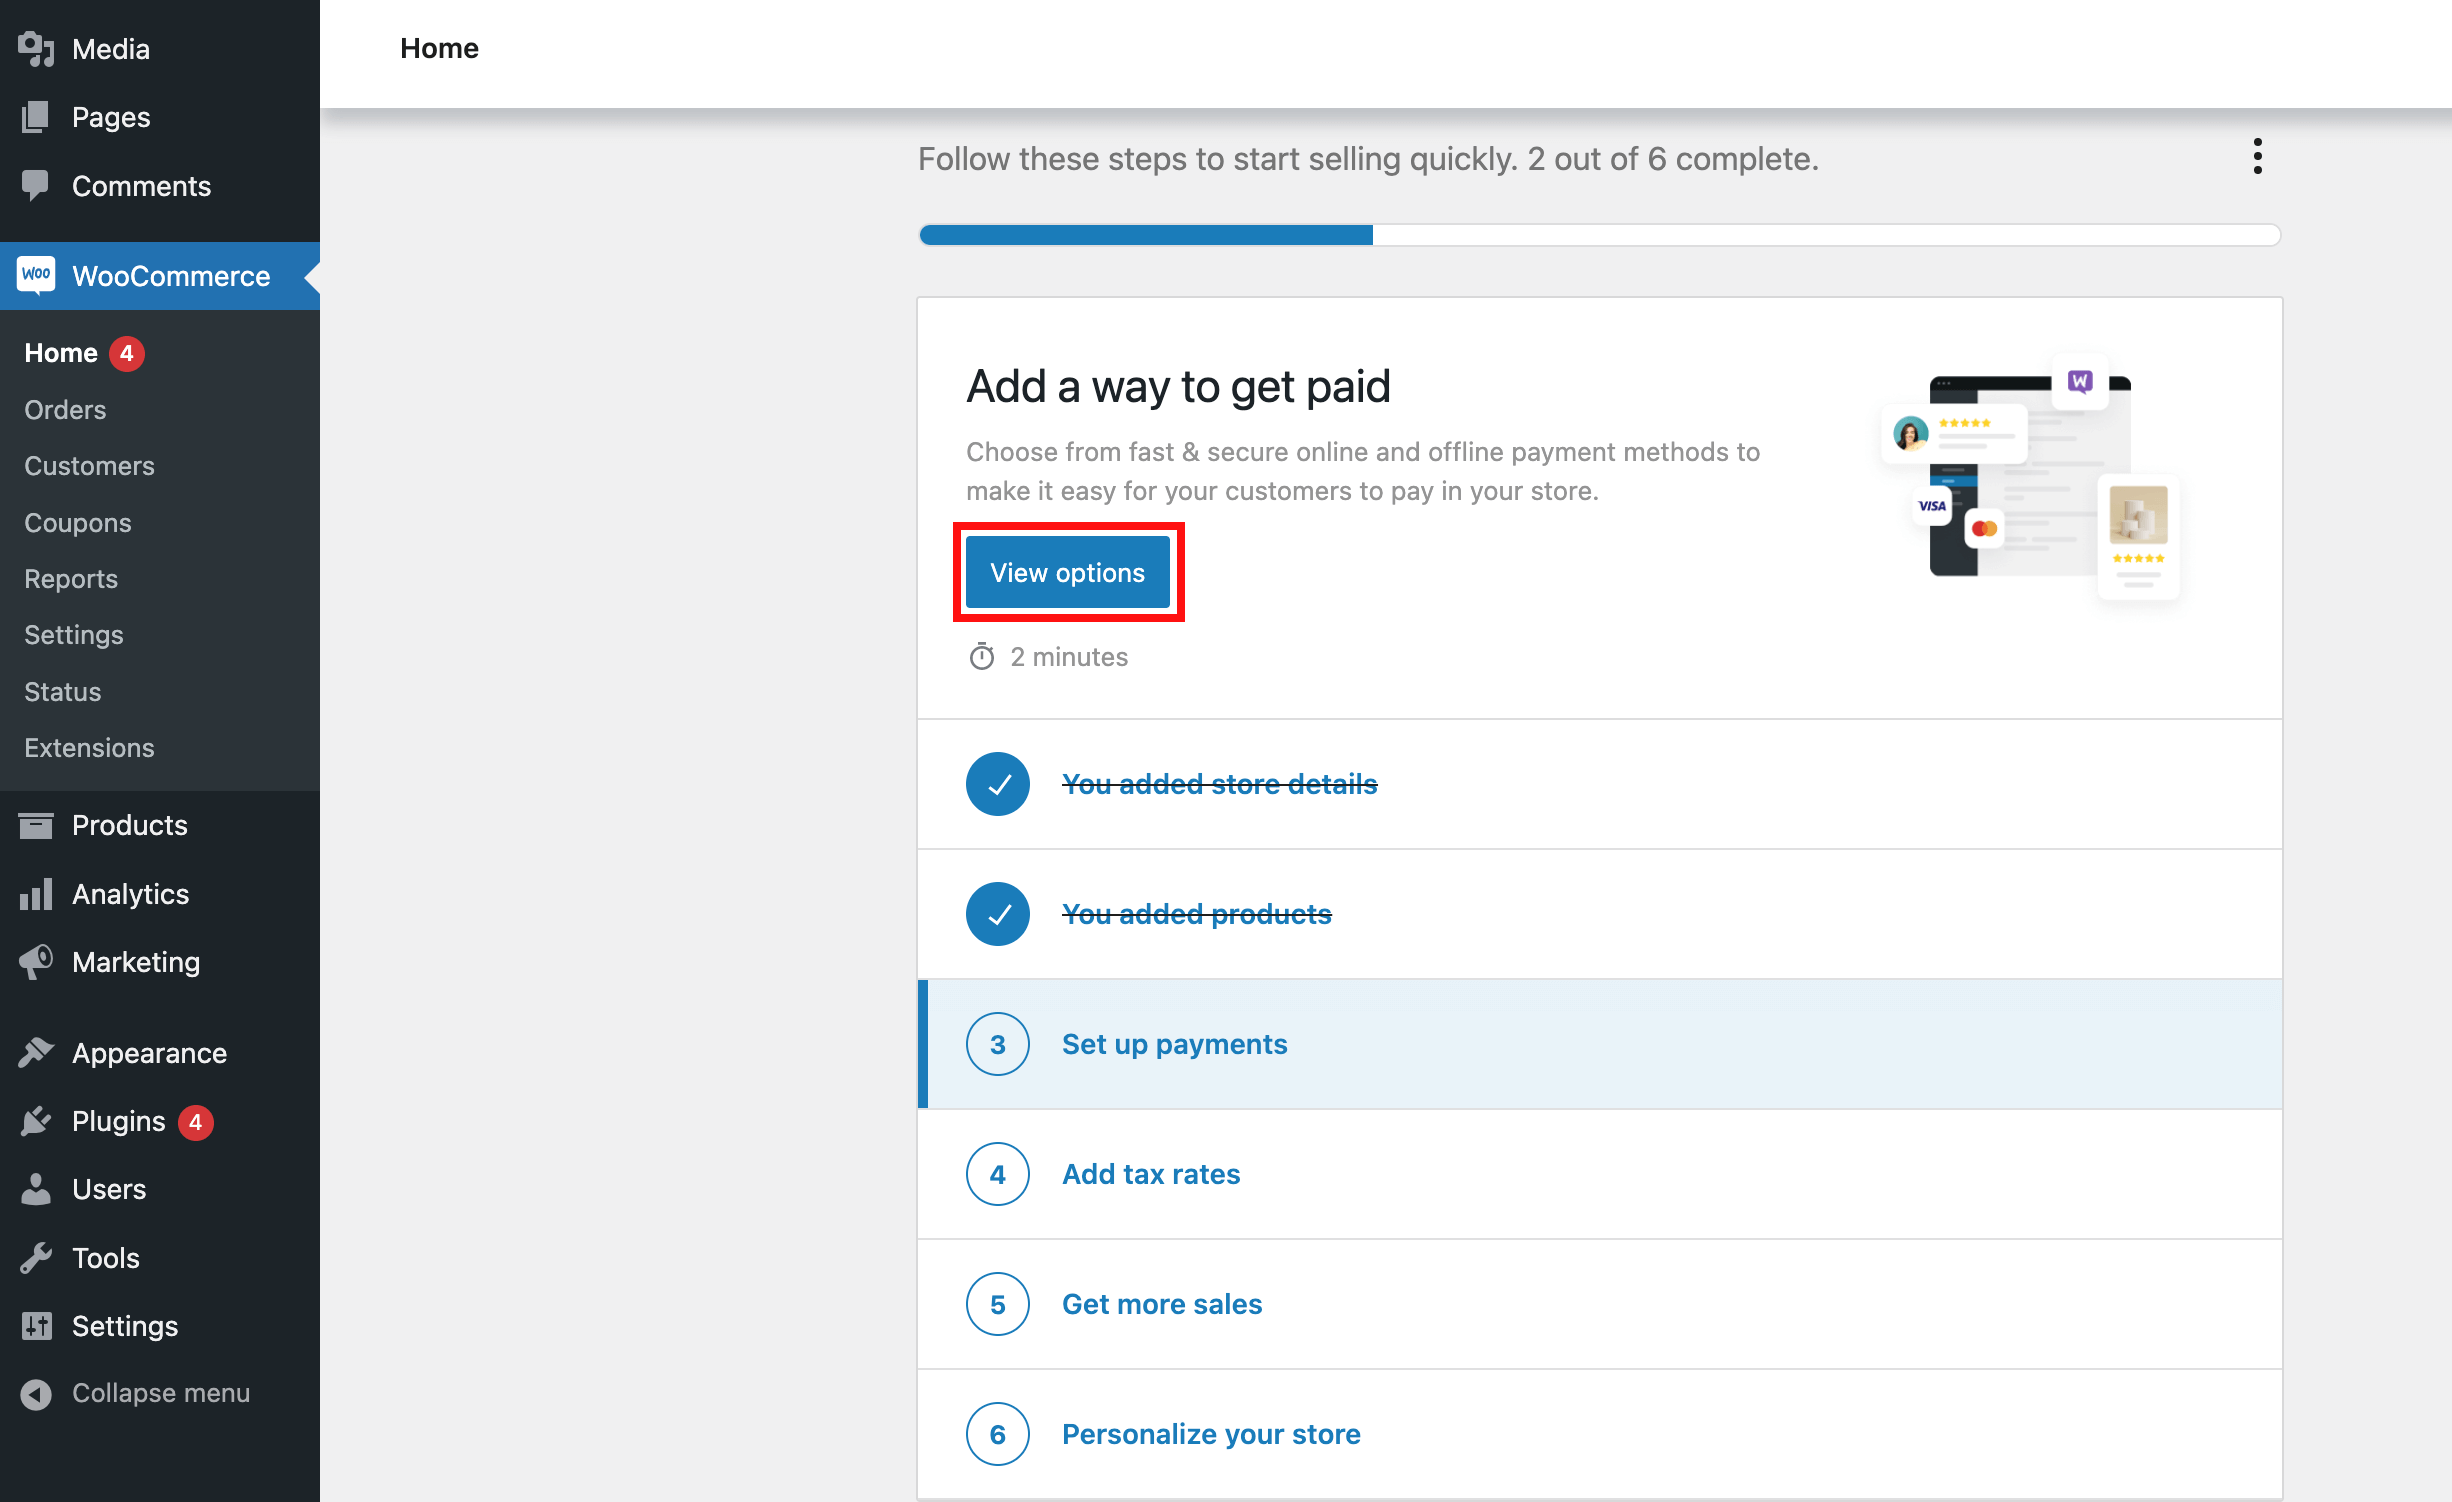
From right here, you’ll be able to learn extra about every processor and even examine them side-by-side that will help you resolve which one is true on your retailer.
The preferred choices are PayPal and Stripe, each of which provide safe, dependable, and easy-to-use fee processing companies.

Moreover, each are well-known and trusted fee processors and are accepted by most prospects.
Right here’s what you’ll want to know earlier than selecting a fee supplier.
Every one among these fee processors affords completely different options, so that you’ll need to perform a little research to find out which one is finest for you.
Now, it’s additionally necessary to keep in mind that completely different fee processors could have completely different charges and options, so it’s necessary to learn all the small print earlier than making a call.
When you’ve selected a fee processor, you’ll want to join an account.
This normally entails offering some private, enterprise, and monetary data, in addition to linking your checking account.
It’s necessary to verify your fee processor is safe and has fame, so remember to learn opinions.
And in the event you’re in search of an offline fee methodology, you’ll be able to supply prospects the choice to pay with money on supply.
When you’ve discovered the fee processor for you, the subsequent step is to combine it together with your WooCommerce retailer. Most fee processors present detailed directions for this course of, so simply comply with their directions and try to be good to go.
Organising Delivery and Tax Choices
It’s time to arrange your transport and tax choices in WooCommerce. When you’re promoting bodily items, organising shipping-related configurations is a vital a part of working what you are promoting.
Then again, in the event you’re promoting digital merchandise, you don’t want to fret about shipping-related settings.
To get began, go to WooCommerce > Settings > Delivery. Right here, you’ll discover a number of choices that you should utilize to configure the transport course of.
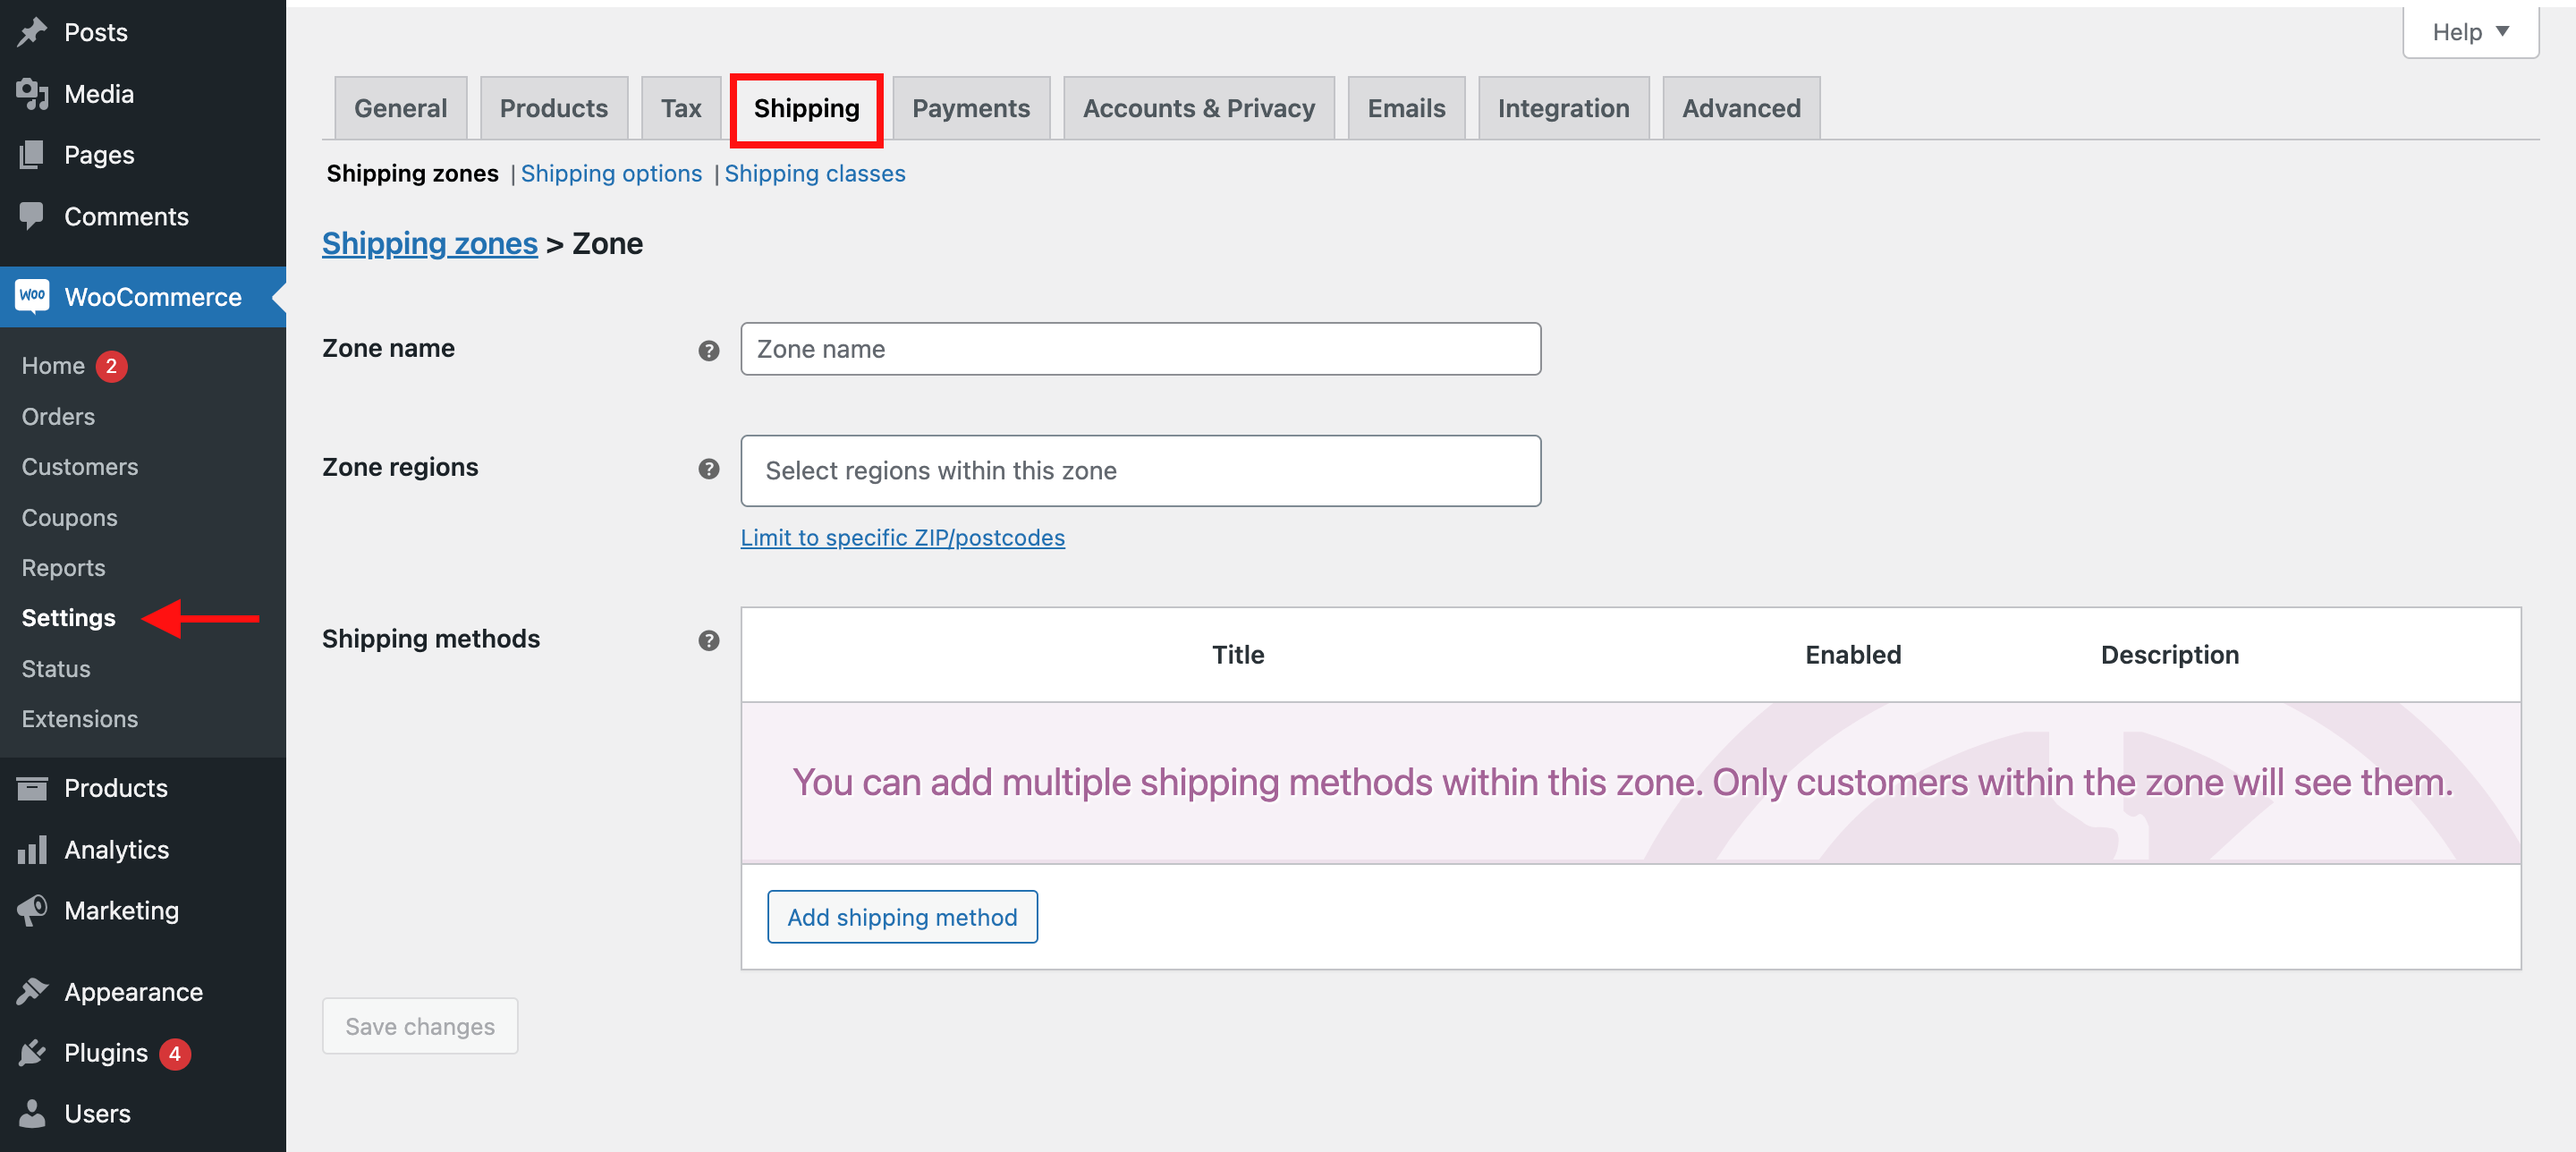
You may resolve on what sort of transport you wish to supply, reminiscent of a flat price or free transport. You can too arrange completely different transport zones, so you’ll be able to supply completely different costs to prospects in numerous areas.
When you’re nonetheless feeling a bit misplaced, you’ll be able to at all times try the WooCommerce transport documentation. It’s stuffed with useful data and ideas, so remember to give it a learn earlier than you begin organising your transport choices.
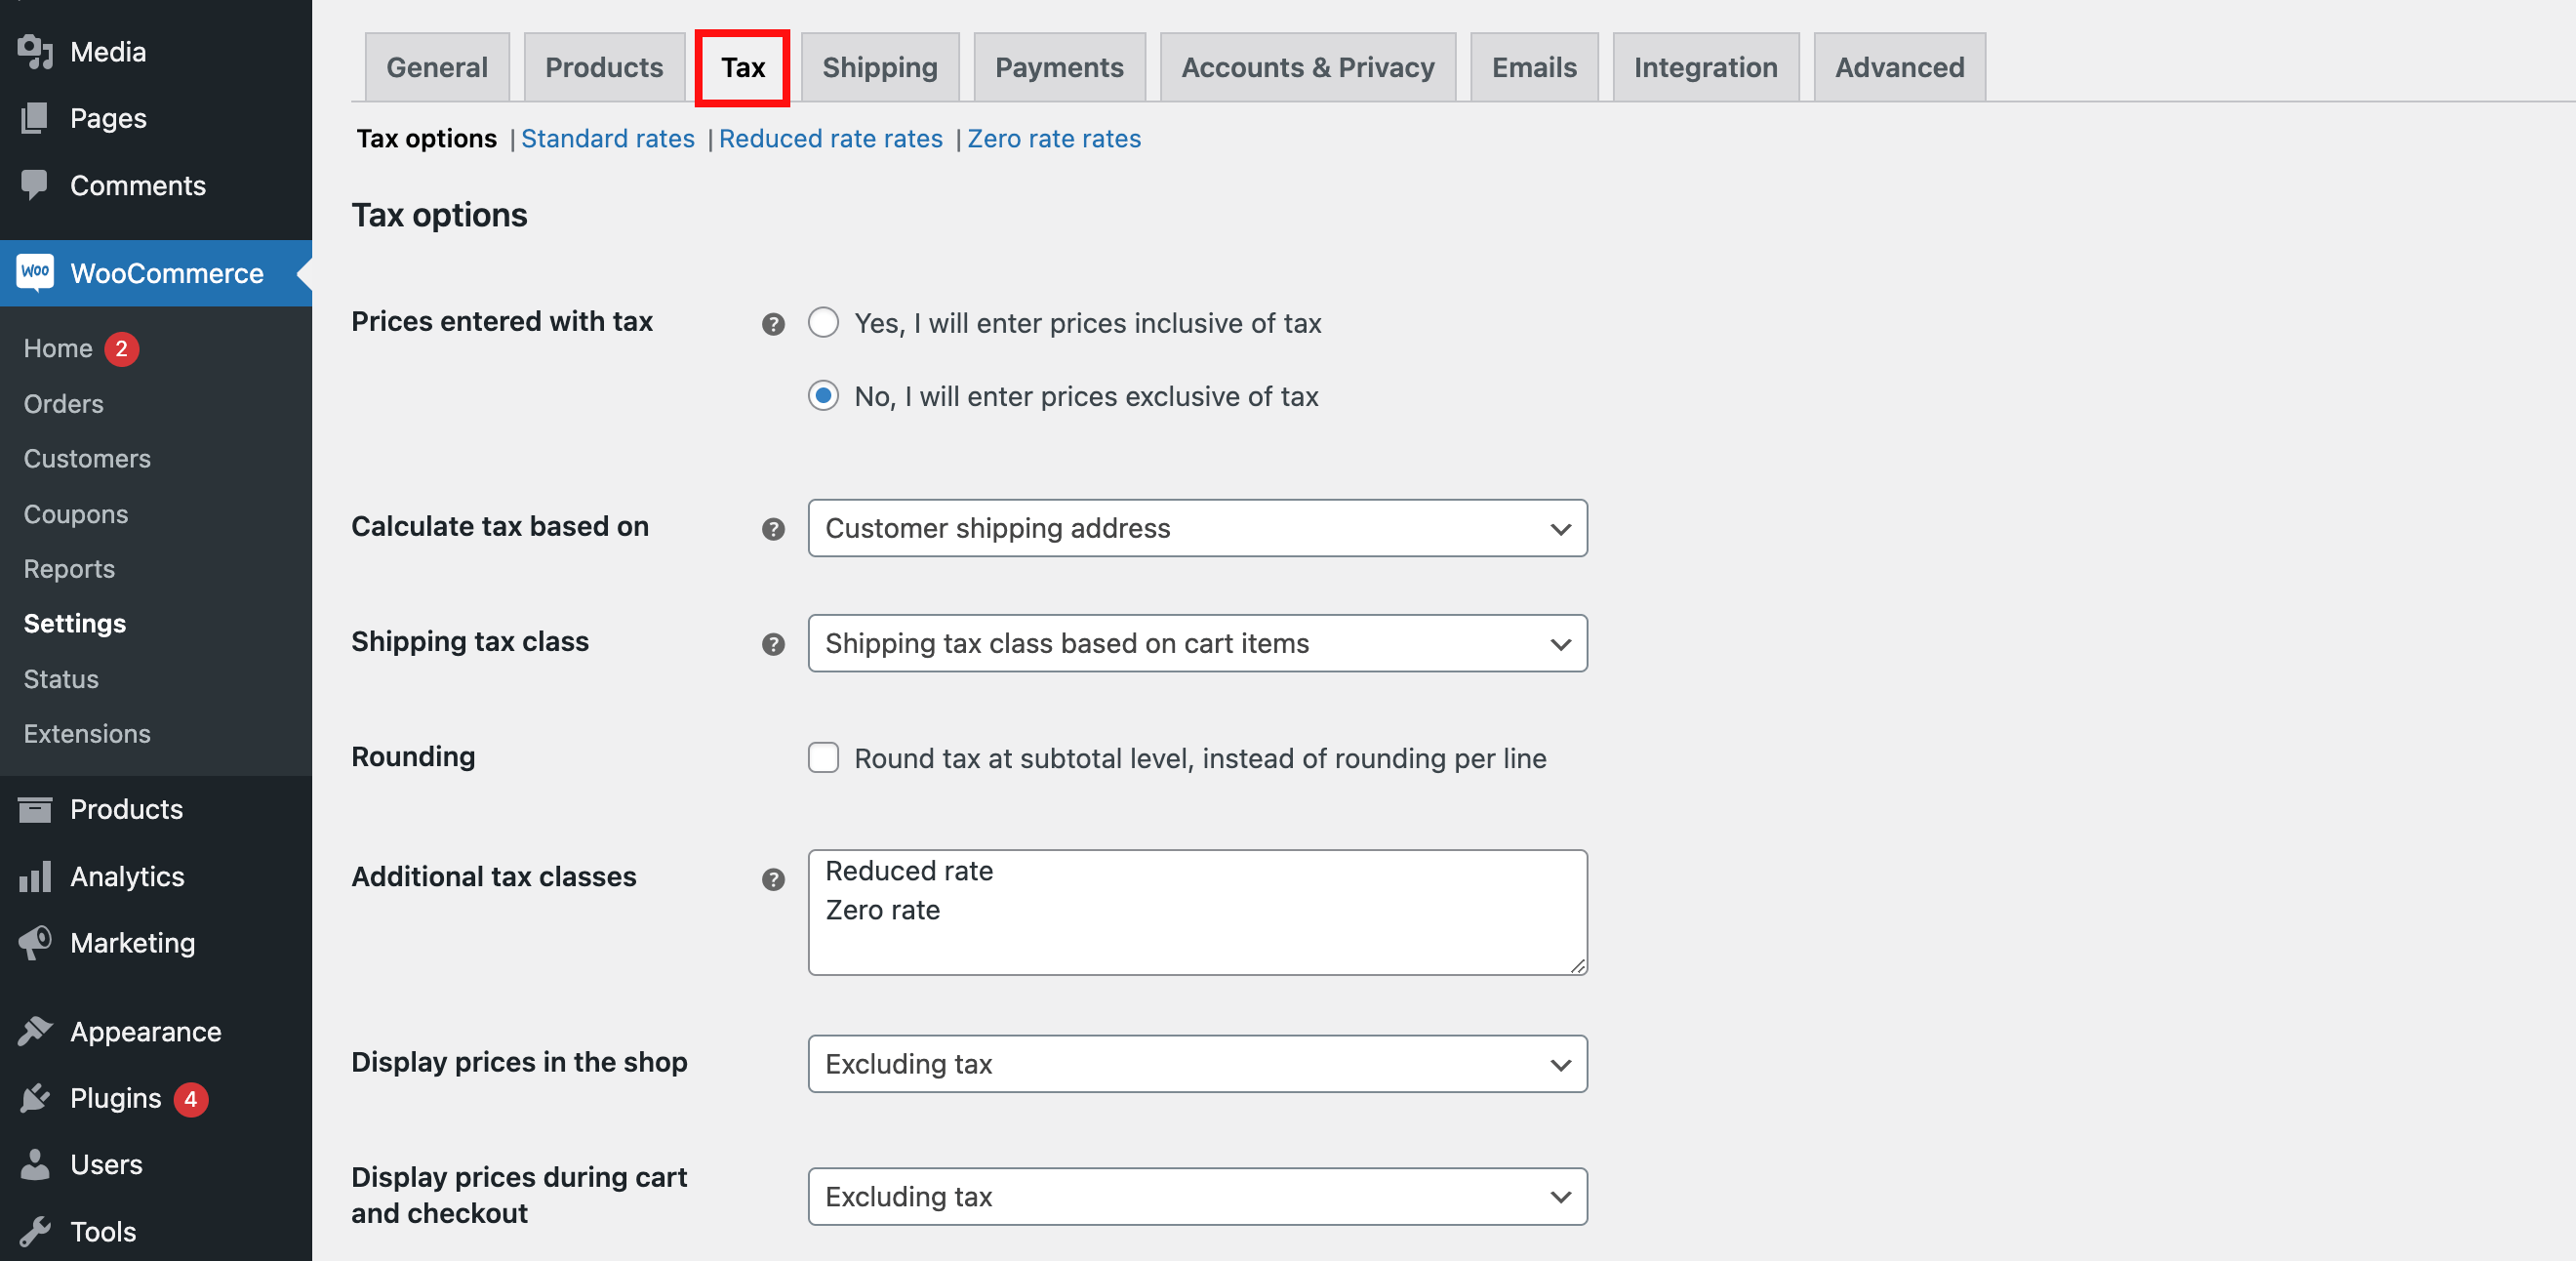
When you’ve configured all of the shipping-related choices, you’ll additionally have to arrange tax choices in WooCommerce. That is performed within the “Tax” tab.
In terms of organising taxes in your WooCommerce retailer, you’ve got a few choices. Whether or not you resolve to make use of a tax accomplice or take a extra hands-on method, you’ll be capable of guarantee what you are promoting is compliant with native rules.
Right here, you’ll be able to arrange the tax charges on your retailer, in addition to resolve whether or not taxes must be included within the value of the gadgets or added at checkout.
When you’re undecided the best way to get began, don’t fear. WooCommerce affords complete documentation on organising taxes on your retailer.
So, remember to learn by the documentation and get assist in the event you want it.
4. Customise Your WooCommerce Retailer
It’s lastly time to customise and launch your retailer!
After weeks (or perhaps even months) of planning, designing, and getting your merchandise prepared, you’re lastly able to make your large debut.
Your retailer goes to be a mirrored image of your ardour and arduous work, so it’s necessary to verify it seems to be, feels, and capabilities simply the best way you need it to.
Selecting a WooCommerce Theme
Step one is to decide on a WooCommerce theme on your retailer. There are a whole bunch of themes out there, so you must take the time to seek out one which most accurately fits your model.
One in all my favourite themes is Astra.
It’s a multipurpose theme, with a variety of customization choices.
In terms of putting in a theme, the method is pretty easy.
All you’ll want to do is head to the WordPress dashboard and choose the Themes tab. From there, you’ll be capable of flick through a big selection of free and premium themes. When you’ve put in the one you want simply click on “Activate” and also you’re all set.
And in the event you’re in search of much more choices, you’ll be able to at all times try marketplaces like ThemeForest.
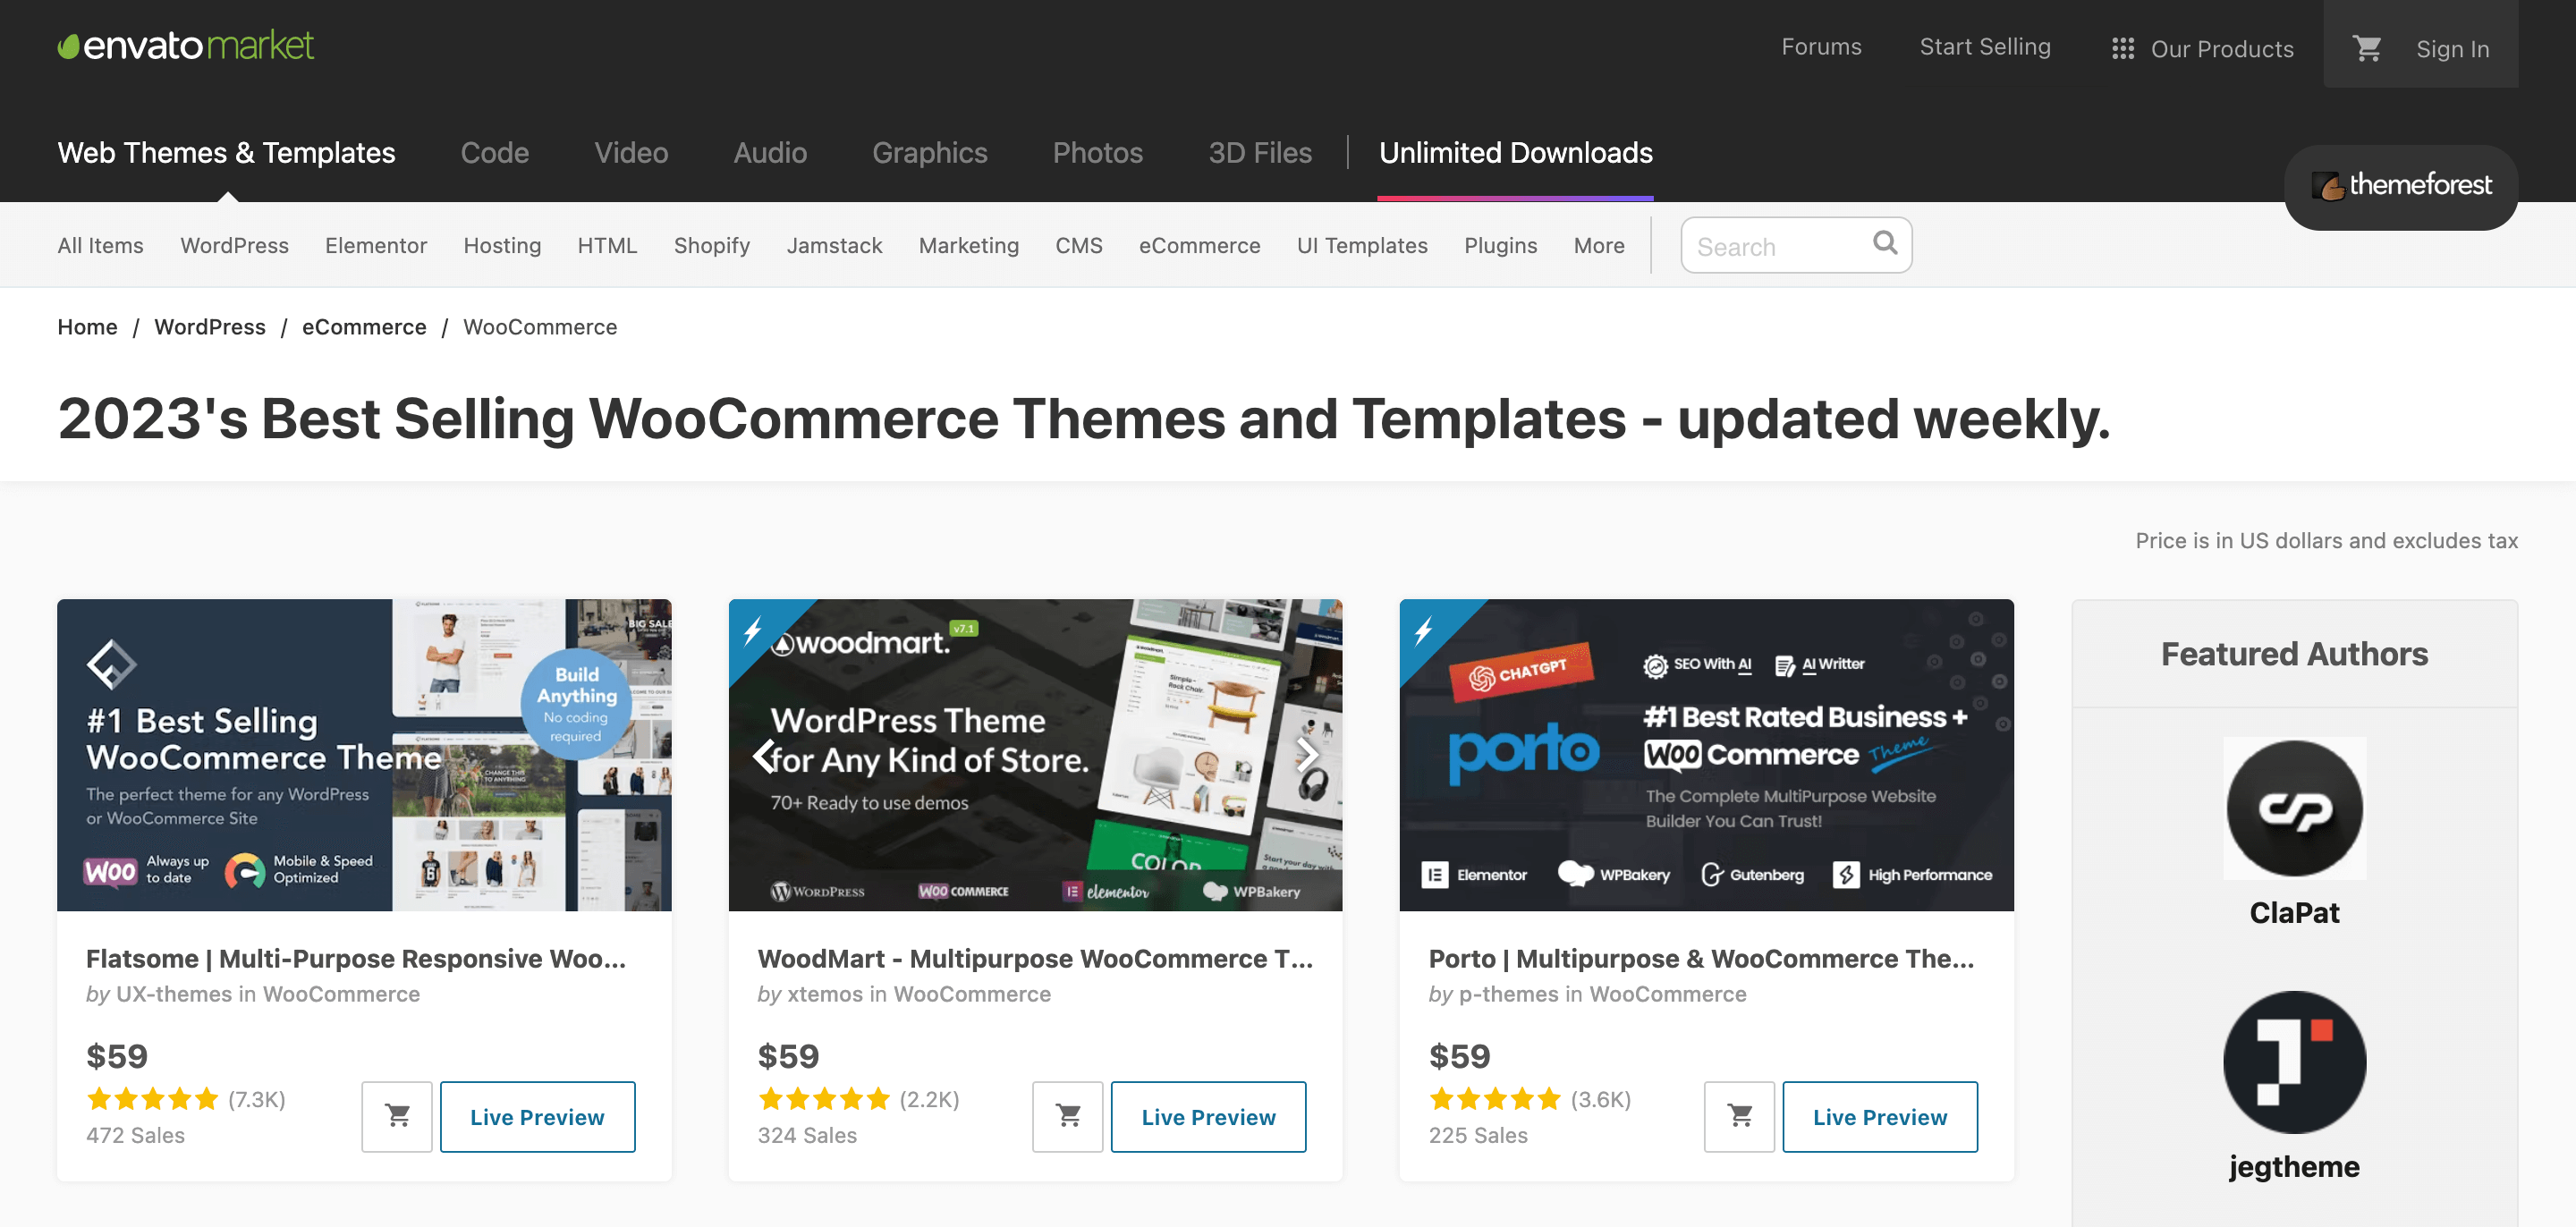
On ThemeForest, you’ll be able to flick through a whole bunch of WooCommerce themes to seek out the proper one on your retailer.
When you’ve put in and activated a theme, you’ll be able to customise it. To do that, navigate to Look > Customise out of your WordPress dashboard. Right here, you’ll be able to customise the colours, fonts, and different components of your retailer’s design.
It could take some effort and time to get every thing trying good, so in the event you don’t really feel like getting your palms soiled, you’ll be able to at all times search for a contract designer from in style freelance marketplaces like Fiverr.com.
And don’t neglect so as to add the ending touches reminiscent of including a weblog, organising an about me, contact web page, and creating authorized pages together with a privateness coverage.
Including WooCommerce Plugins
The best plugins could make your retailer run smoother, optimize velocity, scale back buyer frustration, and make your retailer extra profitable.
So, what are among the finest plugins for a WooCommerce retailer?
Listed here are 5 of our favorites:
- MonsterInsights – This plugin makes it simple to trace the efficiency of your retailer utilizing Google Analytics. You may monitor your retailer’s incoming visitors, prime merchandise, and extra, all from the consolation of your dashboard.
- WP Rocket – This plugin helps to verify your retailer is blazing quick. It may scale back loading instances, optimize photographs, and assist your retailer run easily.
- RankMath search engine optimisation – This plugin helps you be sure your retailer is search engine optimized. It may show you how to create the precise titles, descriptions, and tags on your merchandise, so that they present up in the precise search outcomes.
- Elementor – This highly effective plugin lets you create customized pages on your retailer. You may design customized product pages, touchdown pages, and extra, all with none coding or design expertise.
- WooCommerce PDF Invoices & Packing Slips – That is an e-mail advertising and marketing plugin for Woocommerce shops. It’s a simple option to arrange automated emails (like deserted cart emails) to your prospects, serving to you keep in contact, construct relationships, and enhance gross sales.
These are only a few of the good plugins out there for WooCommerce shops. For extra plugins, you’ll be able to browse the WordPress plugin listing or marketplaces like Codecanyon. You can too try our checklist of the very best WooCommerce plugins for extra concepts.
Putting in a plugin is simply so simple as putting in a theme. Once more, head to the WordPress dashboard and choose the Plugins tab.
When you’ve put in the one you want, simply click on “Activate” and also you’re good to go.
It doesn’t matter what plugins you select, an important factor is that you simply discover ones that assist make your retailer run extra effectively and show you how to meet your targets. So, select correctly.
5. Launch Your WooCommerce Retailer
When you’re able to launch your WooCommerce retailer, it’s time to make the leap!
Earlier than you do, you’ll want to attach your area title to the Cloudways server.
That is performed by updating the A report within the DNS settings of your area title. As soon as the A report is up to date, you’ll be able to entry your WooCommerce retailer at your area title.
To do that, you’ll need to log in to each your Cloudways and Namecheap accounts.
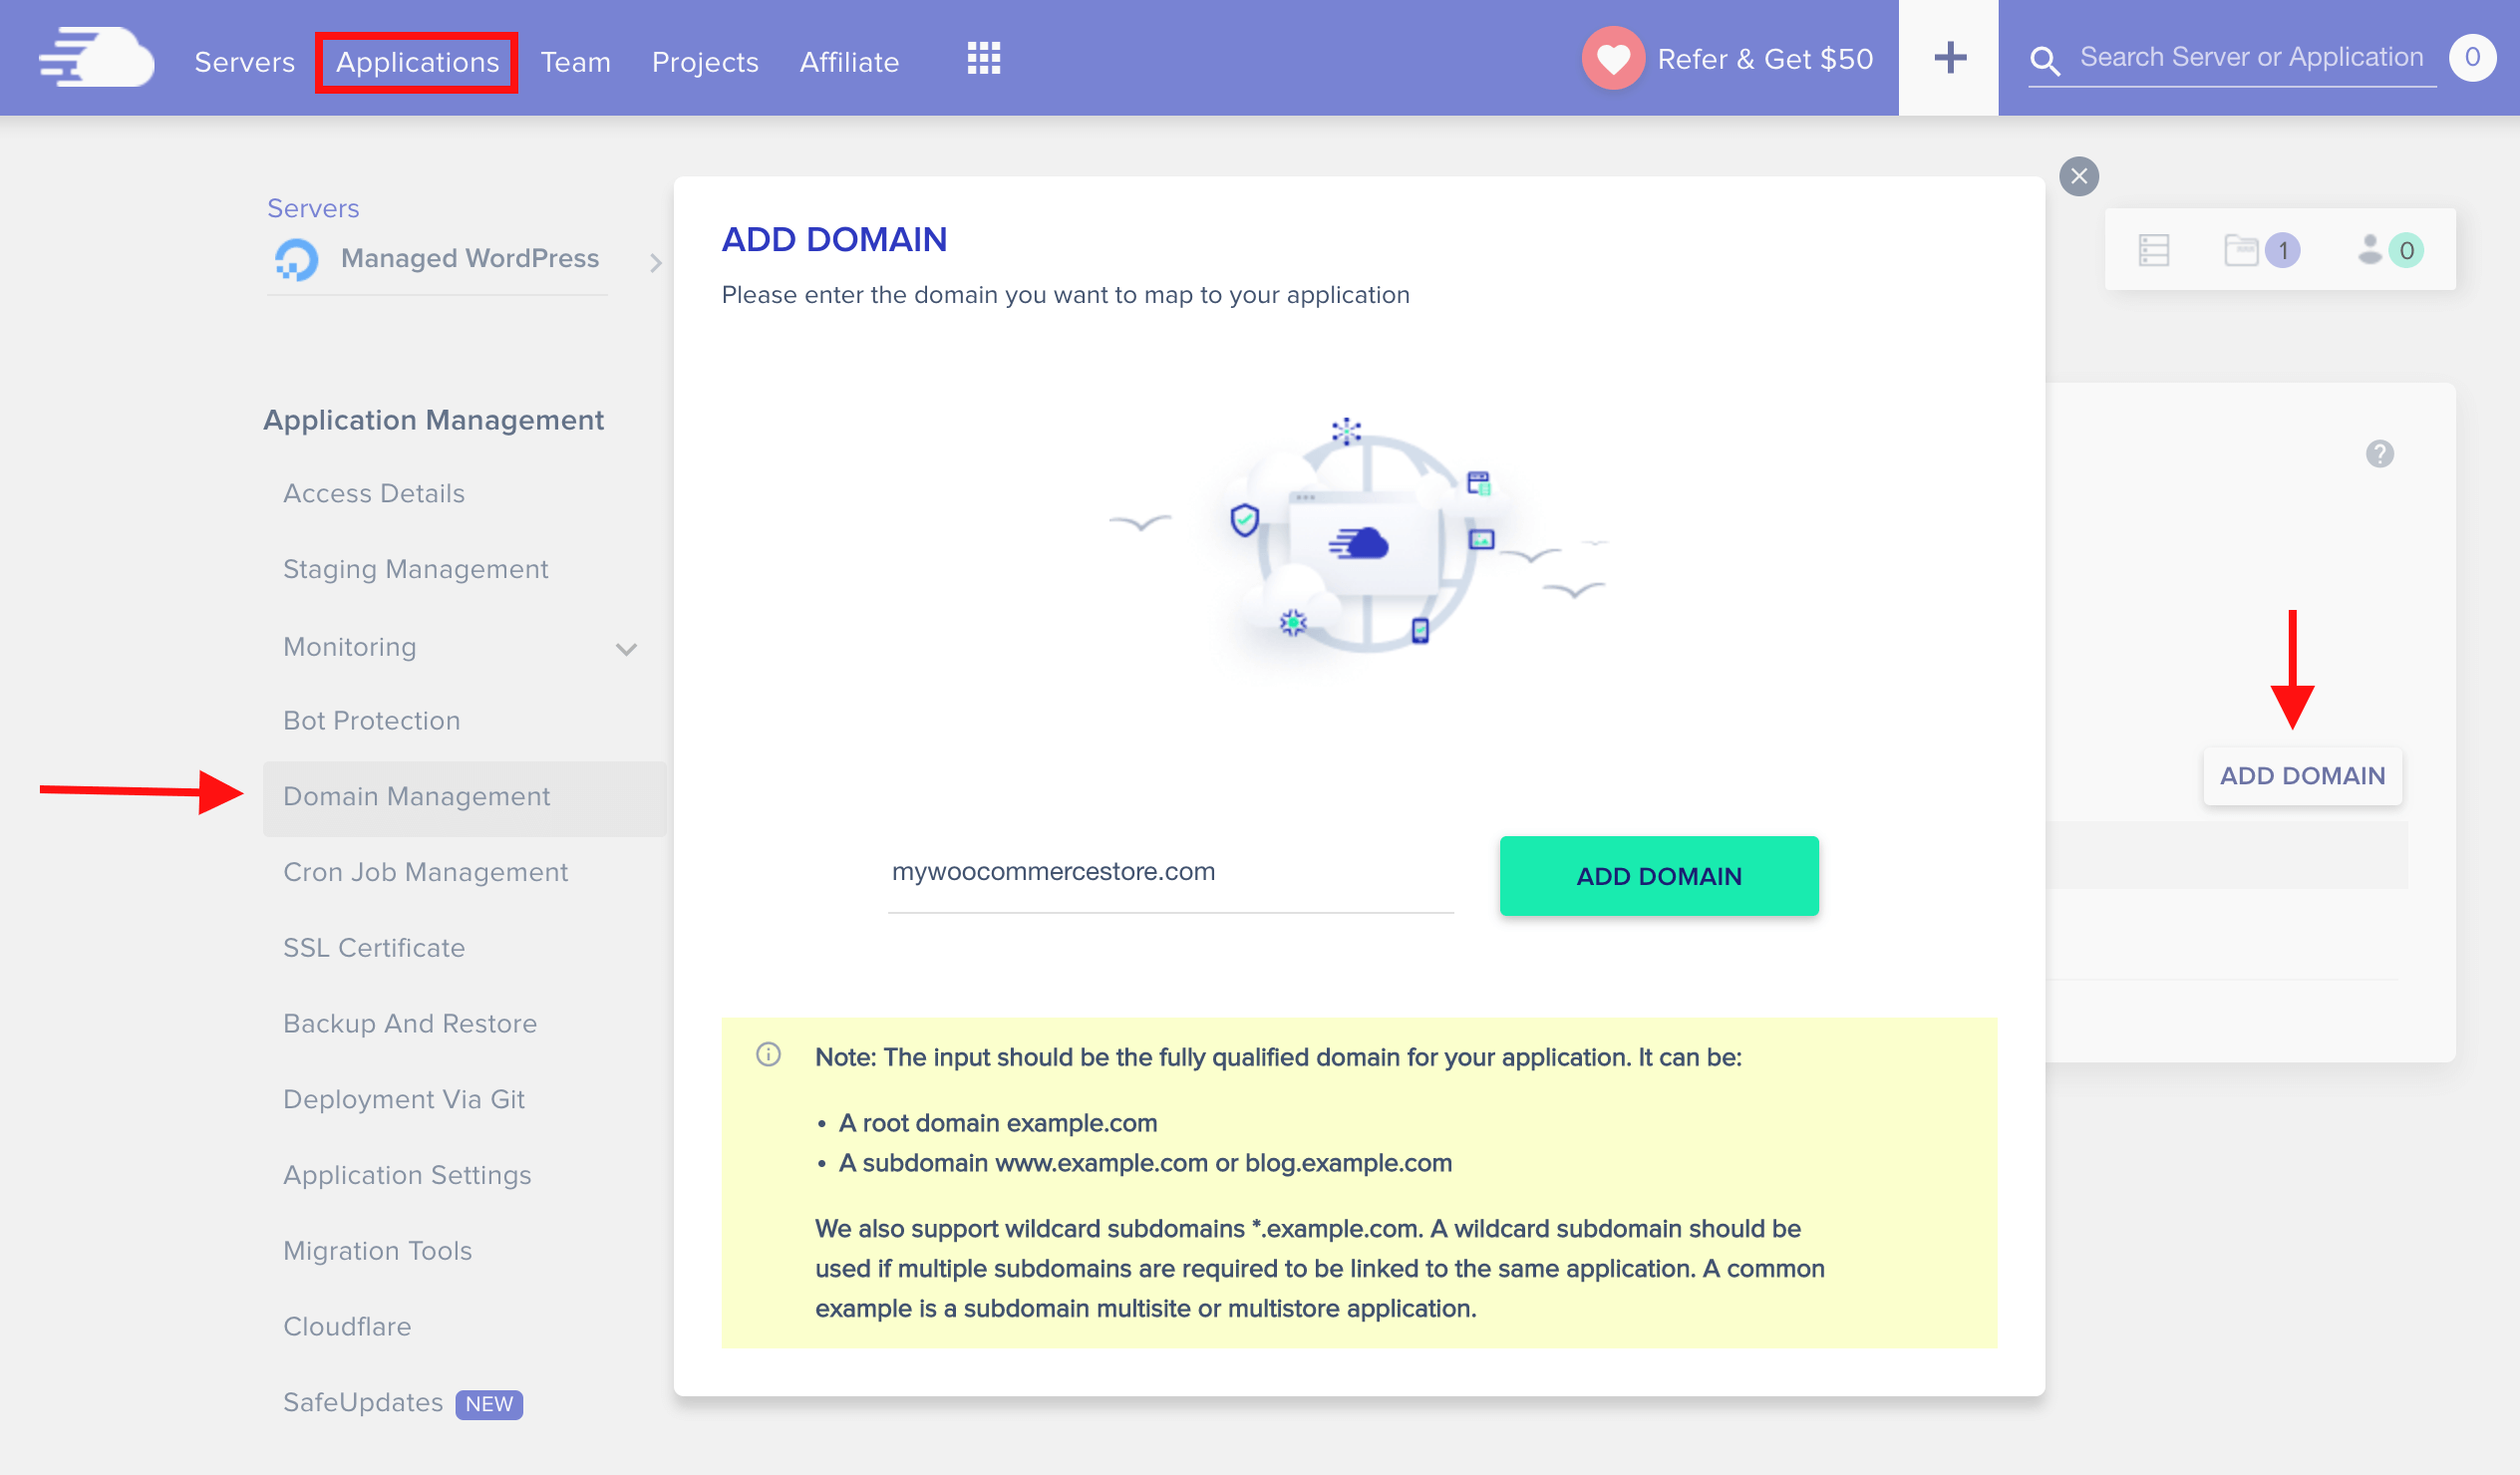
Including Your Area to Cloudways
Now, this may occasionally appear overwhelming in the event you’re new to organising a web site, but it surely’s truly fairly easy when you get the grasp of it.
To do that, you’ll have to comply with the steps under:
To effectively manage your WooCommerce store, there are several best practices to follow. Security is paramount, and you can enhance your store’s protection by using security plugins such as Wordfence. For optimal performance, consider using caching plugins like WP Rocket and a Content Delivery Network (CDN) to ensure your site loads quickly for users around the world. Regular backups are crucial to prevent data loss, and tools like UpdraftPlus allow you to schedule automatic backups. Finally, tracking your store’s performance is vital, and you can integrate WooCommerce Analytics or Google Analytics to monitor sales trends, customer behavior, and other critical metrics.
Conclusion:
In conclusion, WooCommerce is a powerful tool for anyone looking to start an online store. With its user-friendly setup process, customizable features, and scalability, it is a great choice for beginners and experienced entrepreneurs alike. By following the setup steps, adding essential extensions, and adhering to best practices, you can create a secure, efficient, and successful online store.